Ah overlay drawing... something I considered when I started drawing. Unfortunaly it also means missing out on details things behind the cascades, endplate, etc. Overlay drawings are very nice however if you simple want to highlight a particular change or particular object. It doesn't consume nearly as much time as having to figure out the complete wing and correctly drawing its bits, while still also producing nice drawings.
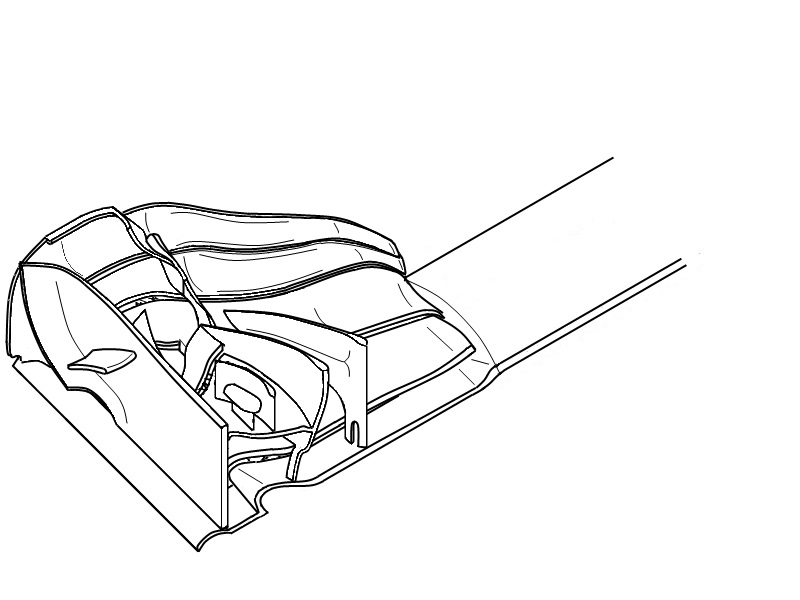
As mentioned, I always analyse complete front wings in one go, requiring me to get every nauseous detail of the wing. From whatever angle you choose to draw, something will always be hidden behind something else. So I have to work with layers, images layered on top of eachother. A painstaking effort, but it gets everything. The good news also is that this method allows me to draw everything from the exact same angle. I could slap a Ferrari endplate on a williams wing and add mercedes' cascades and it would fit perfectly with minimal position adjustment.
In short, When I draw something like this:
I want to be able to dissasemble it to something like this:
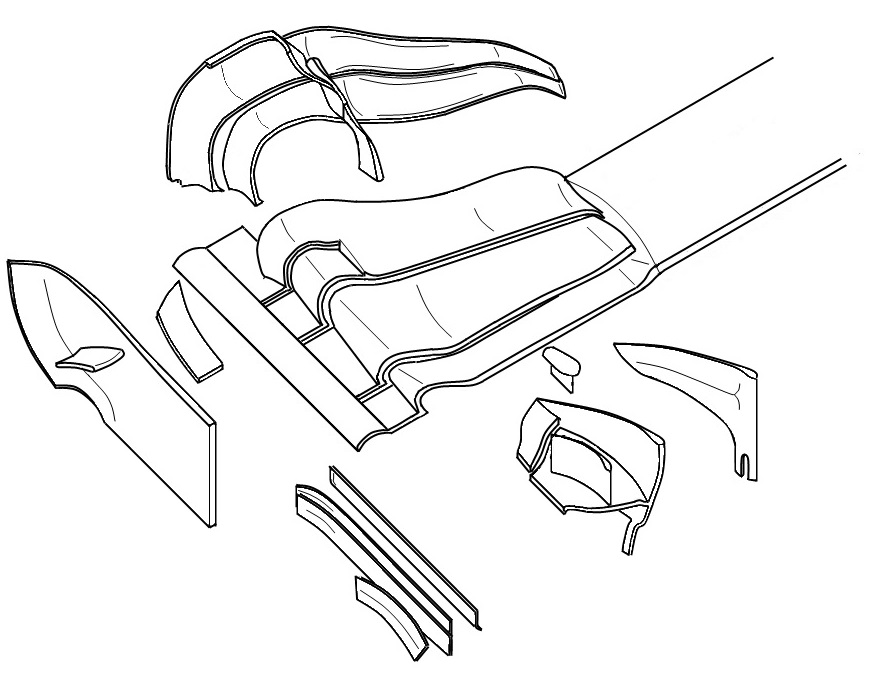
(My newer drawings have much more seperate parts then this, btw).
(Sorry for highjacking the thread

.)
But to get back to your drawing, yes it's very nice indeed! I believe it's more akin to thewptformula's style (I think Scarbs using a live tracing for his drawings, while Matt Somerfield draws with the digital loose hand so to speak).
The only thing you got a bit wrong is the flap adjuster area, but that's completely understandable since that's a very complex piece and very difficult to have your eyes interpret the correct shape.
As you'll probably also have noticed, complex 3D pieces like the very curved upper elements of the mercedes (they are infact not even clear on the photo!) are very, very difficult to draw, either with my or your method. You can try to force the effect with some curved lines in the elements or finetuning the edges, but the only solution guaranteed to always work is shading.