A paperboard Lotus E21

Post here information about your own engineering projects, including but not limited to building your own car or designing a virtual car through CAD.
User avatar
PaulB
72
Joined: 17 Oct 2010, 09:52
Location: Graz/Austria
Contact:

Re: A paperboard Lotus E21

Post

Inner front Suspension arrangement

Even though the 1:1 RB10 needs almost my entire ressources at the moment, I was able to finish the inner front suspension stuff within the last weeks. When the inner suspension stuff was just a simple scheme at the RB7 and a basic arrangement at my Audi R18 TDI, the E21 has now a fully detailed inner FS and pedal arrangement. Although all this details can hardly be seen after bonding the two chassis halfs together, I do not worry about it. It's in there and you can reveal it thru the hole in the front bulkhead.
In the next few weeks I'll finish the few missing parts inside the monocoque, finish the cockpit entry with a clear lacquer und bond the two halfs together - hopefully before christmas.

Front rockers
Image

Front rockers mounted to the inside of the monocoque.
Image

Springs, dampers, PAS (Power Assisted Steering) and steering column.
Image

Two potentiometers and a bit other electronic stuff for measuring single front damper movement.
Image

Assembling a poti. Quite a fiddly work.
Image

Kimis pedal assembly. The cutouts on top of the pedals should initially be just a half circle, but that would have been a bit difficult to produce, so I prefered to do it as a full circle.
Image

Whole pedal assembly mounted to the lower half of the chassis. The big fat line you can see coming from the back is the hydraulic line for the interconnection between front and rear heave dampers.
Image

Different angle of the pedal assembly.
Image

Hopefully my work was accurately enough not to get problems by colliding items when fitting the two halfs together. But I think it should be alright.
Image

At the left hand side you can see the hydraulic lines for the interconnected suspension and the rear brake line. At the right hand side, there are the hyd lines for the PAS and the line for the gas pedal.
Image

Top view of the pedal assembly.
Image

The two chassis halfs almost finished to bond together.
Image

Cockpit entry is ready to get finished with clear lacquer. I'm just waiting for the arrival of my spray cans.
Image

Also a new feature, the cutouts for the whole electronic and hydraulic lines on both sides of the monocoque.
Image

That's it for the mo, thx for reading.

Cheers,
Paul
"Being second is to be the first of the ones who lose!" - Ayrton Senna

Paul Bischof
Milton Keynes, UK
MK2 2HL
http://paulsf1.wordpress.com/

Schifty
-1
Joined: 04 Dec 2013, 18:54

Re: A paperboard Lotus E21

Post

Will be interesting to saw when its will be finish !

User avatar
PaulB
72
Joined: 17 Oct 2010, 09:52
Location: Graz/Austria
Contact:

Re: A paperboard Lotus E21

Post

Schifty wrote:Will be interesting to saw when its will be finish !
I imploringly hope, that it's already interesting during the built...
"Being second is to be the first of the ones who lose!" - Ayrton Senna

Paul Bischof
Milton Keynes, UK
MK2 2HL
http://paulsf1.wordpress.com/

User avatar
johna650
0
Joined: 30 Nov 2013, 18:49

Re: A paperboard Lotus E21

Post

First post ever! Happy to see you progressing on a project like this! For sure the level of detail is very high! Thumbs up for you my friend and keep up the good work! Although I did not understand quite a lot about the weave styles of carbon fibre... Any help would be appreciated very much!

User avatar
humble sabot
27
Joined: 17 Feb 2007, 10:33

Re: A paperboard Lotus E21

Post

holy crap dude! my mind she is blown! I had no idea how the mechanicals were even arranged in the pedalbox, and you went through all that effort to build it. Good on ya.
the four immutable forces:
static balance
dynamic balance
static imbalance
dynamic imbalance

User avatar
Alonso Fan
10
Joined: 06 Apr 2013, 18:21

Re: A paperboard Lotus E21

Post

Wow, that's amazing!

do you think that, in the future, you may be able to make an actual mechanically functioning model of an f1 car (such as the Ferrari F138) out of paperboard?

if you did, that would be even more interesting (not to say that your work isn't interesting)

these super high detailed models must take you ages, so thanks for keeping this topic updated

looking forward to the finished model... :)

thanks again

take care

Alonso Fan
SHR Modding
Youtube
Twitter
Discord

Sound Developer for Reiza Studios
Sound Modder for Assetto Corsa

Lord Teddy
0
Joined: 12 Dec 2013, 02:38
Location: Manchester, England

Re: A paperboard Lotus E21

Post

Absolutely fantastic! The attention to detail on this things in beyond belief.
"Just leave me alone, I know what I'm doing" - Kimi Raikkonen

serpentinebelt1978
0
Joined: 09 Dec 2013, 20:08

Re: A paperboard Lotus E21

Post

Crazy stuff! What a project, I'd love to see more! :)
Mainly do car maintenance. F1 enthusiast otherwise.

User avatar
PaulB
72
Joined: 17 Oct 2010, 09:52
Location: Graz/Austria
Contact:

Re: A paperboard Lotus E21

Post

Hey guys!
humble sabot wrote:holy crap dude! my mind she is blown! I had no idea how the mechanicals were even arranged in the pedalbox, and you went through all that effort to build it. Good on ya.
I guess that should be my new mission: to teach people all about Formula 1 cars. ;)
Alonso Fan wrote:Wow, that's amazing!

do you think that, in the future, you may be able to make an actual mechanically functioning model of an f1 car (such as the Ferrari F138) out of paperboard?
[...]
I don't think so. It's already such a difficult thing to get the removable parts of the car so accurate and it's all still paper. And the mechanic wear of the parts is too big to make some devices with mechanical functionality.

Bonding together upper and lower Monocoque Halfs

Over the last few weeks I had a very little time where I was able to bond together the two monocoque halfs. There were a few little prbolems where the single dampers and the pedal assembly collided during the bonding process. The single dampers are now not in there correct position (they are tillted a bit inwards) but you can hardly see it. I also added a part of the outer layer of the monocoque.


The two monocoque halfs finished for the bonding process. You can also see the frame for the cockpit padding.
Image

The finished cockpit padding. Ref. 2013 FORMULA 1 TECHNICAL REGULATIONS-Drawing 3
Image

Cockpit padding inside the upper half. Not very much space left for the driver. :)
Image

And finally the two halfs bonded together. The stiffnes of the monocoque is amazing. Its a very lot stiffer as for example the RB7.
Image

A bit of "delamination" during the bonding process at the inside of the cockpit area.
Image

The outer shell of the monocoque with all it's cutouts for suspension members, hatches and so on.
Image

Chassis with outer shell.
Image

That's it!

Cheers,
Paul
"Being second is to be the first of the ones who lose!" - Ayrton Senna

Paul Bischof
Milton Keynes, UK
MK2 2HL
http://paulsf1.wordpress.com/

User avatar
PaulB
72
Joined: 17 Oct 2010, 09:52
Location: Graz/Austria
Contact:

Re: A paperboard Lotus E21

Post

Hey guys,

some huge progress over the last few weeks.

Side Pod and Airbox Manufacturing

After bonding together the two halfs of the monocoque I immediately started designing the side pods. Always one of the most challenging things. The shape of a modern F1 side pod is such a masterpiece this days that it's really hard to model it from paper. As the proper pods surface is bent in two directions and paper is basically not drapable and just able to be bent in one direction, I had to simplify the shape to a developable, just in one direction bent surface. It actually worked out well with the usual problems at this stage.

Second big point of progess is the airbox. The E21's airbox is the most car typical airbox since the Merc 2010/11 fin style airbox. The two PDRS (Passive Drag Reduction System) floppy ears were a bit of a pain to do and the right hand one did not got perfect, but it's acceptable. This is also my very first airbox, I did with full details like roll hoop inside, profiled leading edge and so on. The car will propably get a bit too high (it's already very close to the 950mm limit). I will propably measure it at RBT with a more adequate measuring tool than a set square.

Another huge improvement is the surface finishing of the car by sanding every single surface up to 1500 sand paper. This will help strongly during the paint process. The paint process itself will be 2 stepped. With a first stage lacquering of all the painted (means red'n'black surface with the sponsor labels on it) surface by approximately 7 or 8 layers and second stage will be with all aditional features like bodywork fixing flange, carbon fibre texture, etc.

Quick forecast over the next weeks. On 28th of Jan, RB10 will be launched. Hope it's as good as the 9 end season car. :) I expect finishing off the whole stuff on the monocoque next weekend to get started 1st stage lacquering the car. And starting parallel with the engine, which shouldn't be that a big challenge as I have already built the same one for the RB7 and have seen the engine in flesh now for many (very many) times - but didn't took any drawings, sketches, dimensions or anything else with me. Just the stuff which I was able to memorize in my head.

The 5 stages of the side pod shape. Top left was the initially calculated shape. The next ones are all refined shapes by using my side pod jig to evaluate the perfect shape. Was a very challenging task, but I brought it to a very satisfying level.
Image

My side pod jigs. The left hand one is for evaluating the best shape and the right hand one is/was the bond on jig for forcing the pod into the right shape during bonding on the car.
Image

Side pod during bonding process. There were a few stages to get it finished. I also applied a glue film on the inside of the pod to give it a bit more stiffness.
Image

First airbox test. Height check and so on. The fairing between the air inlet and the monocoque went thru the same process as the side pods.
Image

Airbox with seperated roll hoop. I guess, what means that I don't know, that Lotus is using a carbon roll hoop. Even if I know that f.e. STR or FI are using Aluminium ones.
Image

Bonded in roll hoop. It was a bit difficult in the end to get access to the (later bonded on)PDRS inlets.
Image

Moulding of the PDRS inlet. The negative mould tool is from full cardboard and sanded into right shape.
Image

Chassis at it's current stage. As you can see, the first sponsor logos are already fitted. Airbox is bonded on and looking quite good.
Image

Rear view of the car. The internal ducting of the airbox will be a bit challenging. But that's nothing to worry about this time. That's the problem of March or so.
Image

Rear end of the monocoque. It's looking really good now. I'm very satisfied with most of my work. Note the nice louvres beside the impact structure beside the drivers head. They are there for helping ventilation of the engine/radiator bay.
Image

The nice vanes and winglets on top of the side pod. Note the nice moulded top edge of the vanes. They are sanded up to 1500 sand paper to a almost perfect shape (rounded edges, ball shaped front corners).
Image

One of the very few differences between the real car and my model (apart from the size) is my logo. There are two reasons for it: I decided to label now all my cars with at least one of my logos. Second reason, almost more important, I can hide the cutting edge between the side pod and the actual (structural) chassis. Nice turn I would say.
Image

And a bit of fun at the end. It's not going on so seriously during my car build all time. I might not missunderstood the sense of an airbox, but that's definitely assembled in the wrong position.
Image

Cheers guys,

Paul
"Being second is to be the first of the ones who lose!" - Ayrton Senna

Paul Bischof
Milton Keynes, UK
MK2 2HL
http://paulsf1.wordpress.com/

User avatar
Daliracing
4
Joined: 16 Sep 2013, 23:19
Contact:

Re: A paperboard Lotus E21

Post

amazing work! looking forward to the rest of it :D

User avatar
PaulB
72
Joined: 17 Oct 2010, 09:52
Location: Graz/Austria
Contact:

Re: A paperboard Lotus E21

Post

Chassis ready for Paint Shop

I know that this time, it's much more interessting to finally see the first new cars for the season, but anyway, here's a bit more from my Lotus:
Just a short, but reasonable update. Chassis is now finished for 1st stage painting! During paint process I'll start off with the engine.

Last minutes before the chassis goes to the paint shop!
Image
"Being second is to be the first of the ones who lose!" - Ayrton Senna

Paul Bischof
Milton Keynes, UK
MK2 2HL
http://paulsf1.wordpress.com/

Writinglife
2
Joined: 29 Nov 2012, 11:09

Re: A paperboard Lotus E21

Post

Holy carp you are talented. It makes me wonder if Lotus F1 would cool enough to show it off somehow (maybe on their website).

Anyway, keep showing off your work as it's astounding.

User avatar
PaulB
72
Joined: 17 Oct 2010, 09:52
Location: Graz/Austria
Contact:

Re: A paperboard Lotus E21

Post

Chassis finishing off

As reported in the last post, the chassis was in the paint process over the last few days. This car is the first one, where I created a really planed paint process. There were four steps:

- 1st Step, paint preparation: Sanding every single surface of the car and especially cutting edges up to 1500 sand paper. After sanding, all sponsor labels were added as quick as possible to avoid damage or whitening. Quick clean of the main surfaces to get rid of big dust particles or similar contamination.
- 2nd Step, prime coat: Tape all surfaces that need no highly polished surfaces (means monocoque inside, chassis sides behind side pod intake). Applying first coat of clear lacquer immediately after finishing with the first step. Applying 9 layers at all. Waiting at least half an hour between applying next layer.
- 3rd Step, main coat: Add all missing non highly polished surfaces to the chassis (monocoque underside, front bulkhead, radiator ducts,...). Applying additional five coats of clear lacquer and drying it on a radiator. Waiting at least one hour between every single coat.
- 4th Step, subsequent improvement: Inspect painted surfaces and apply another few spray dots to faces where no polished finish yet.

And the result of this process is astonishing! I never got such a nice surface quality and highly polished finish of the car. I will apply this process from now on at every car with probably a few improvements.

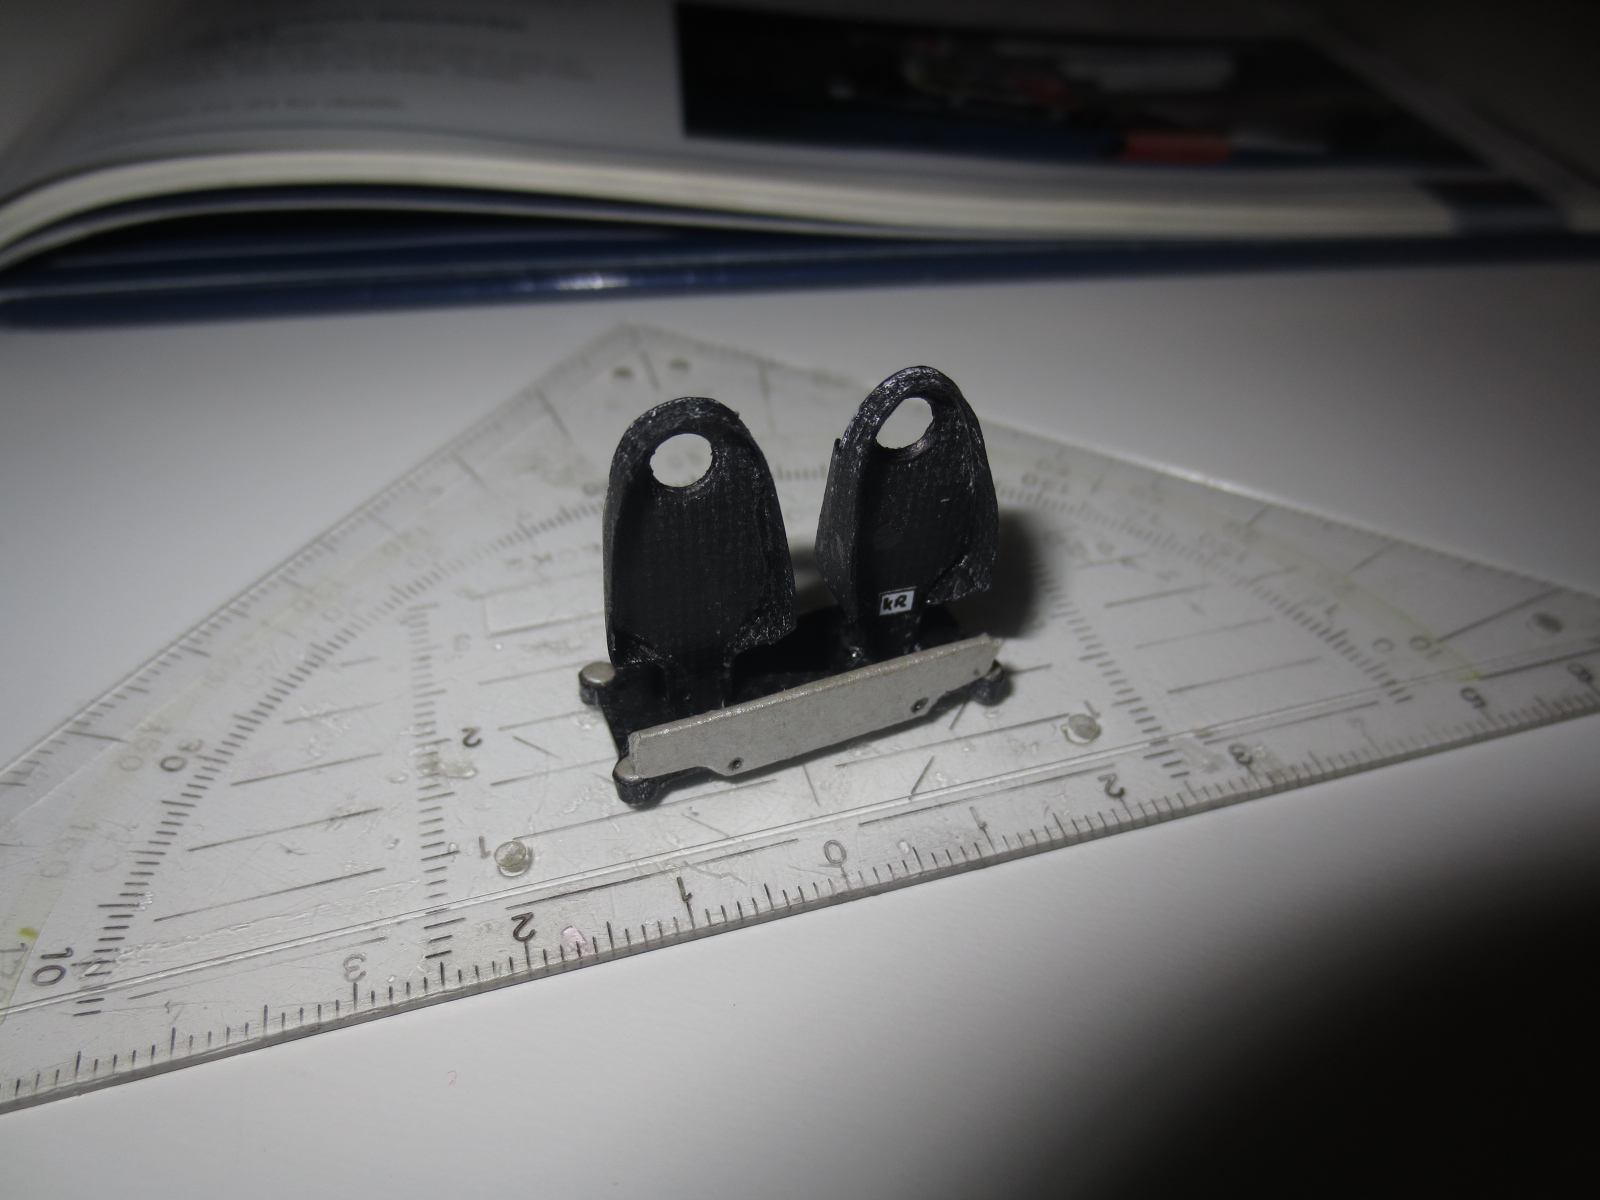
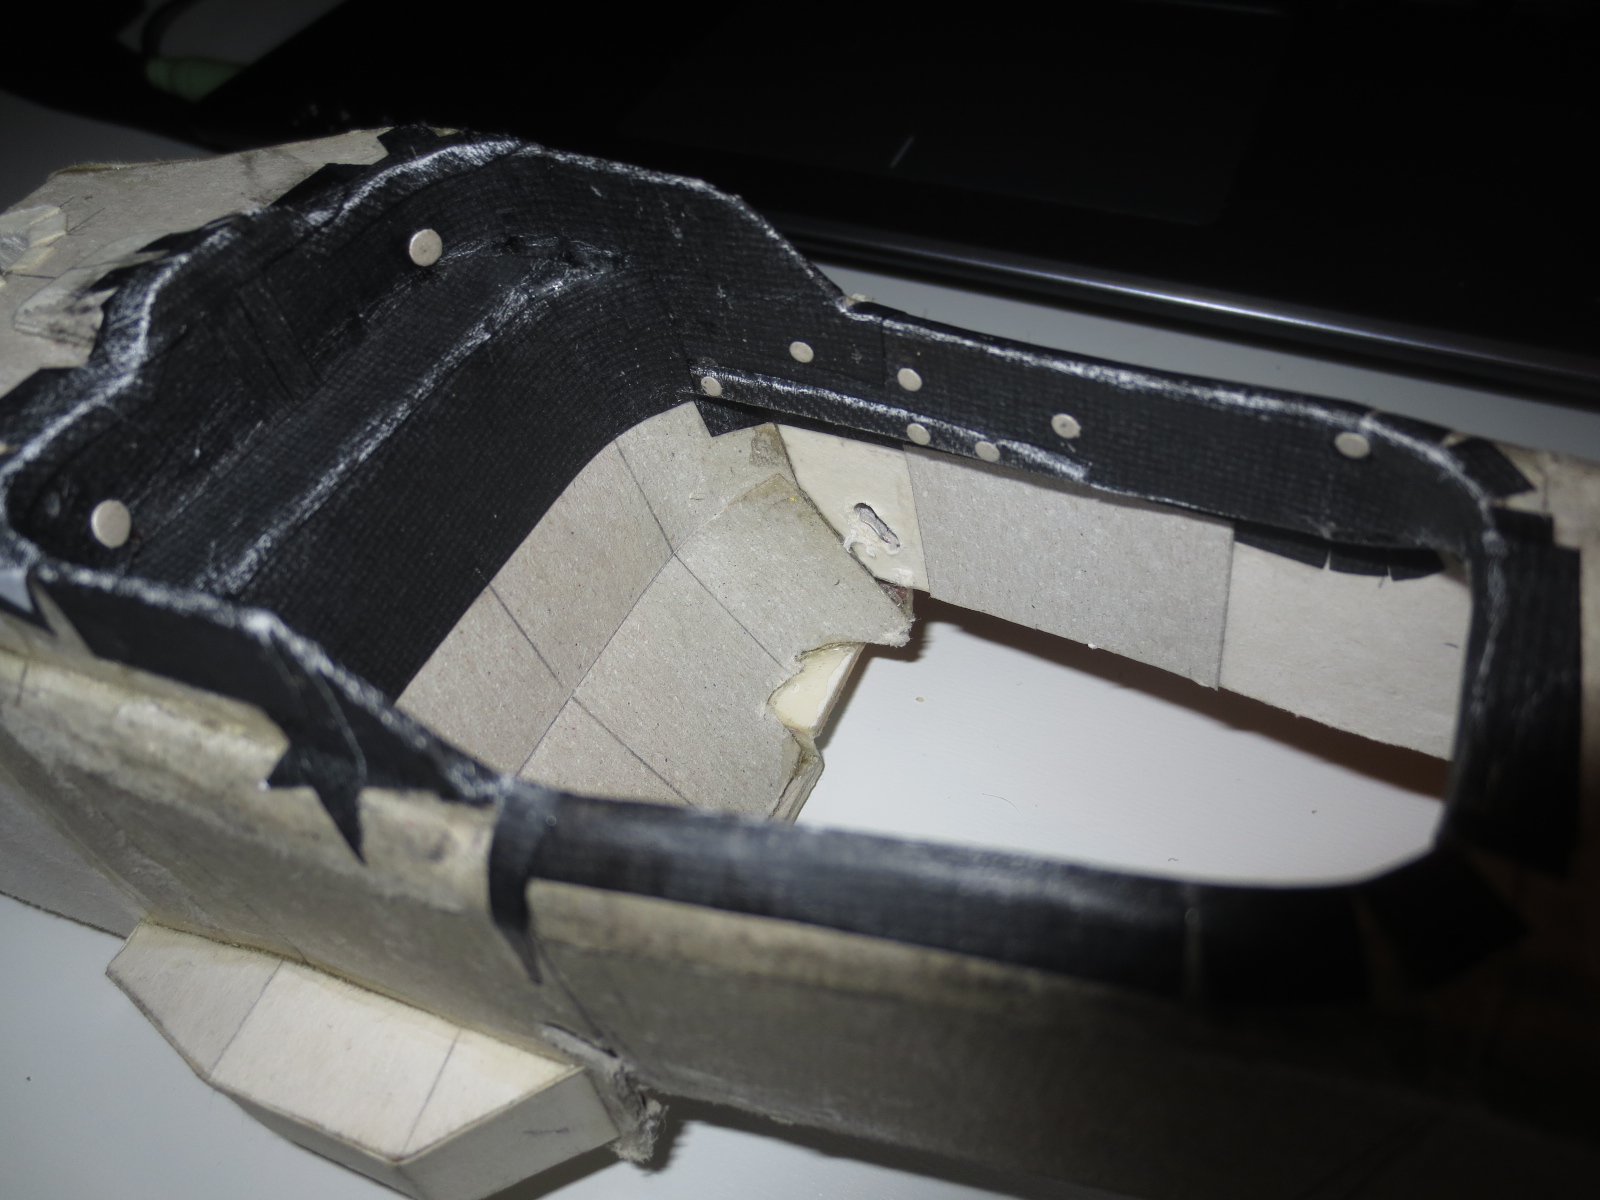
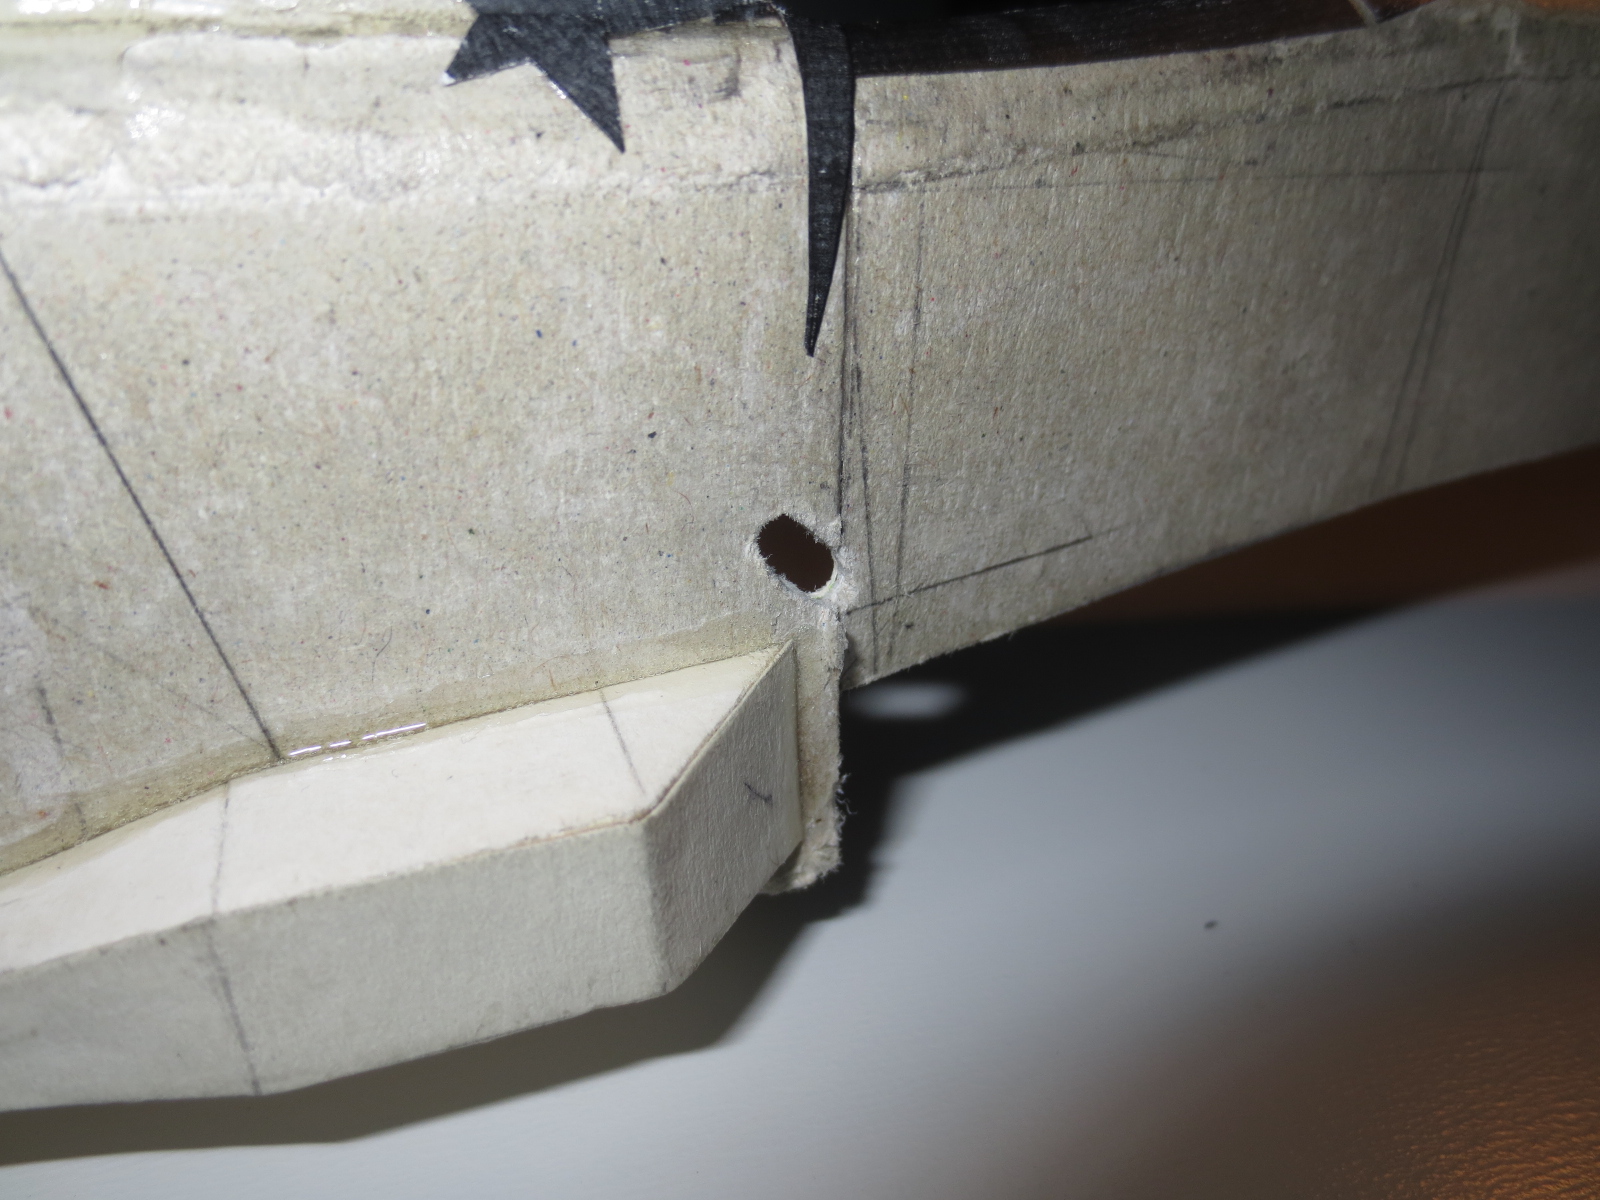
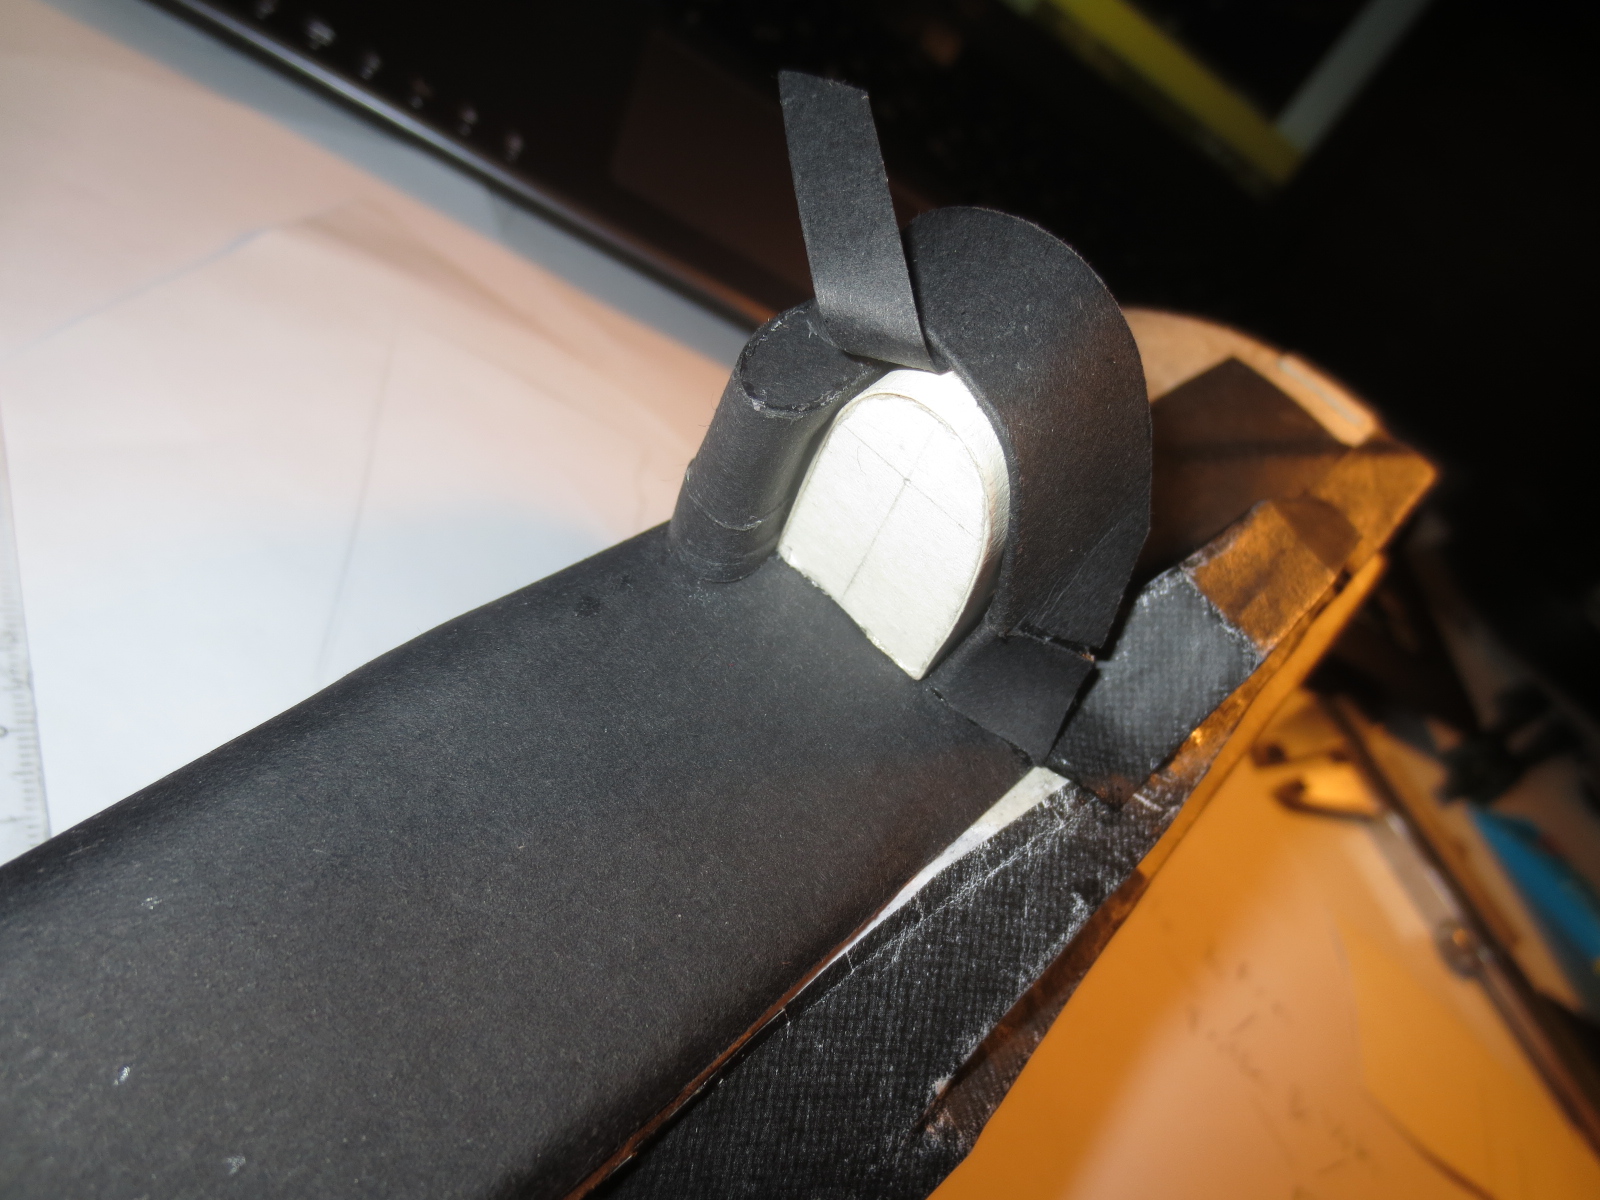
After the paint process it's obviousely very critical to work on the car (avoiding surface containment). When I'm working on a specific area on the car, I have to cover the surrounding surfaces with some tape stripes. What I also detected during working on the car shortly before the paint process is, that the monocoque is --- extremely stiff and rigid. I was hardly struggling to get the holes for mirror assembly and nose pins done. With a hammer and a scriber and nail I was working for several minutes to get this four holes onto the car. That means, that the implementation of my thoughts about how to get the chassis stiffer and not significantely heavier has taken full effect. I guess I was never so satisfied with a chassis as I am at the mo. Although there could be some minor improvements, but that can wait till the next car.

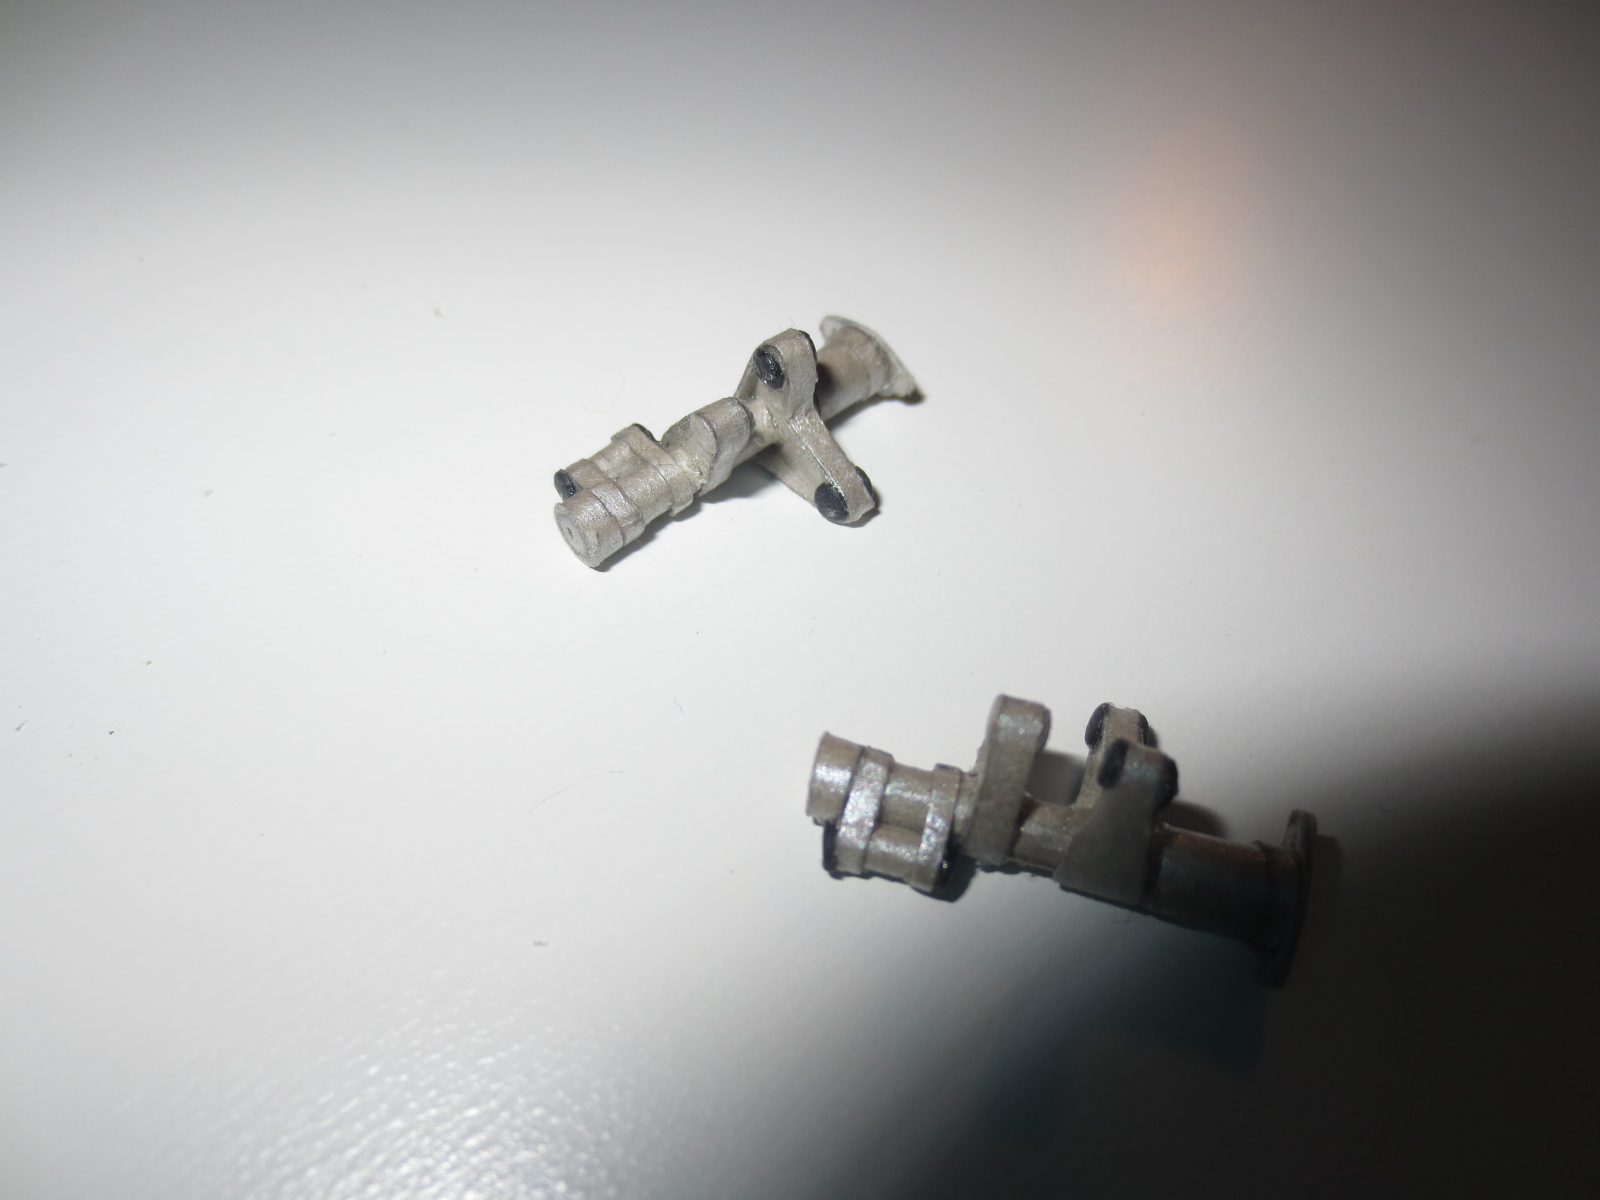
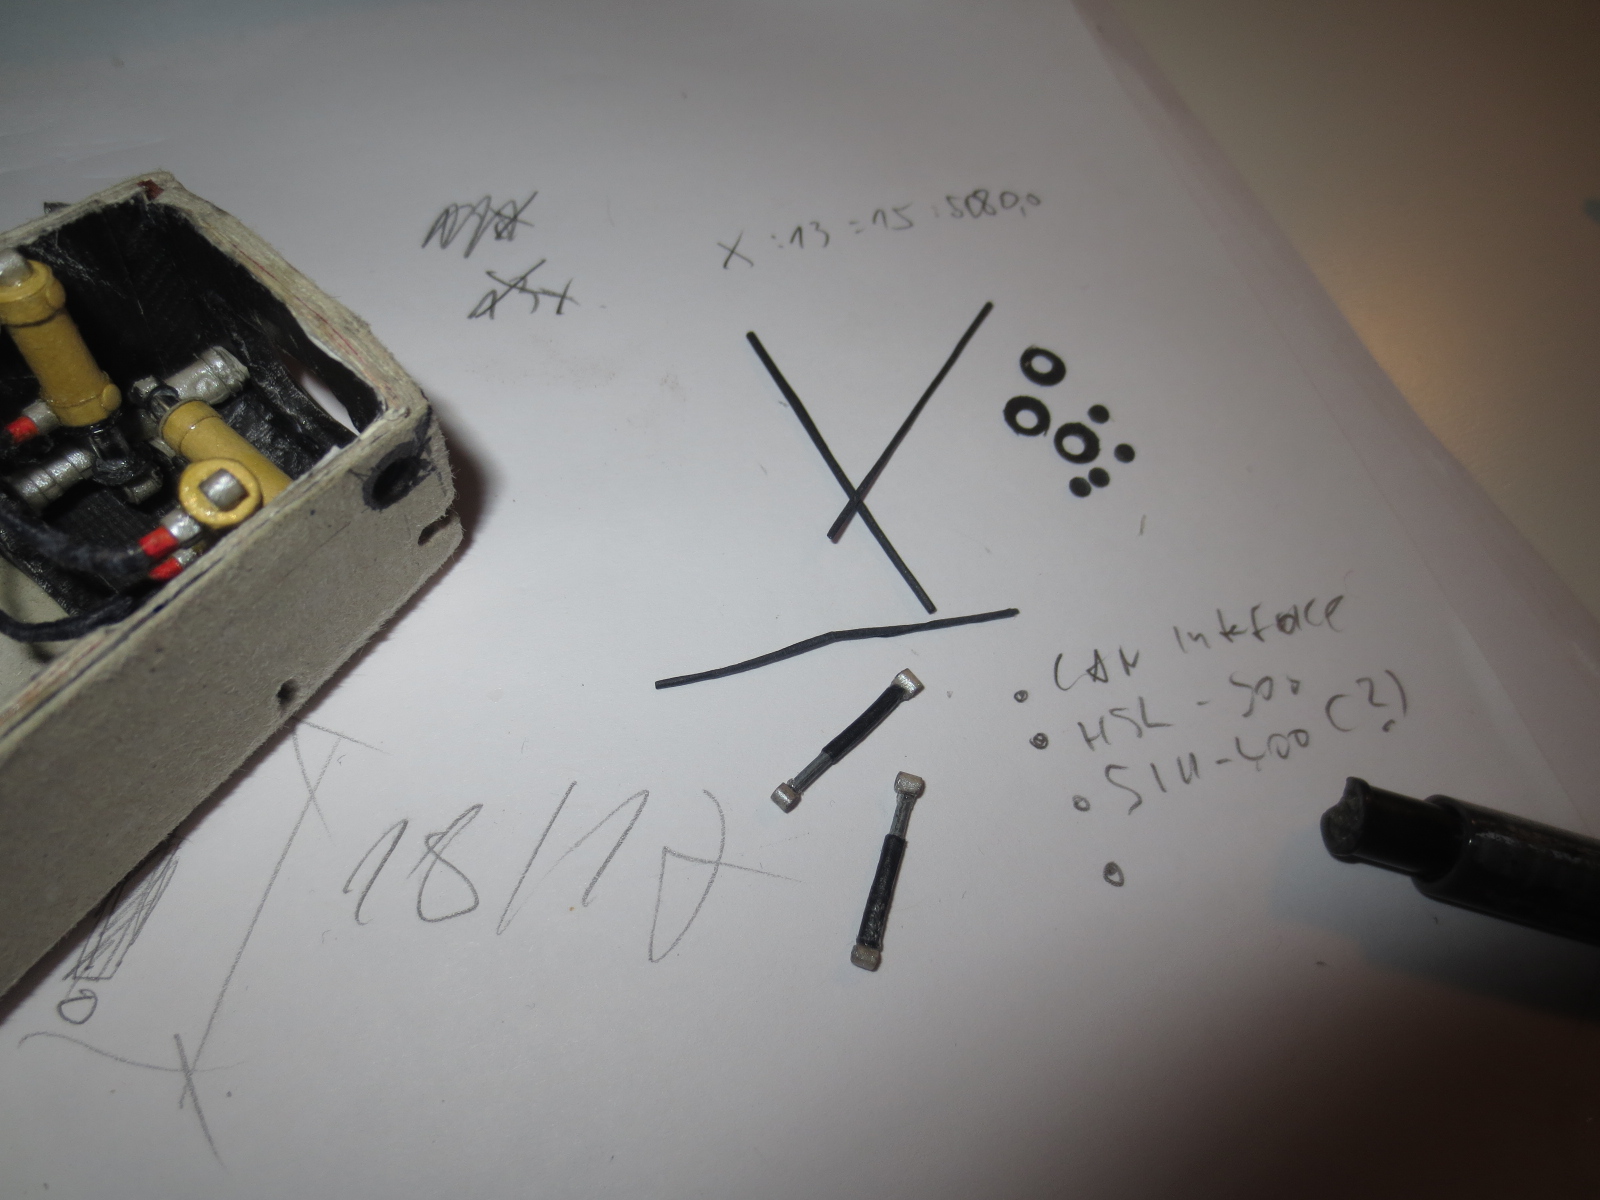
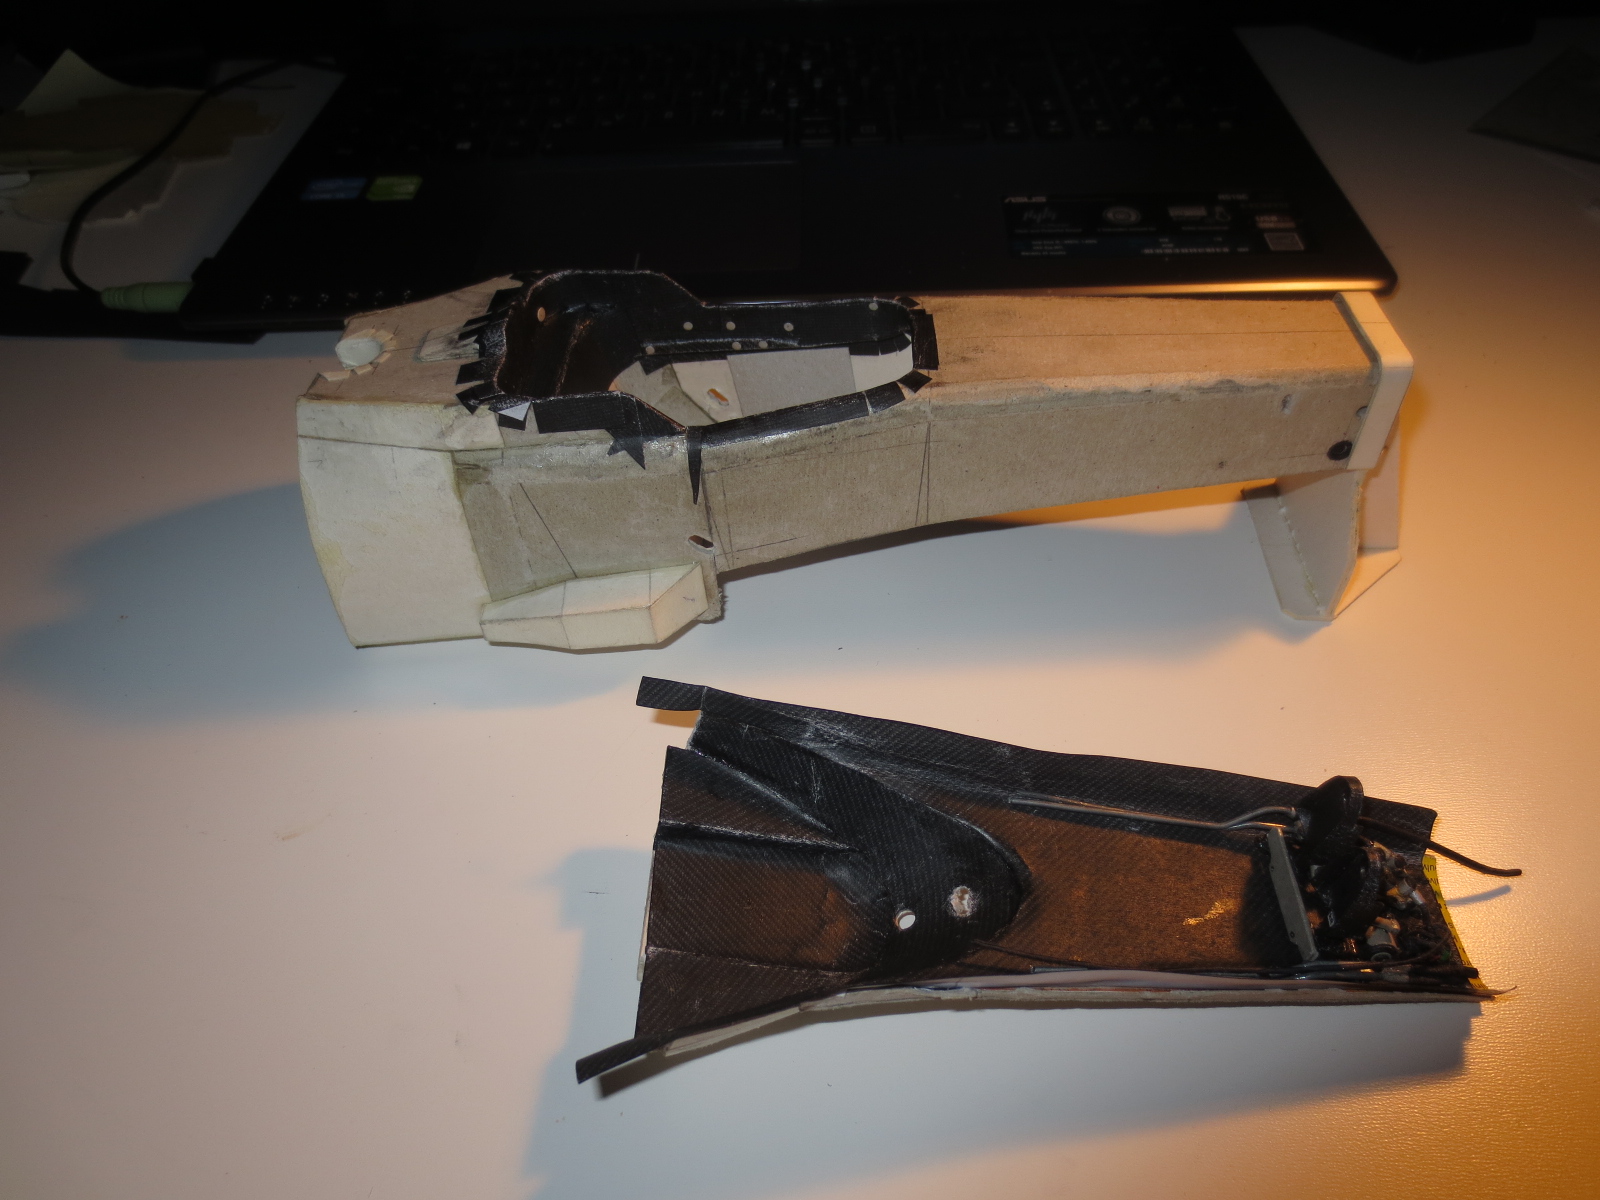
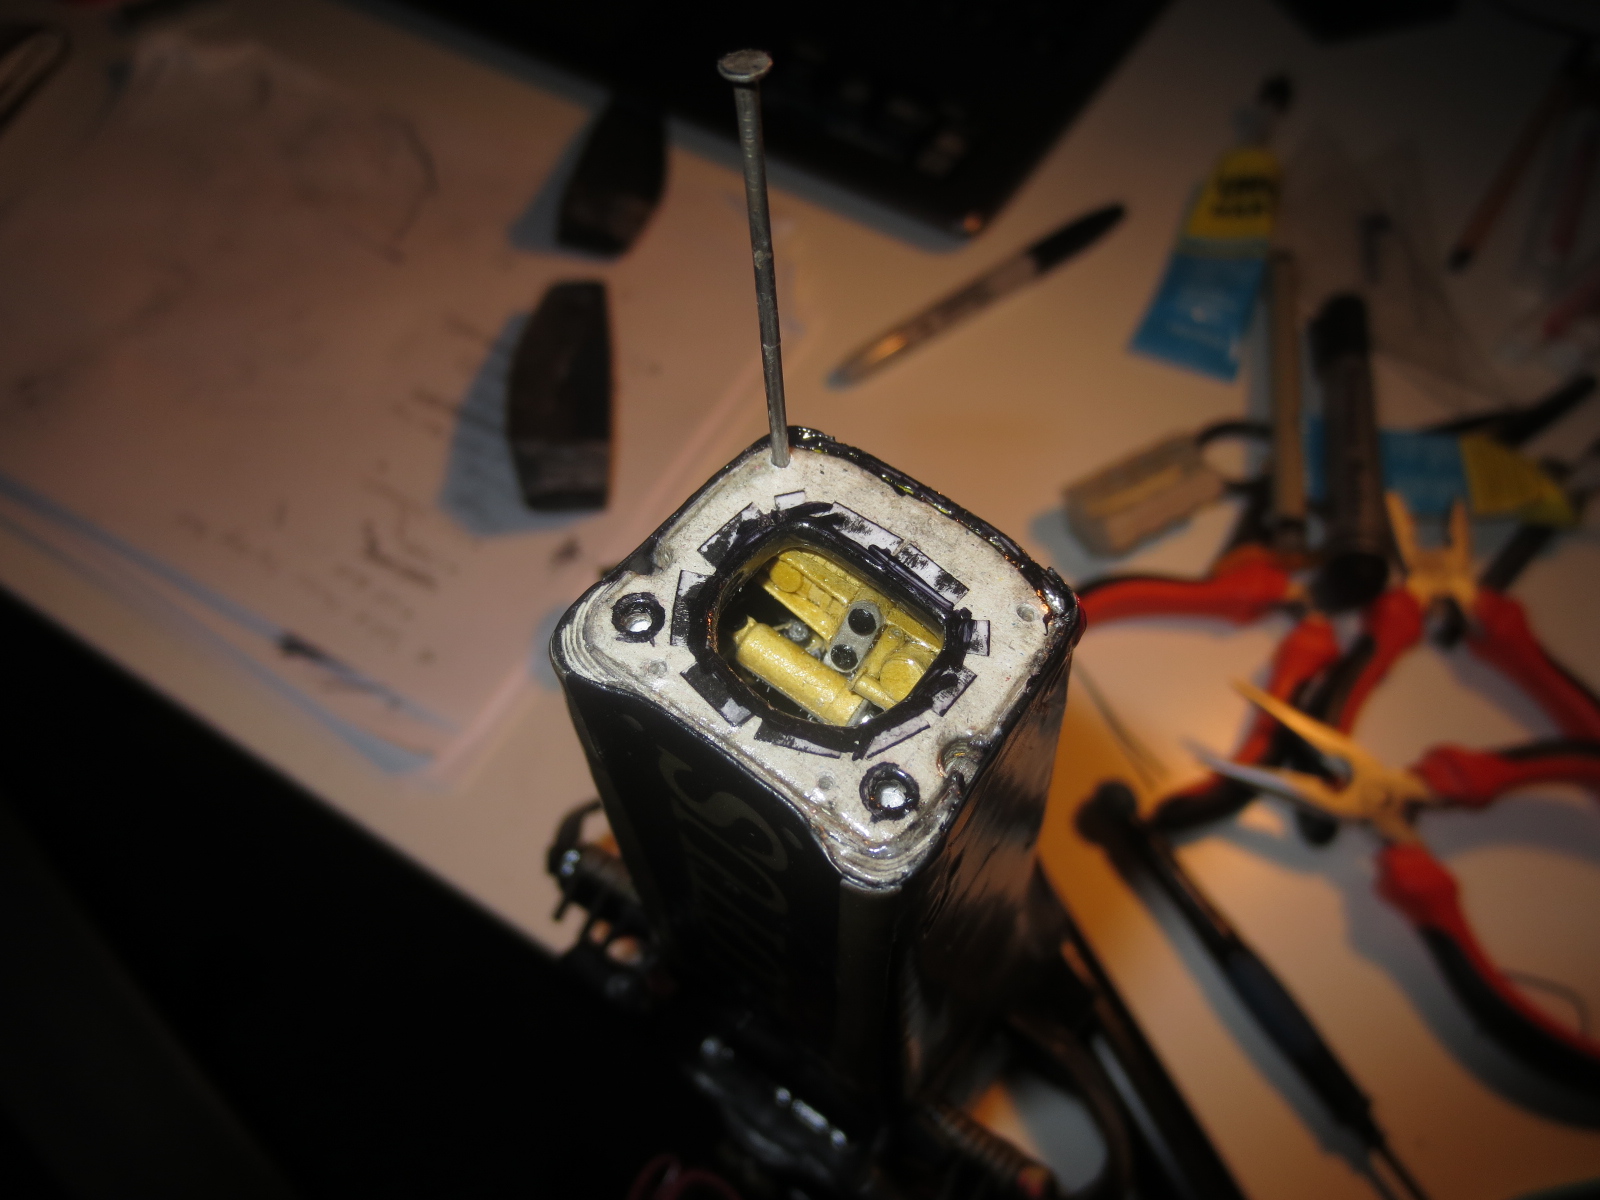
During the paint process, which contains a lot of waiting (which I partly bridged by drinking beer), I also started the manufacturing of the engine. The manufacturing of the engine block is one of the most annoying parts of the car. Machined metal parts, the most time consuming work in paper modelling. It's a pain in the ass!

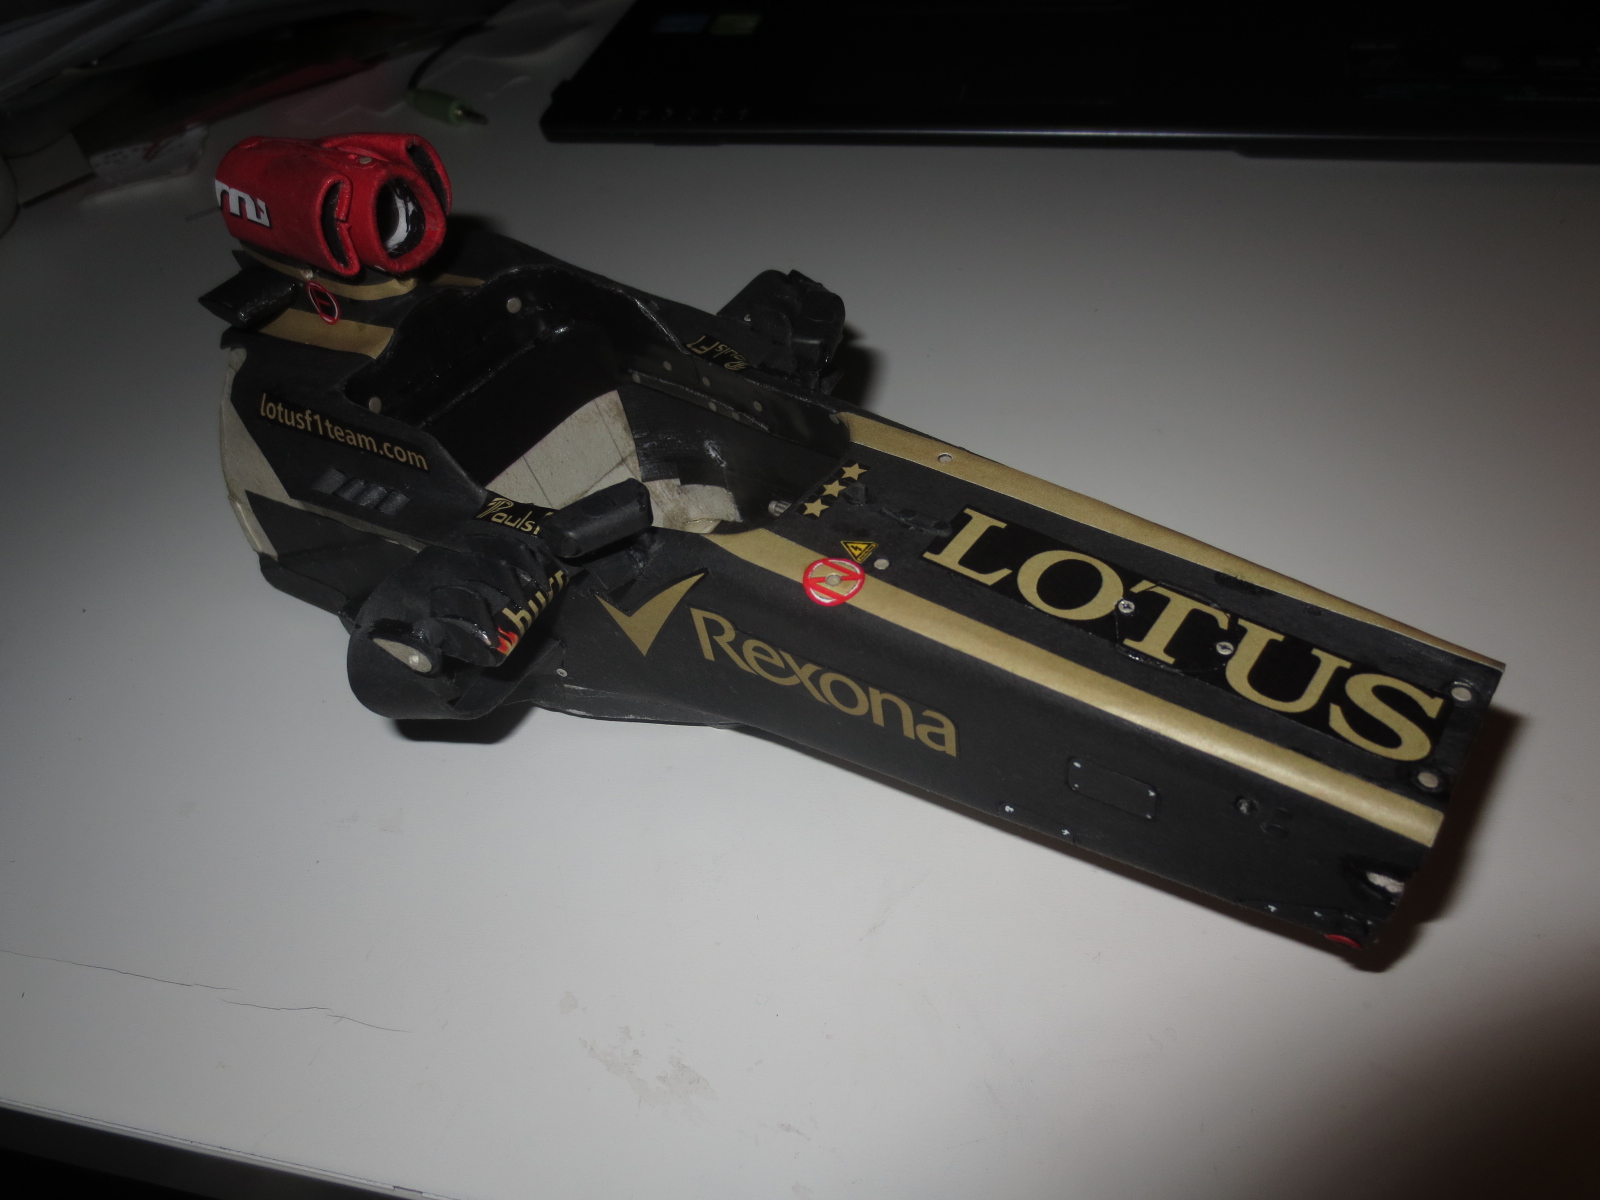
The chassis shortly before the paint process. All surfaces were treated to 1500 sand paper. Few sponsor logos and rear mirrors missing.
Image

Within the paint process. Immediately after applying the lacquer, the car always looks perfect, but after drying you're back in reality... It takes an awful lot amount of time to get a proper paint job done.
Image

Prime coat: Nine layers of lacquer results in this milky look. But the surface is already wonderfull. All edges are beatuifully blended and smooth. After this, I had to wait for 24 hrs plus, to rework the car before applying the final main coat.
Image

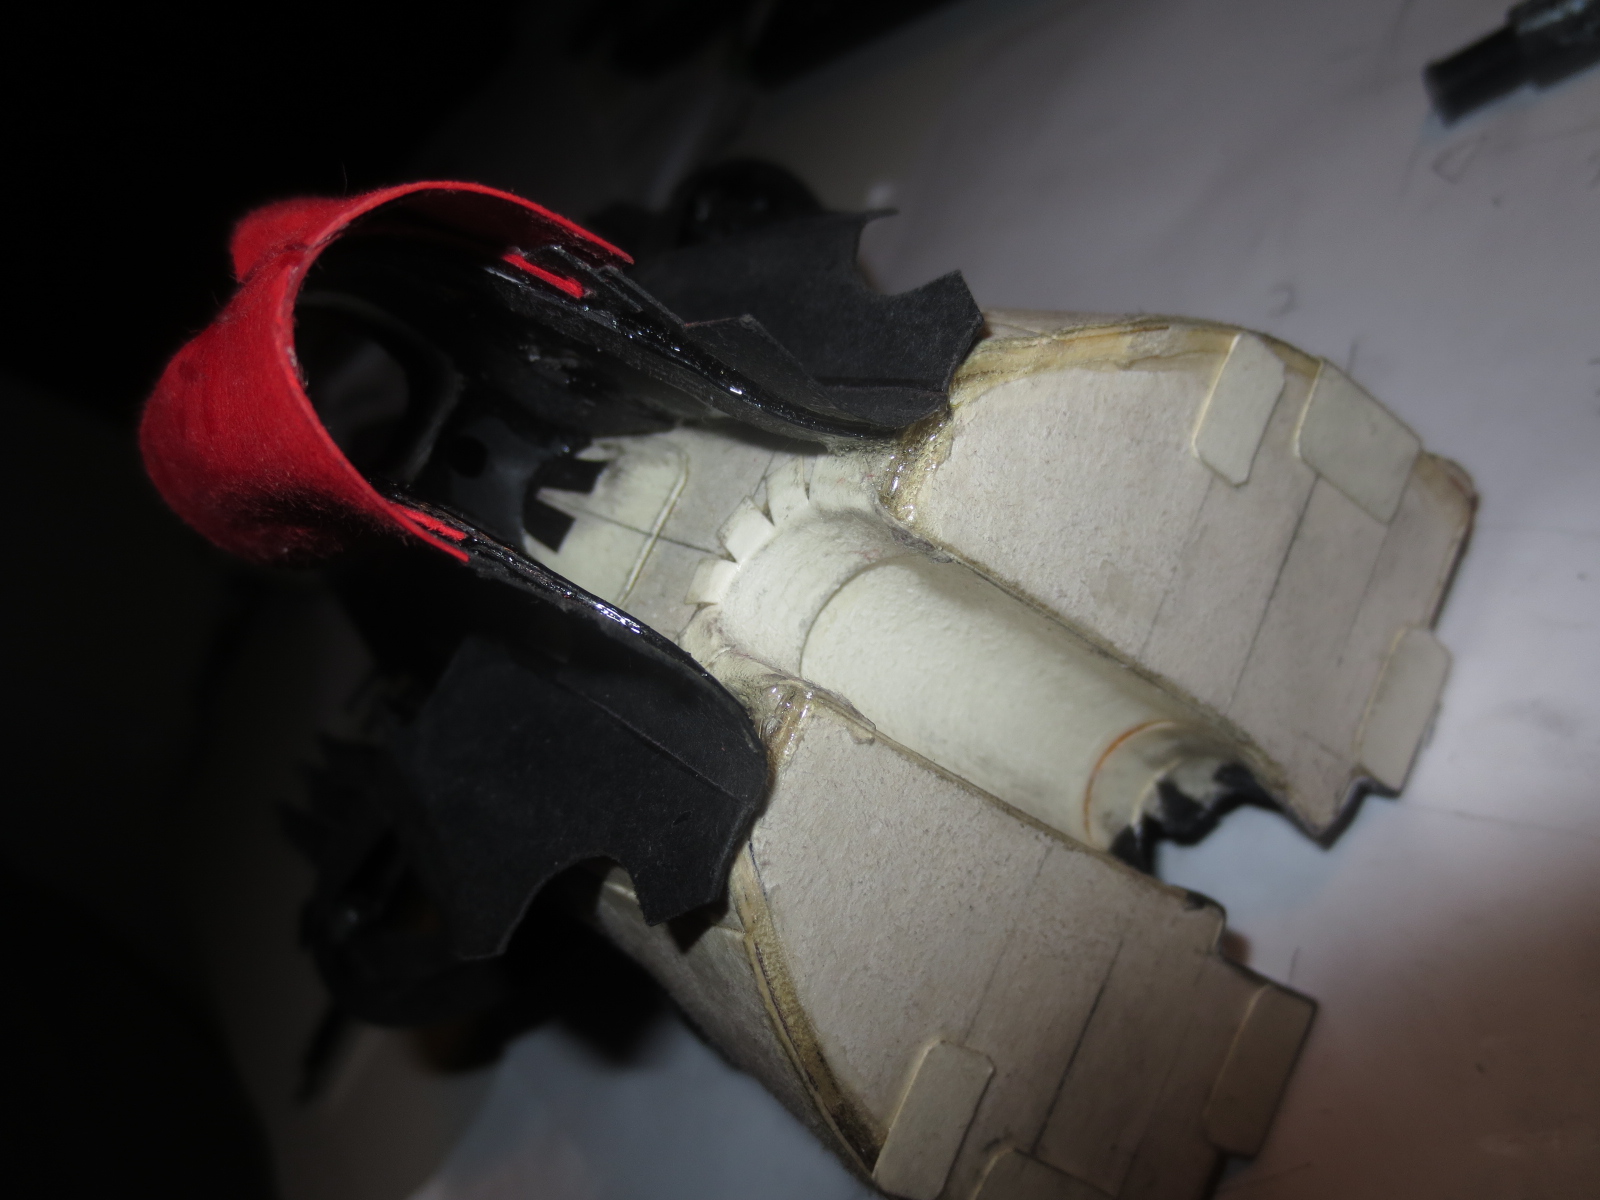
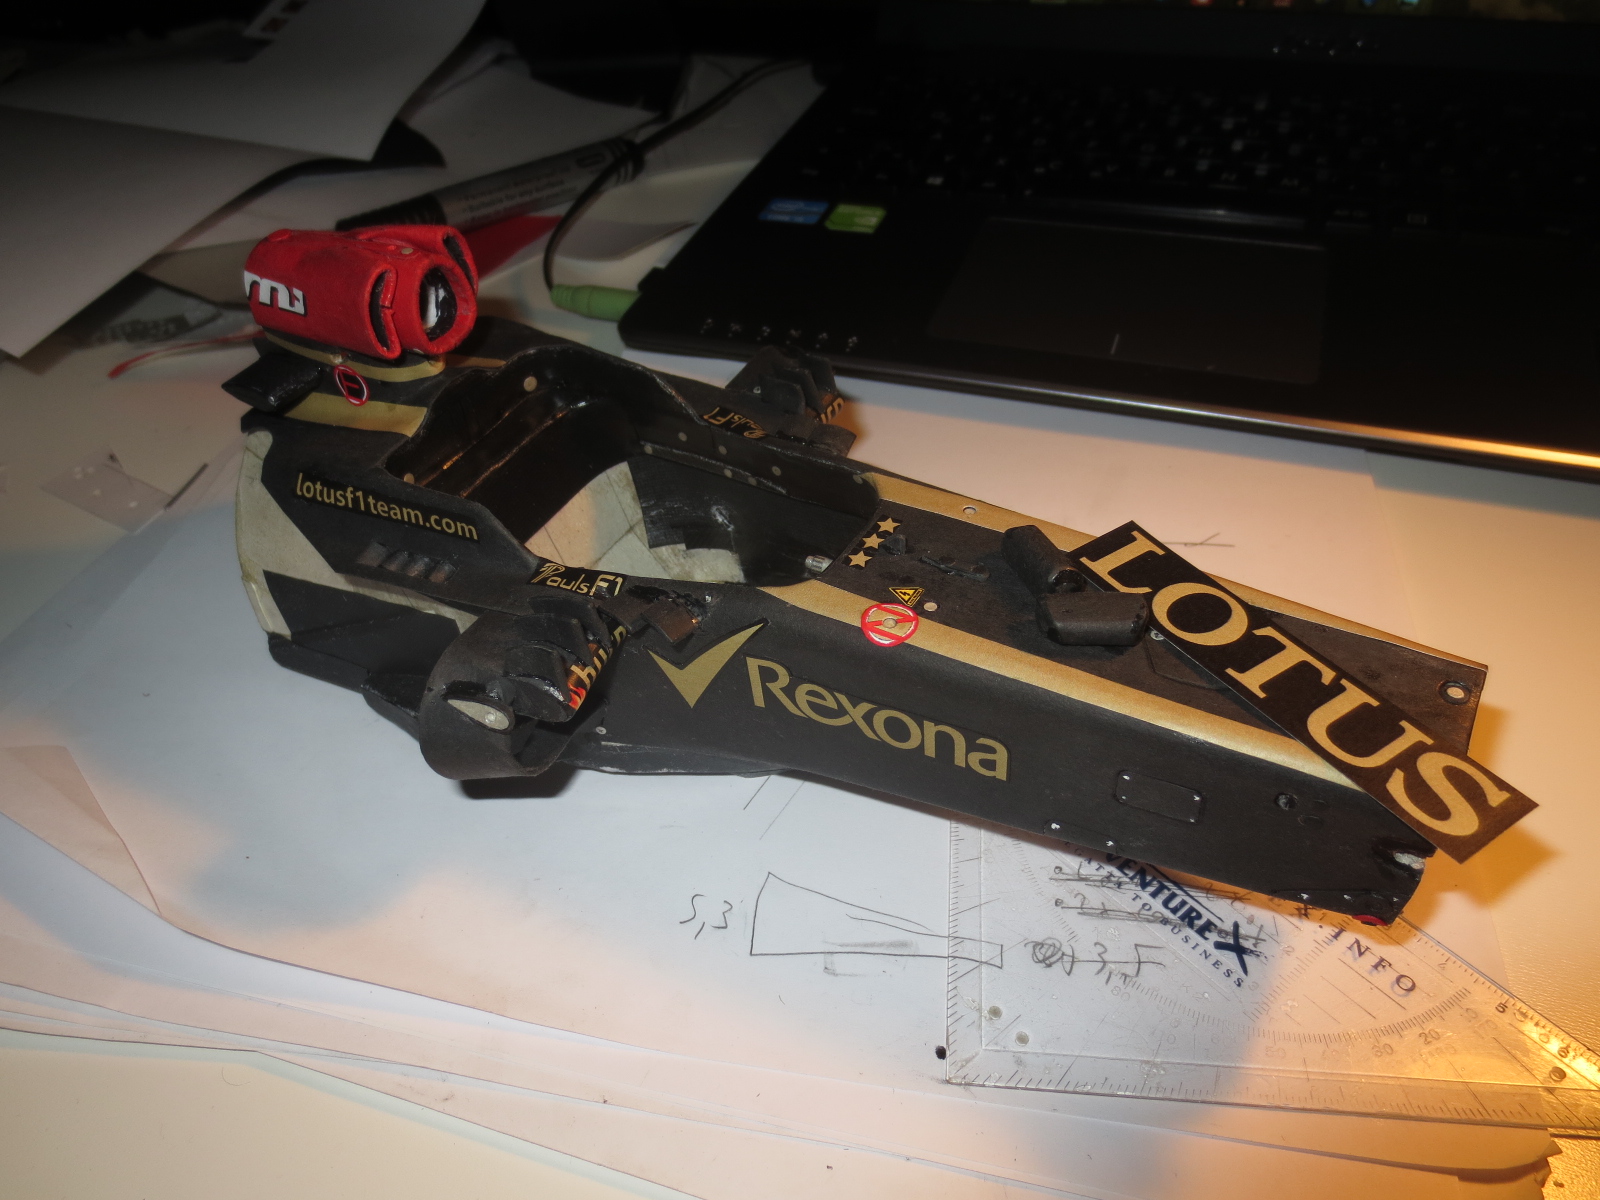
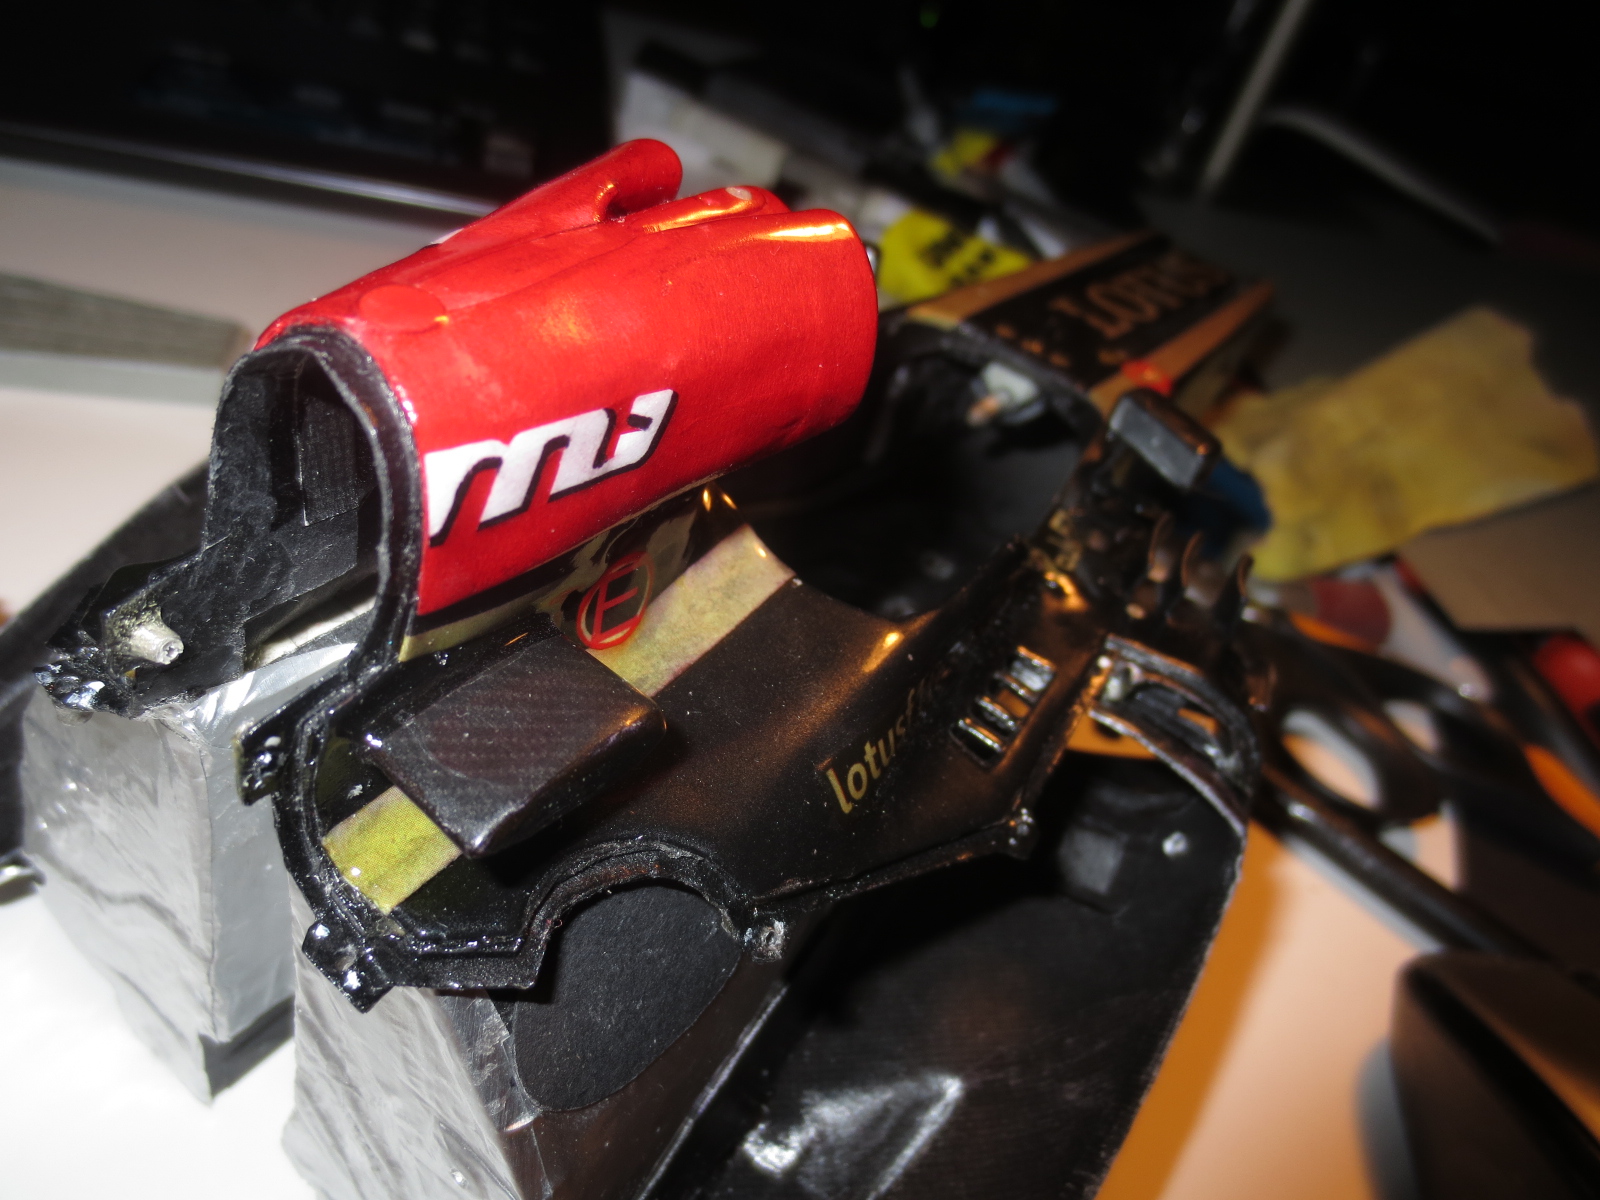
One part of the car rework was f.e. the fit of the rad ducts. As you can see, I taped off the surrounding surfaces to avoid contamination of the nice surface.
Image

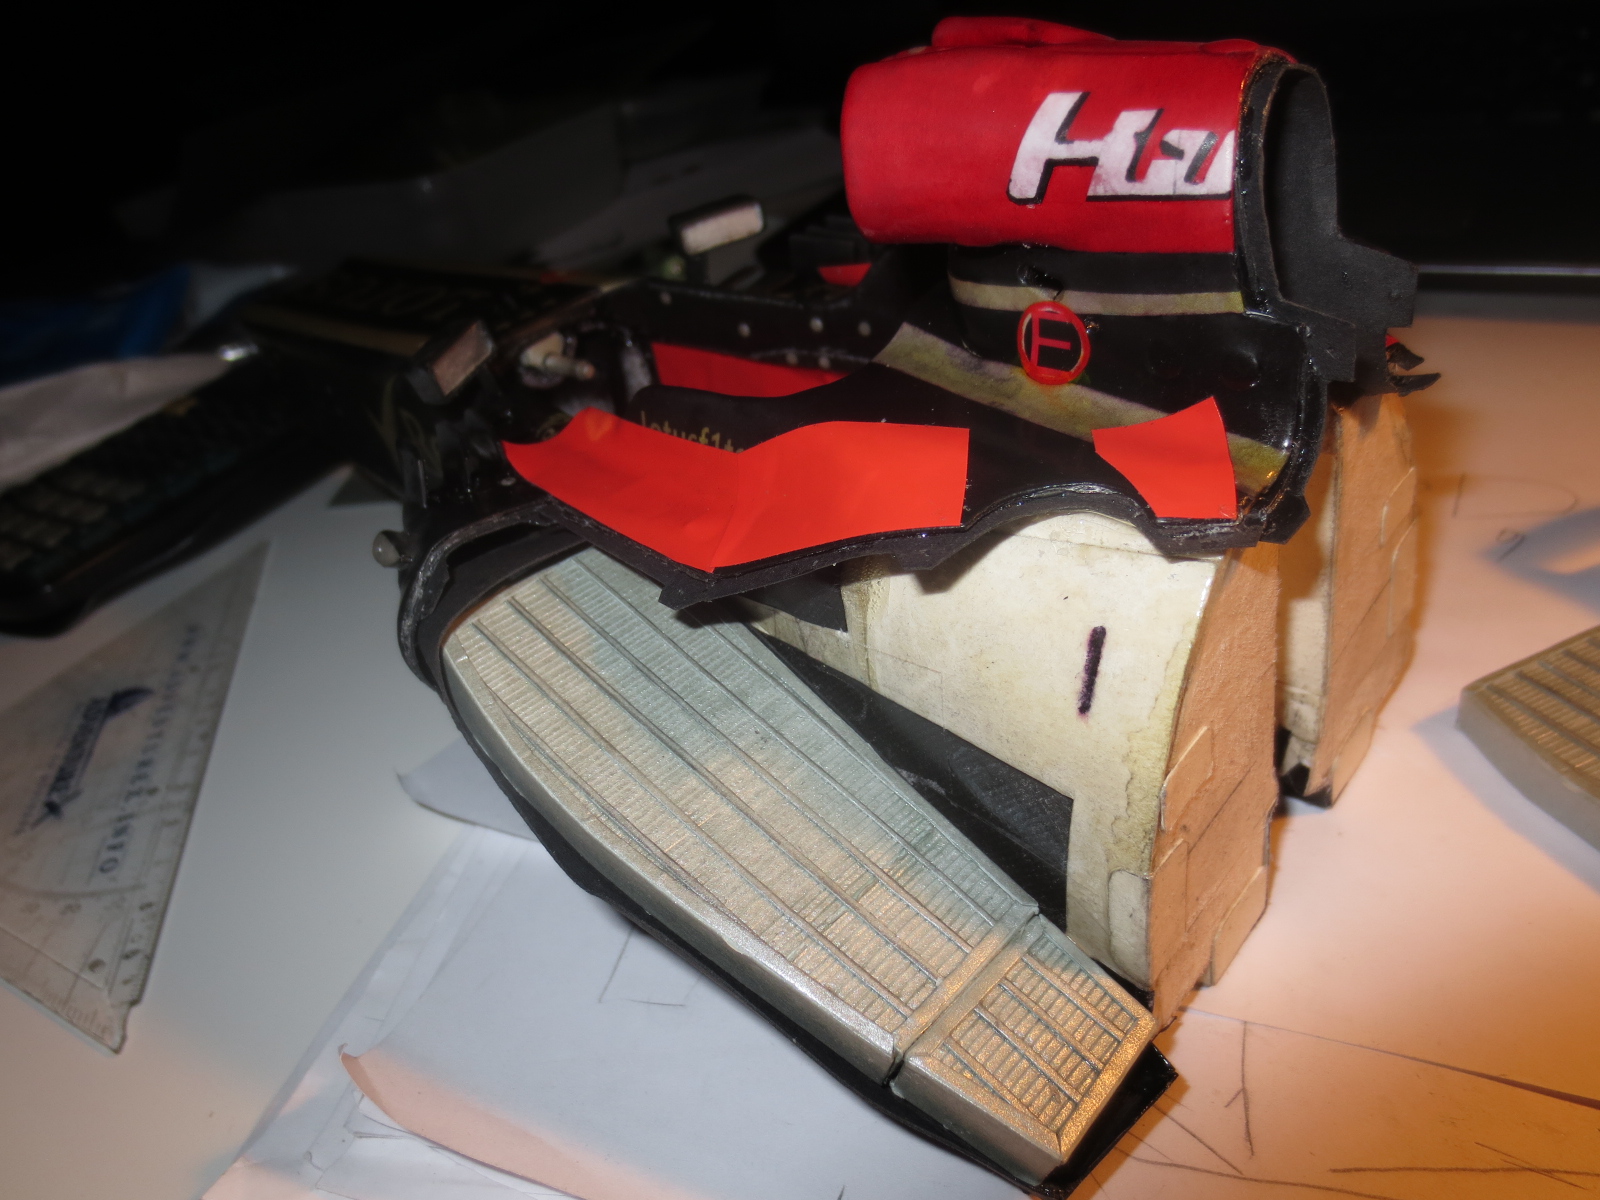
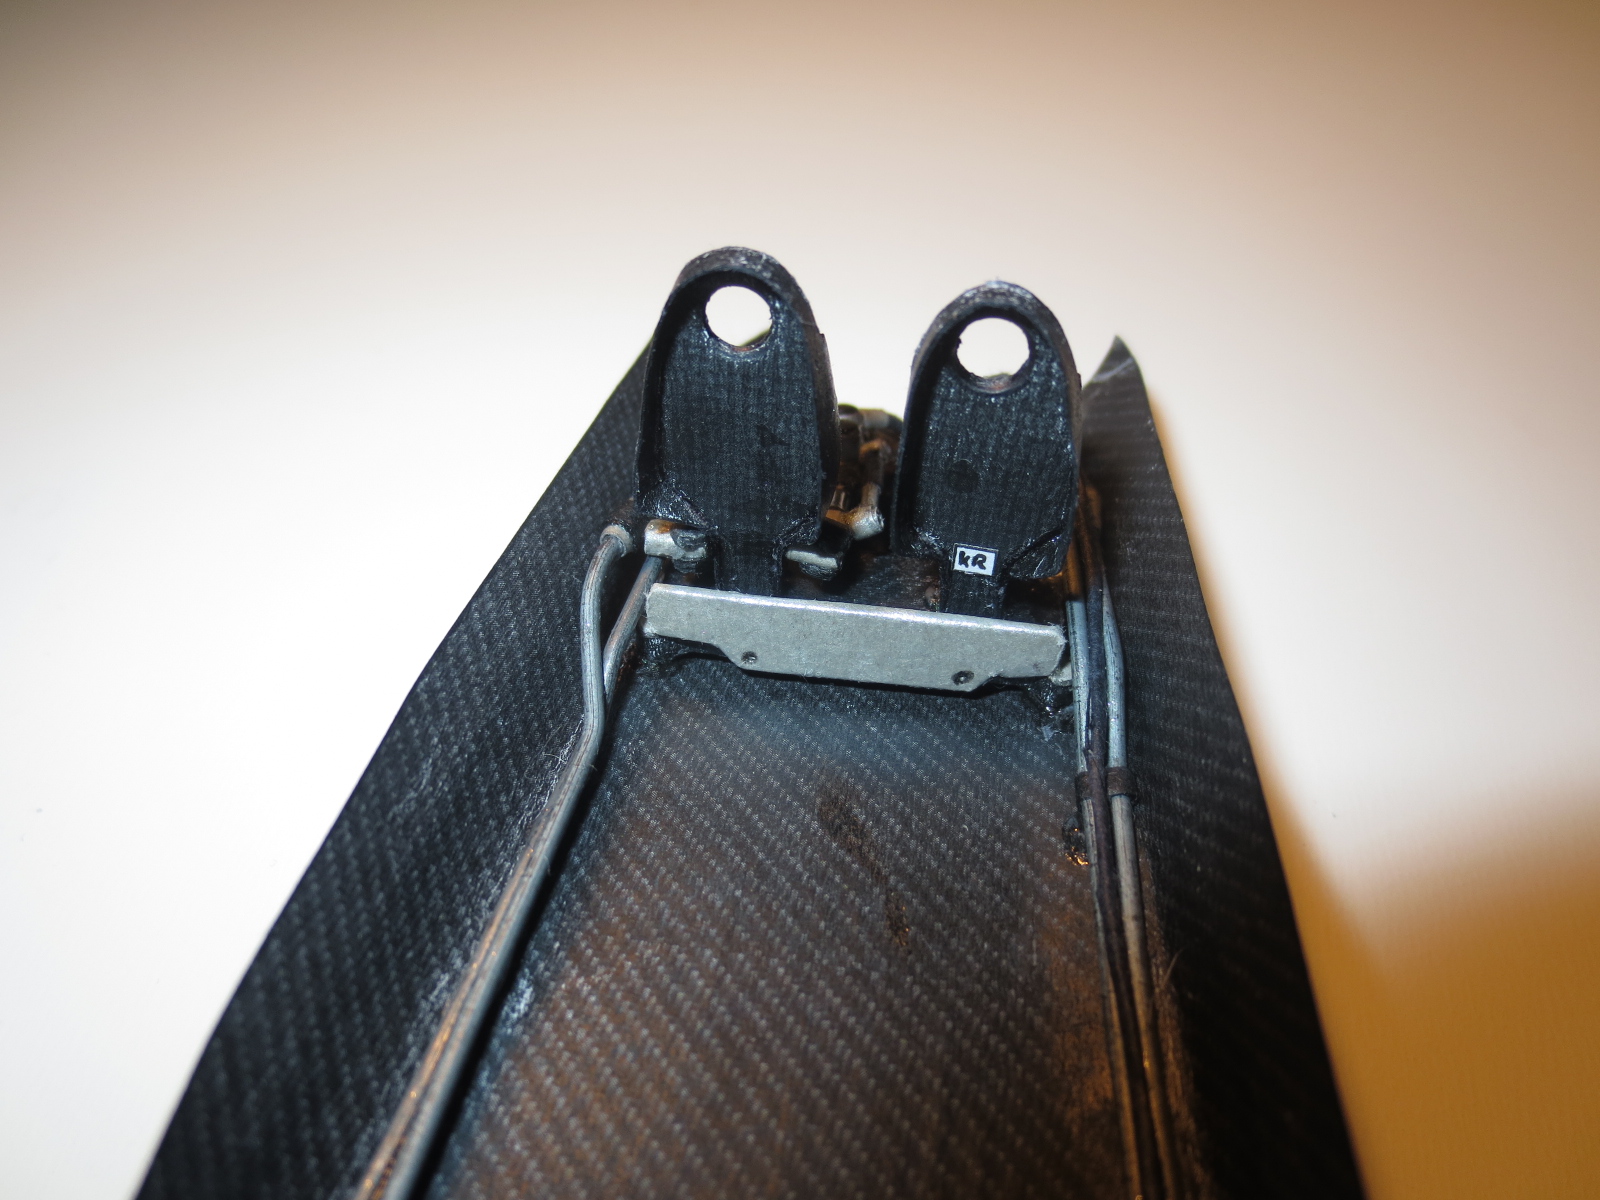
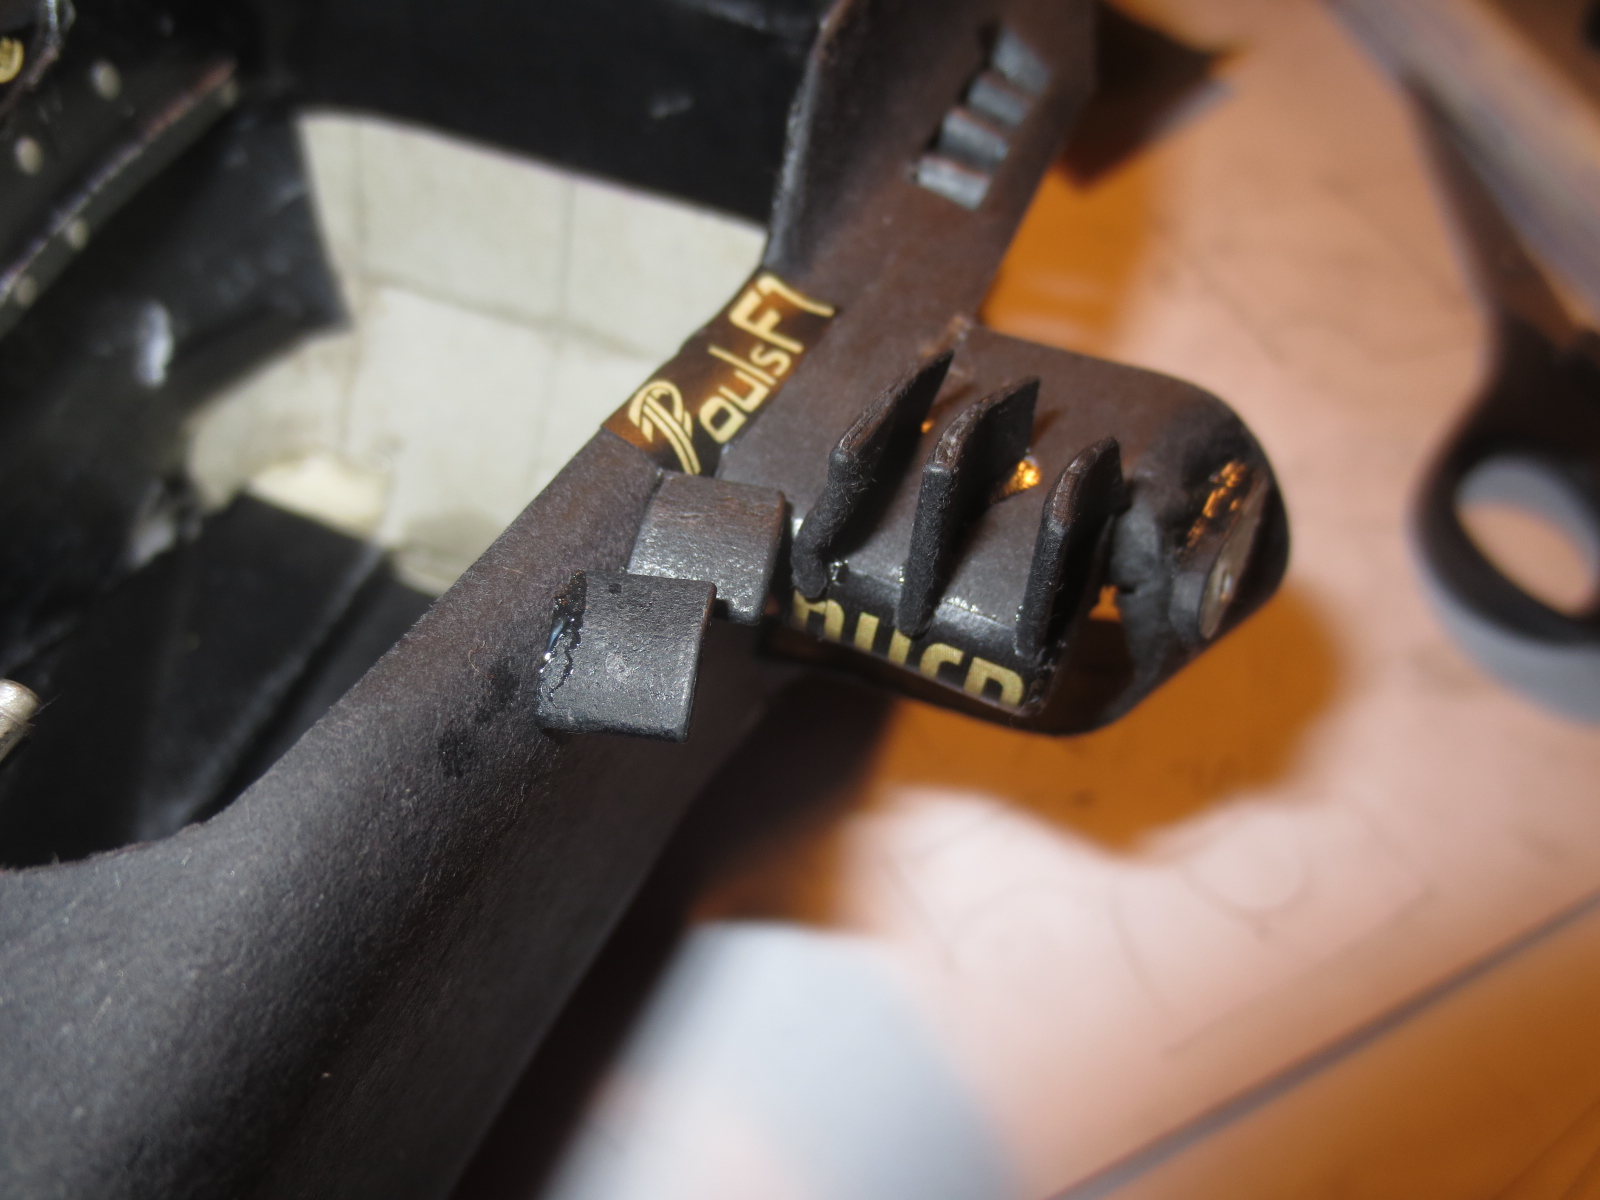
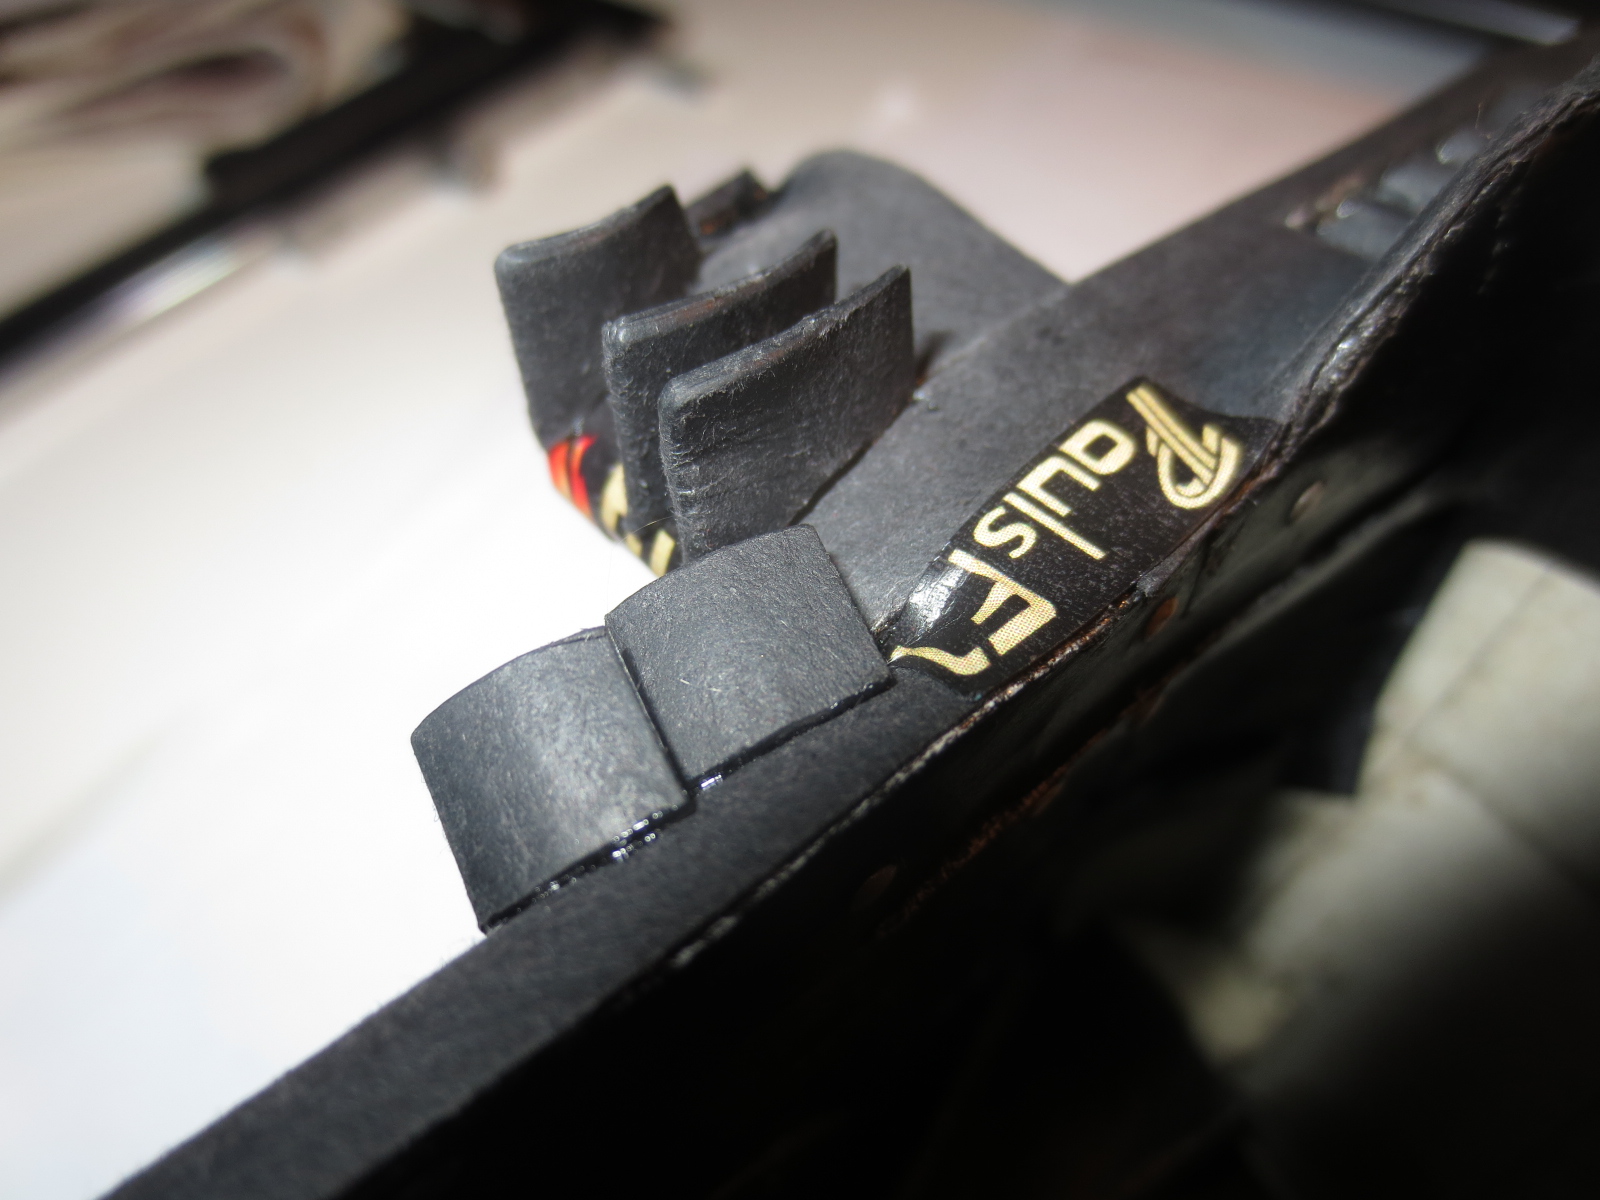
This is also the first car, where I really planed a fastening system for the whole bodywork panels. And I hope it will work. It's kind of the same system as it's on real F1 cars. Here you can see the fit of one fastener...
Image

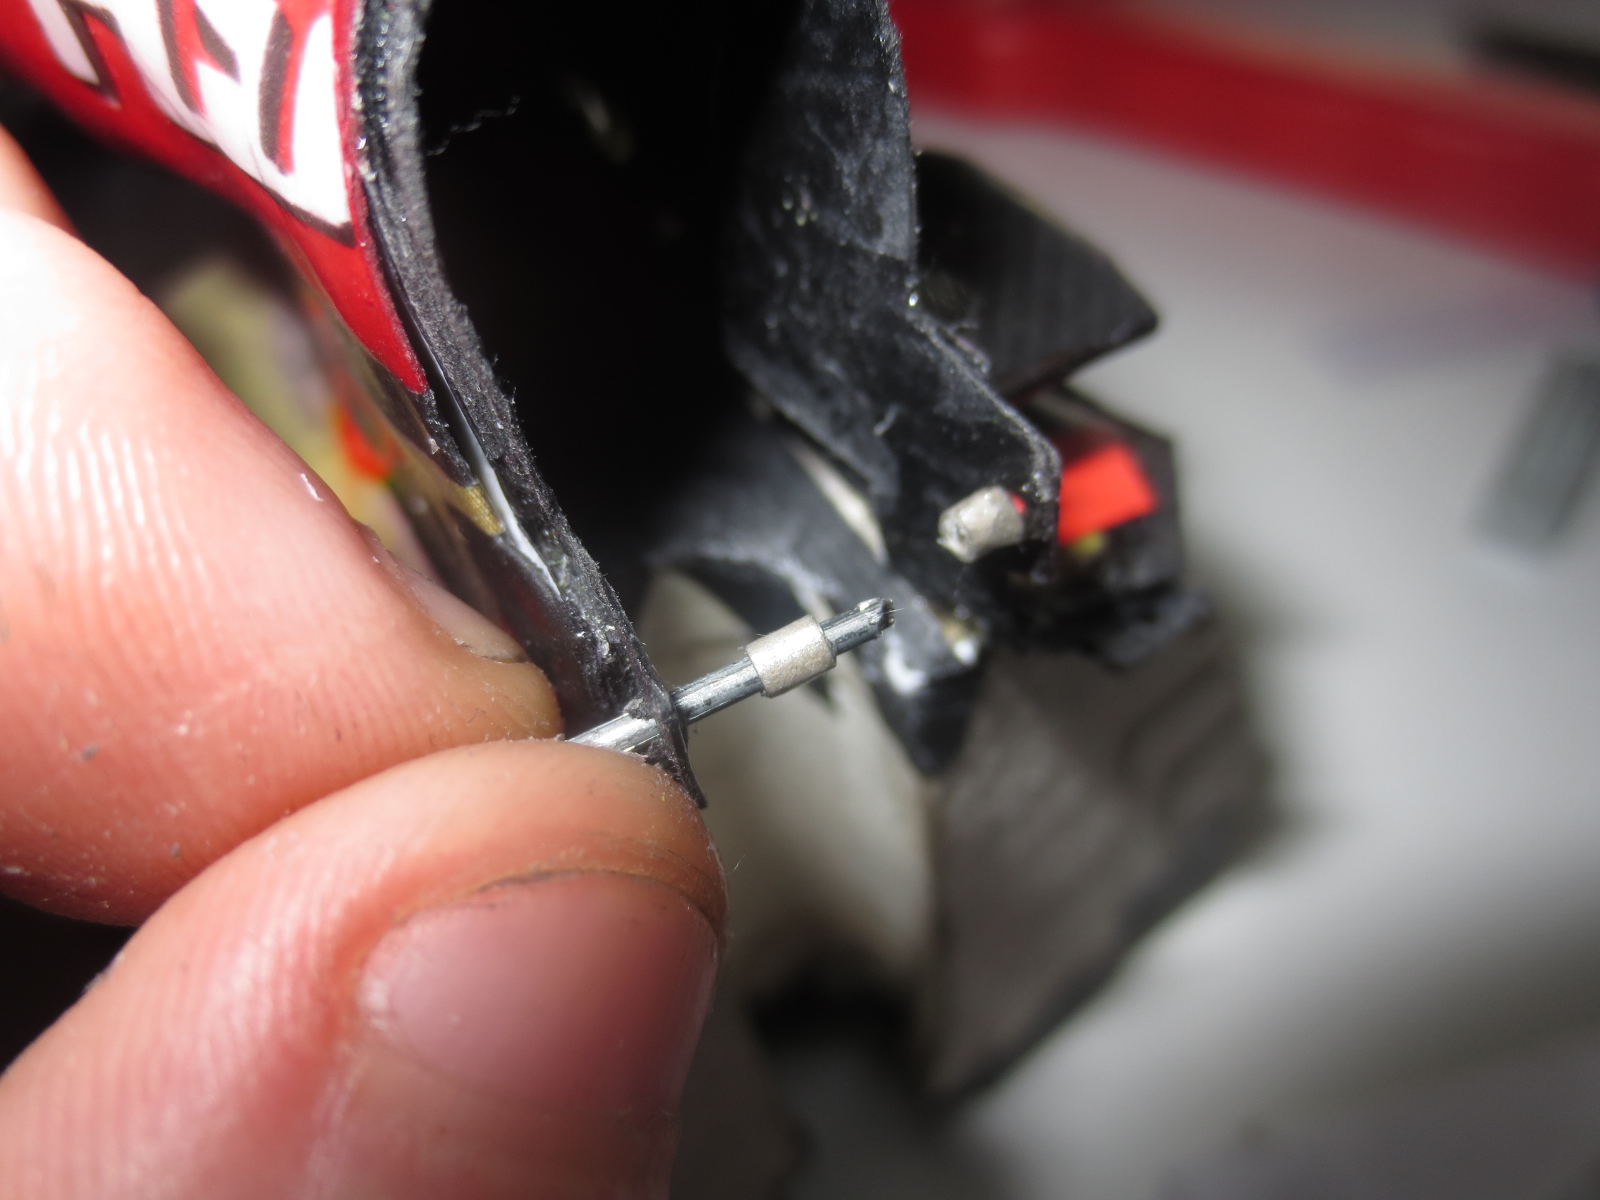
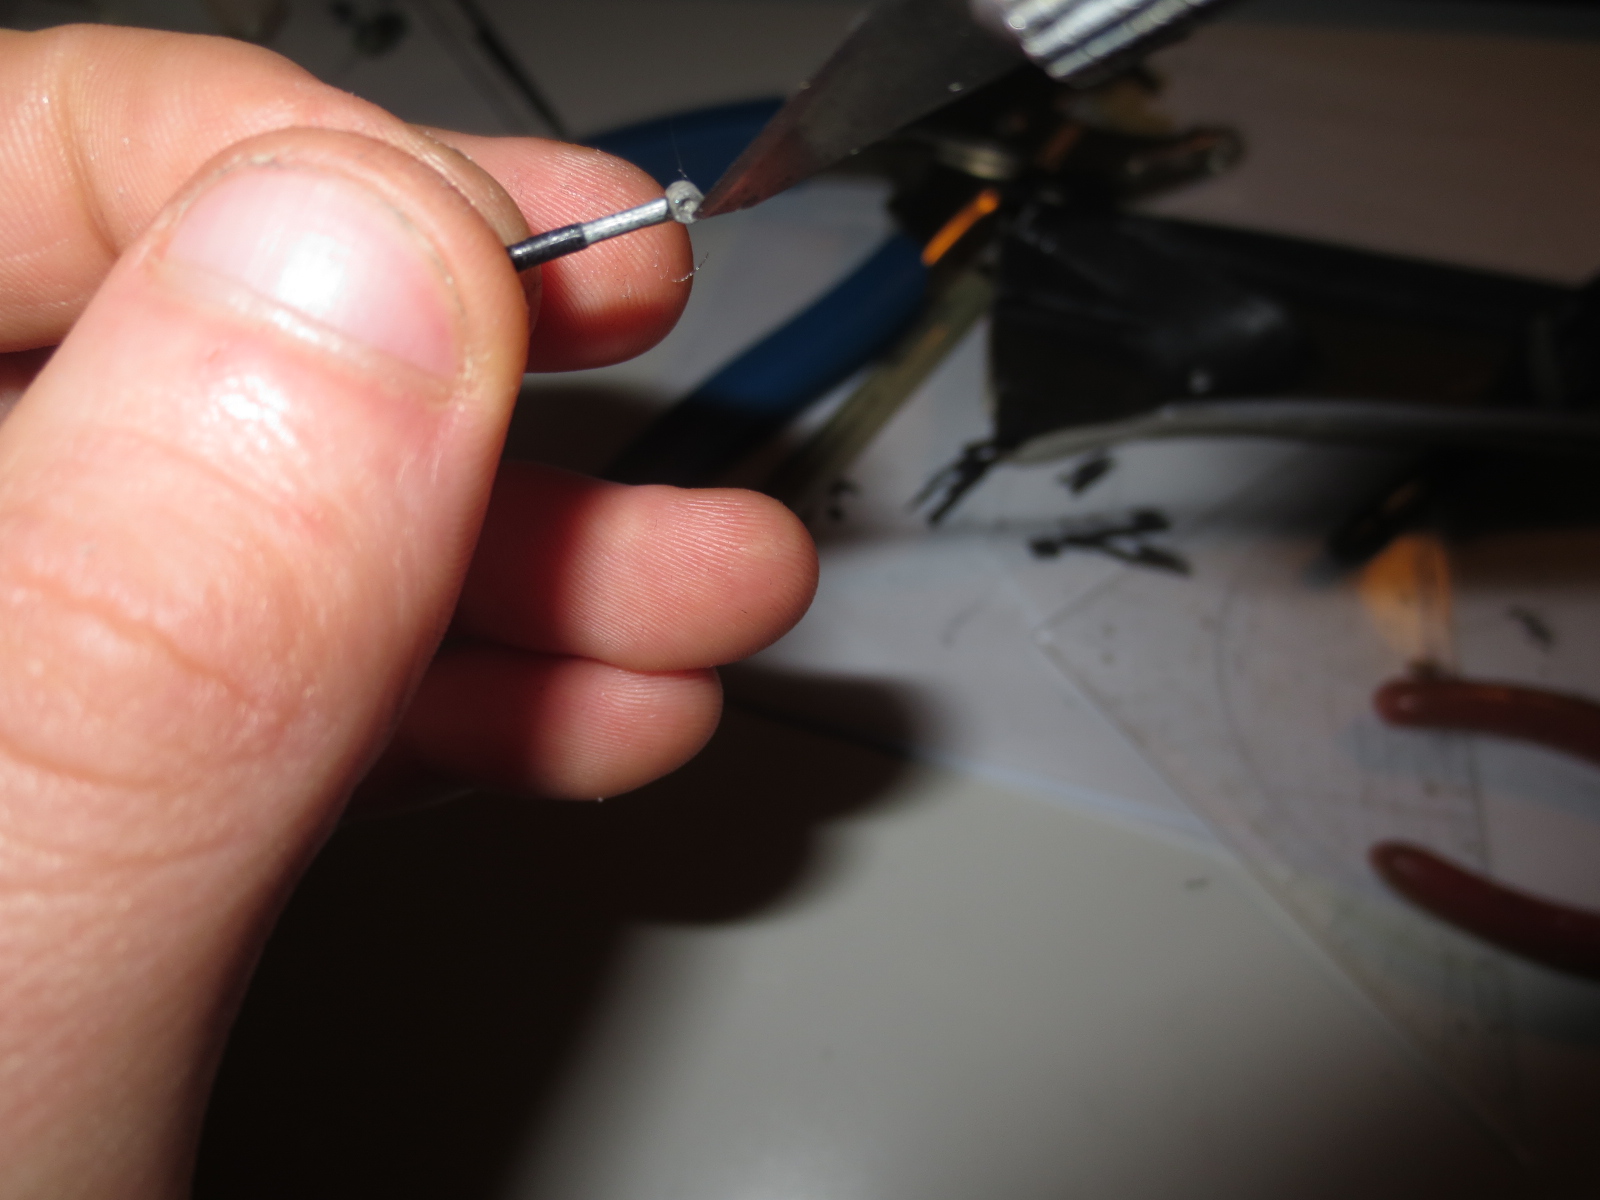
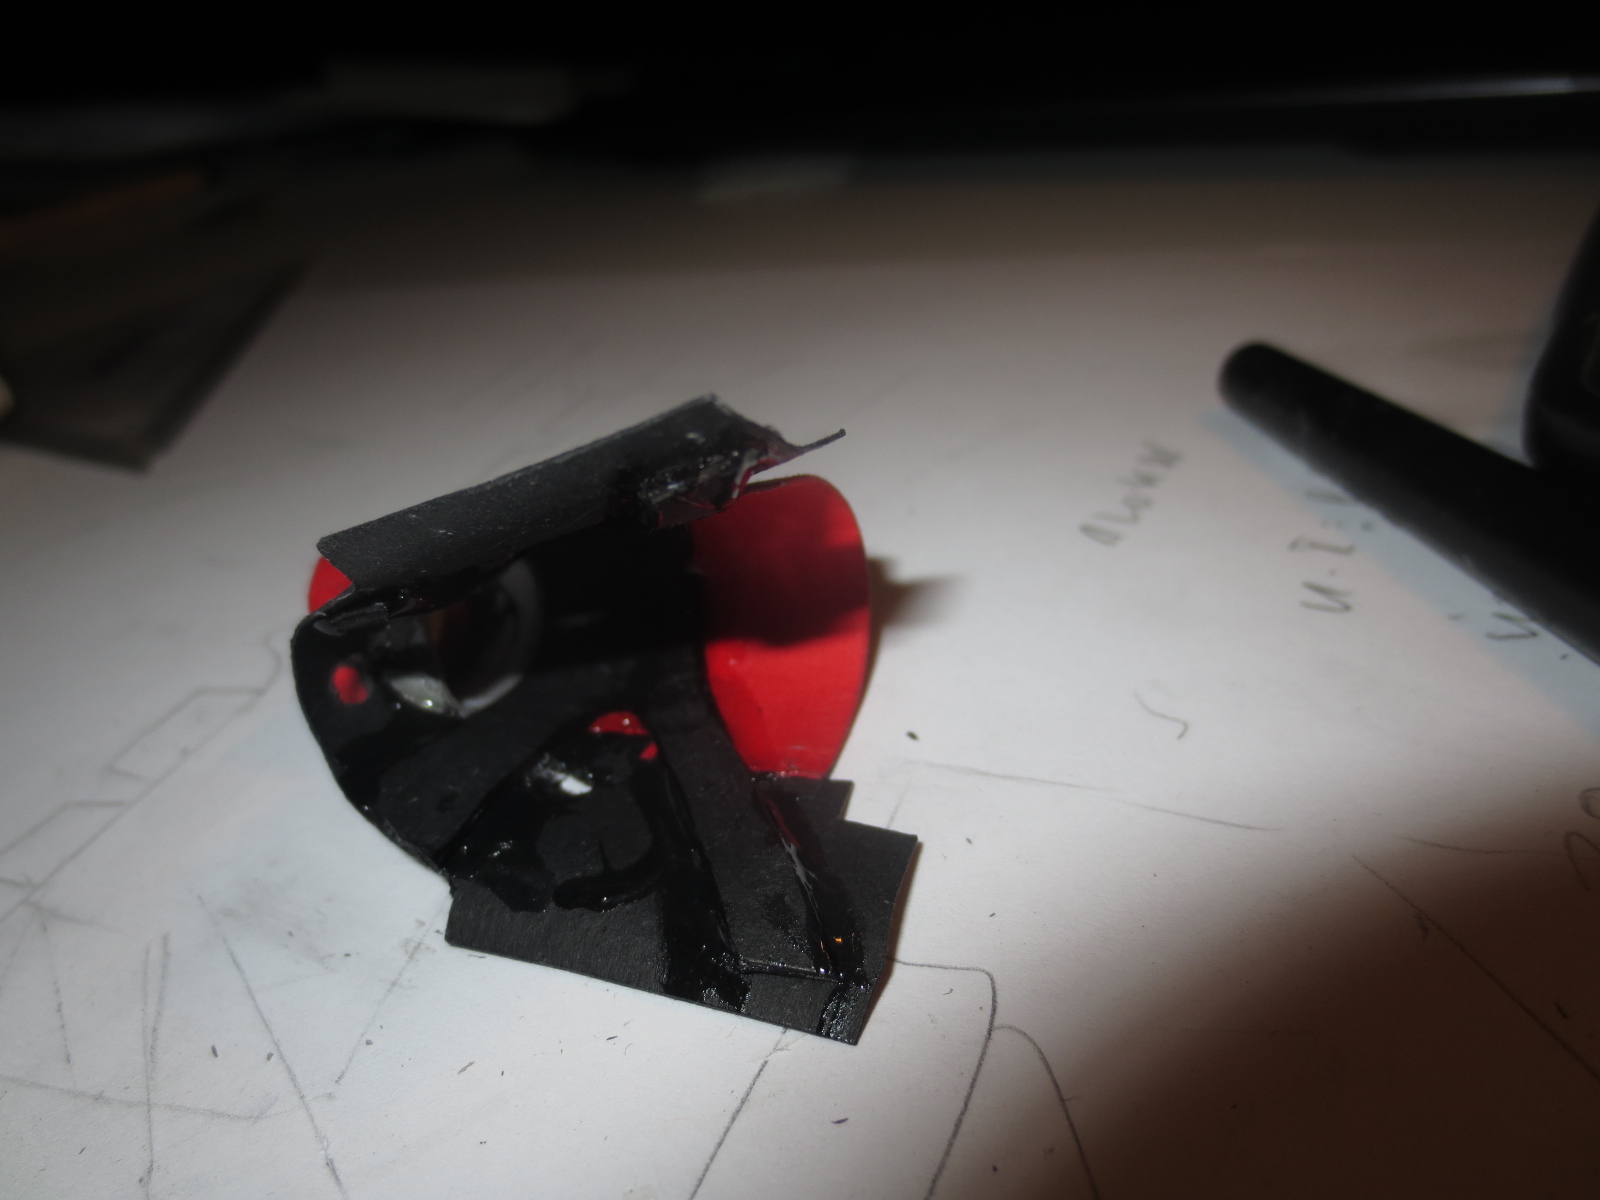
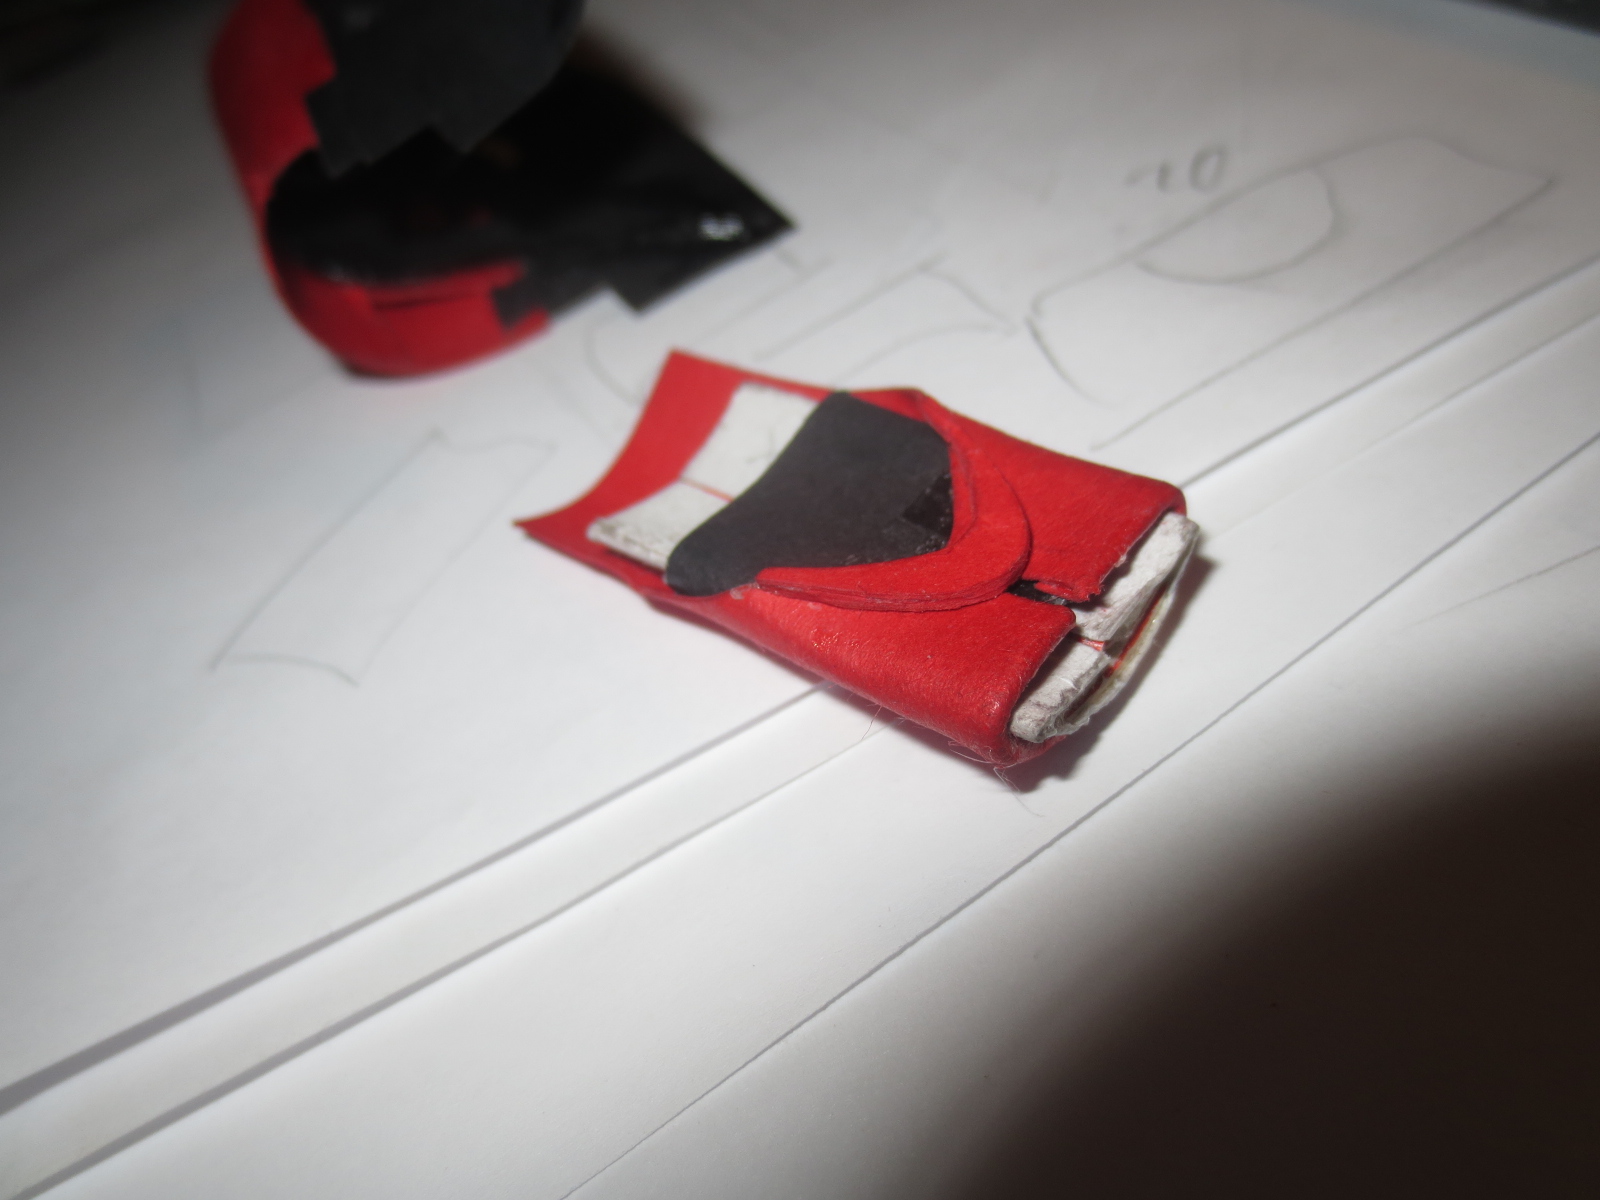
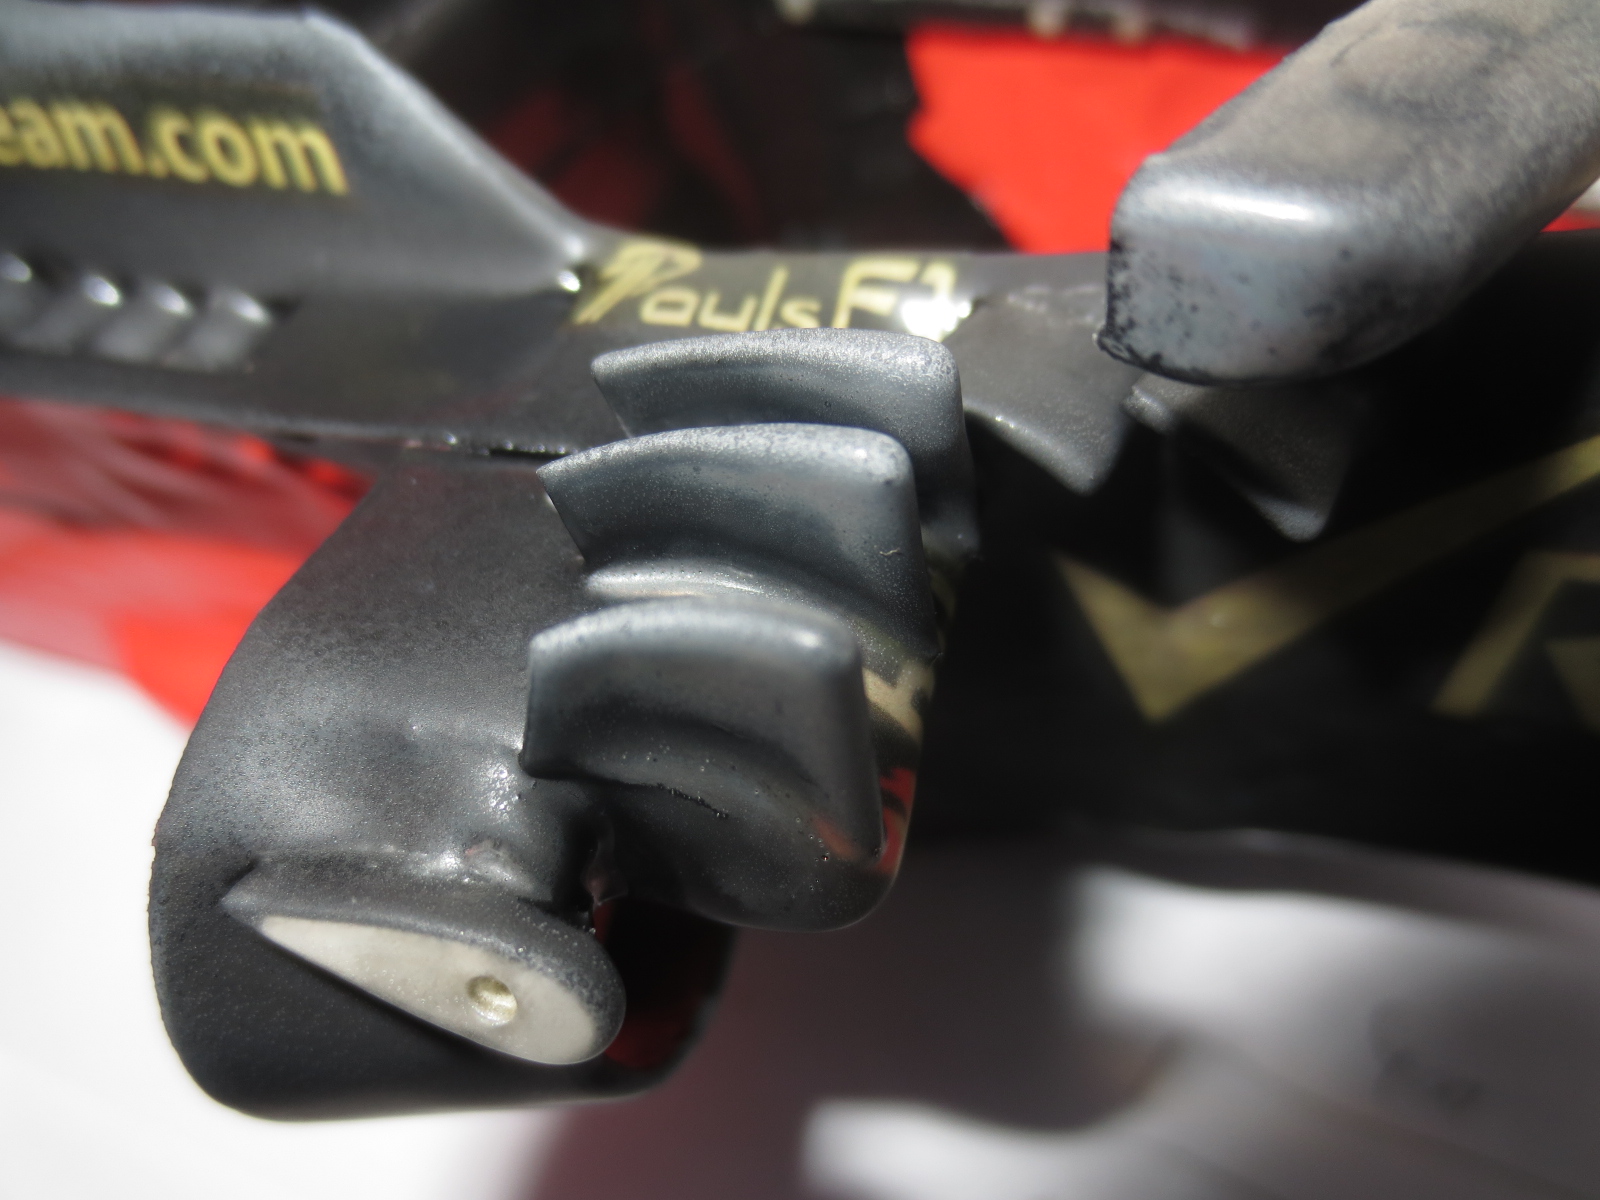
"Machining" the holes for the nose pins. I would say, in combination of glue and my treatment of the paper, this components are much harder than some plastics or woods...
Image

First pic after finishing the 3rd paint step.
Image

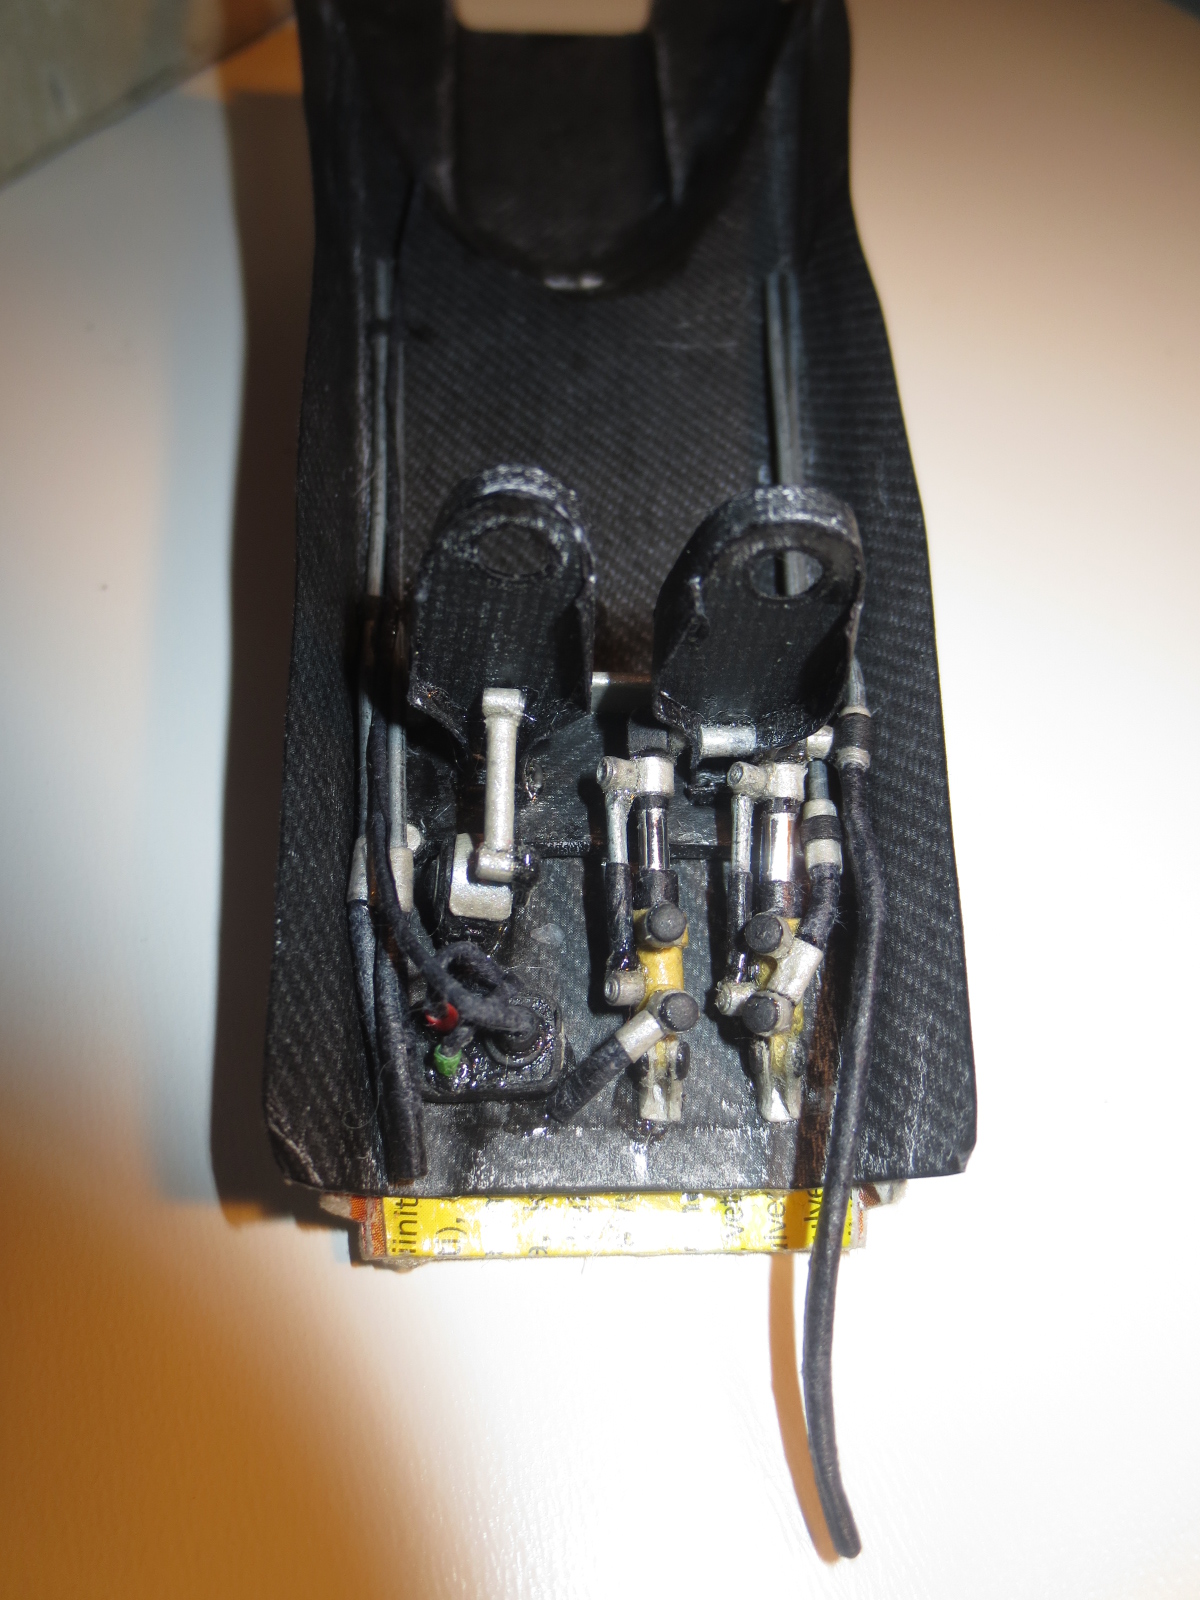
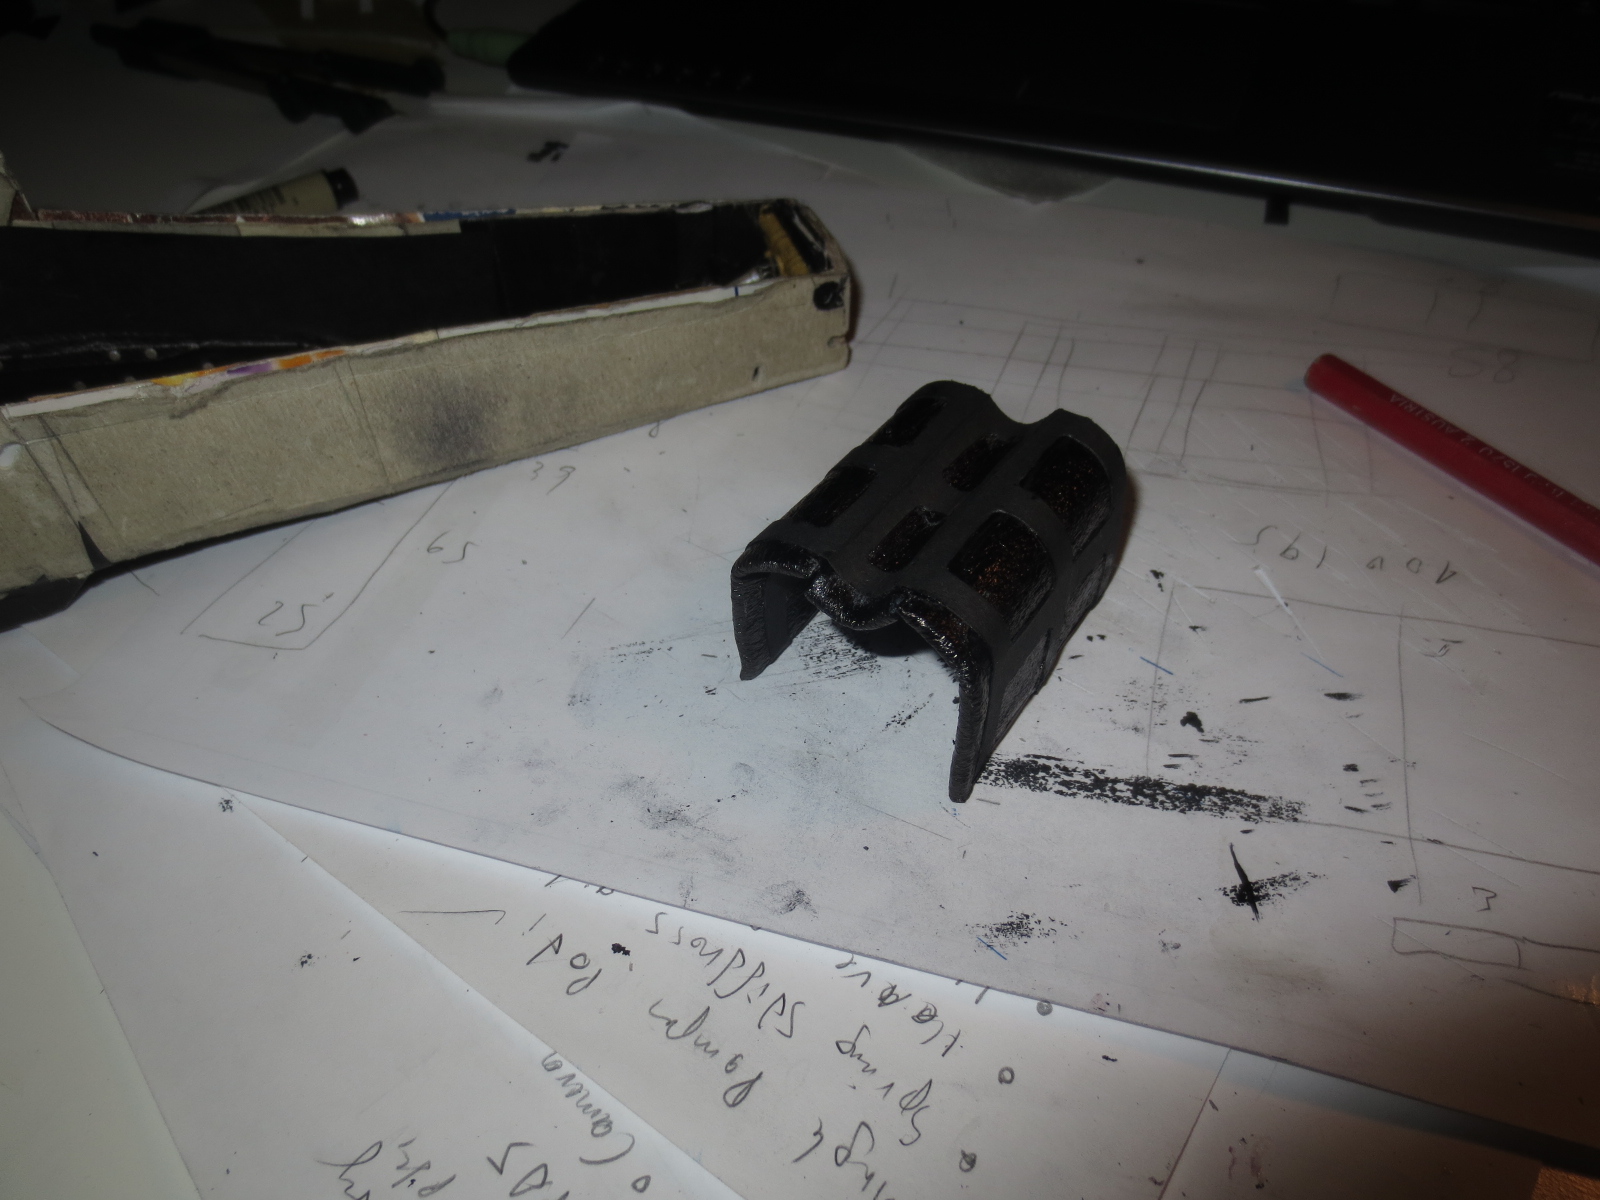
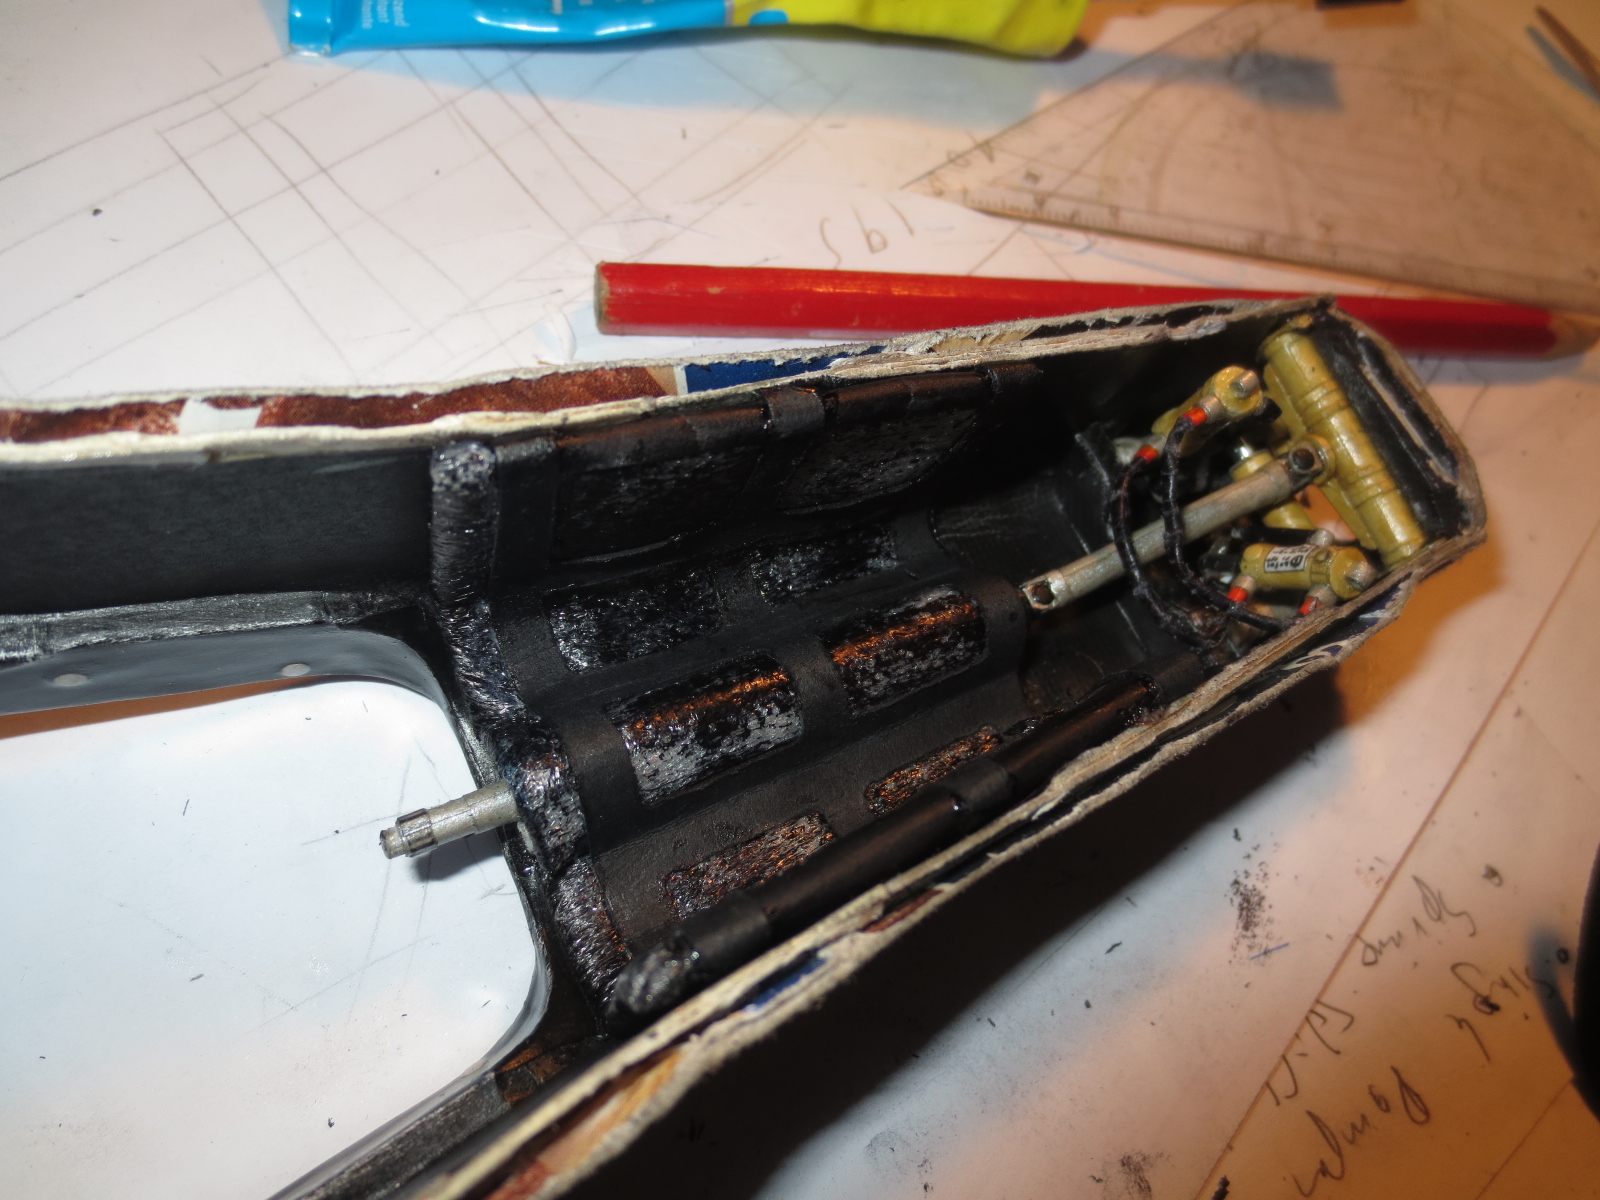
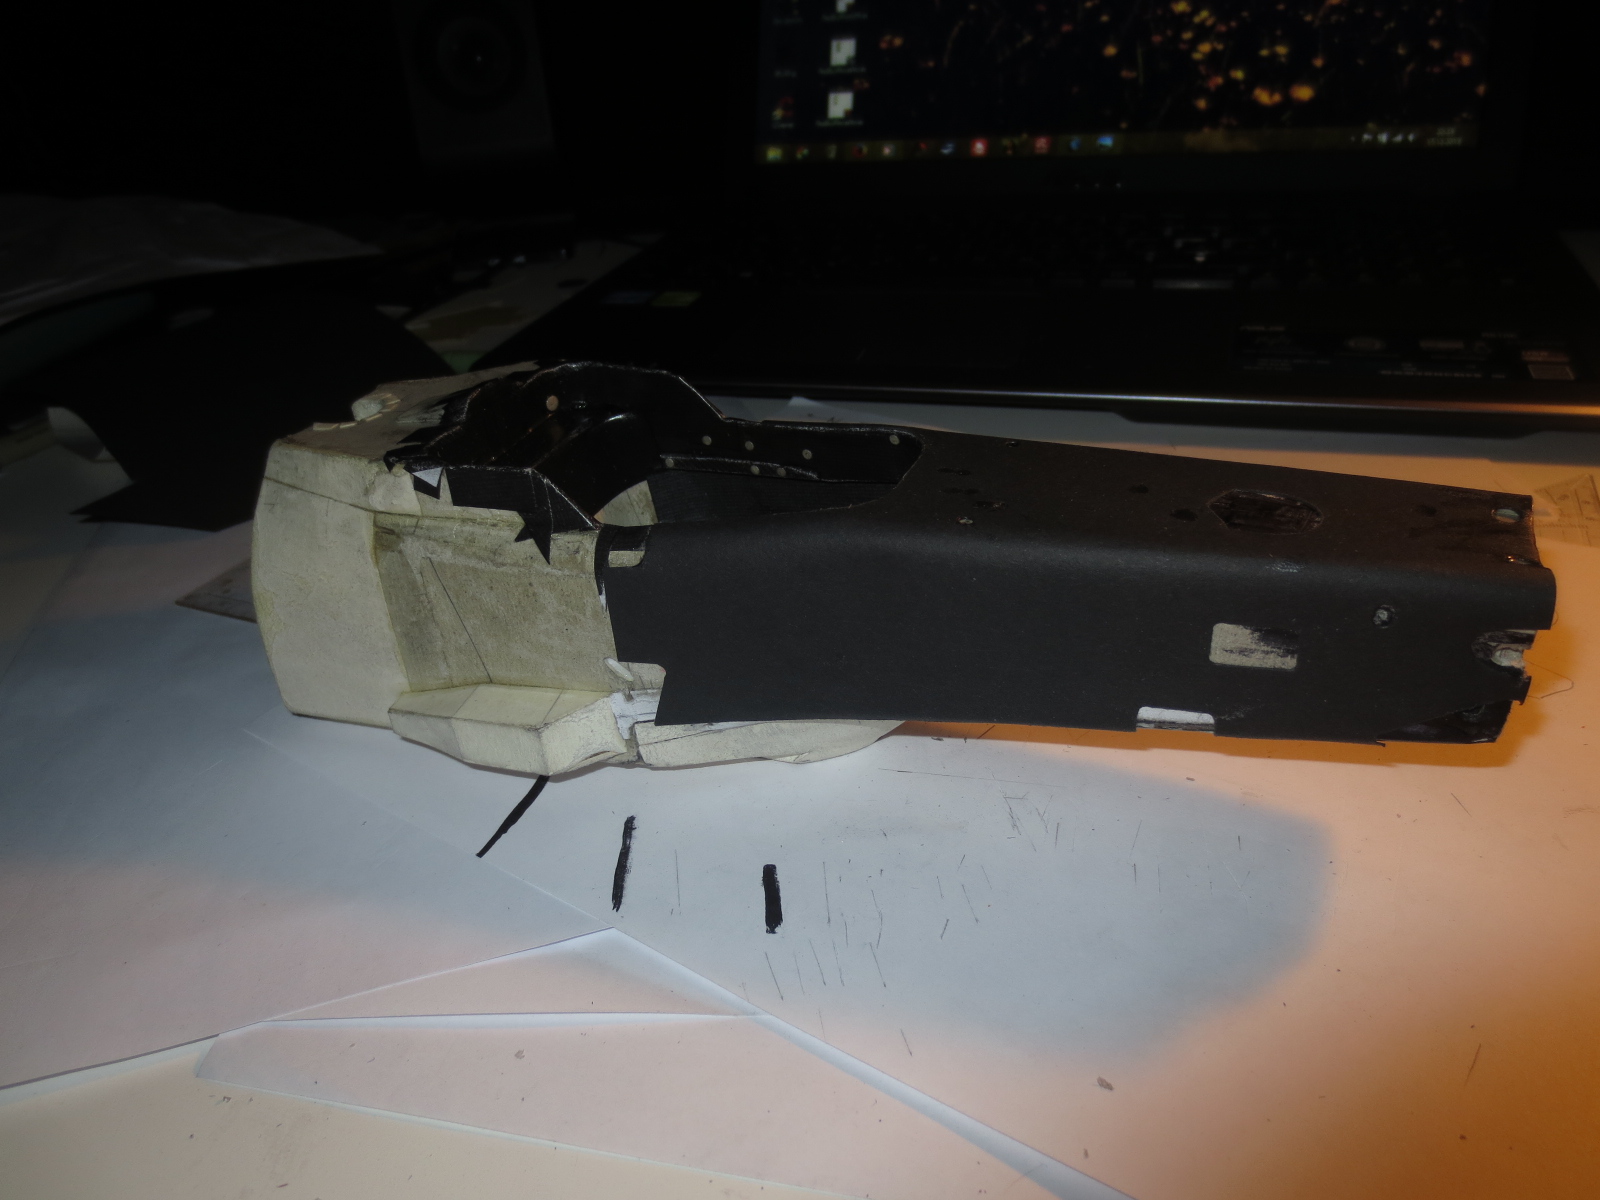
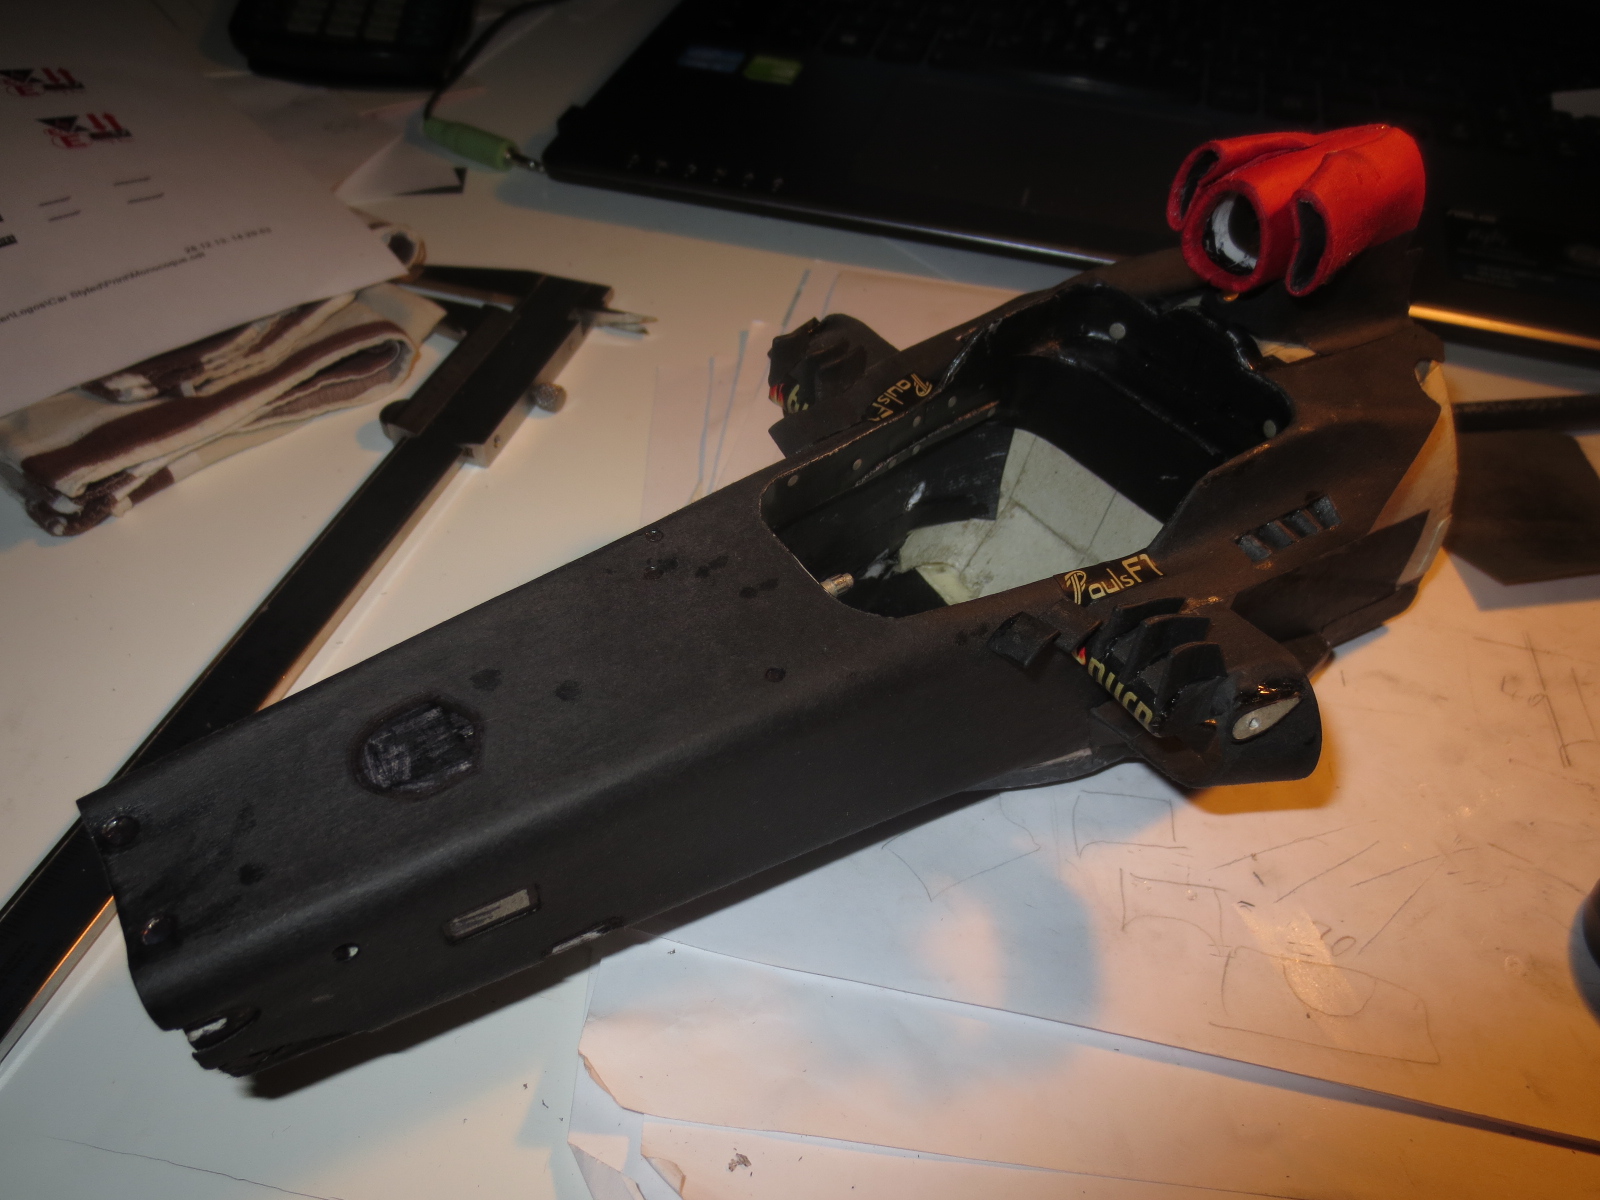
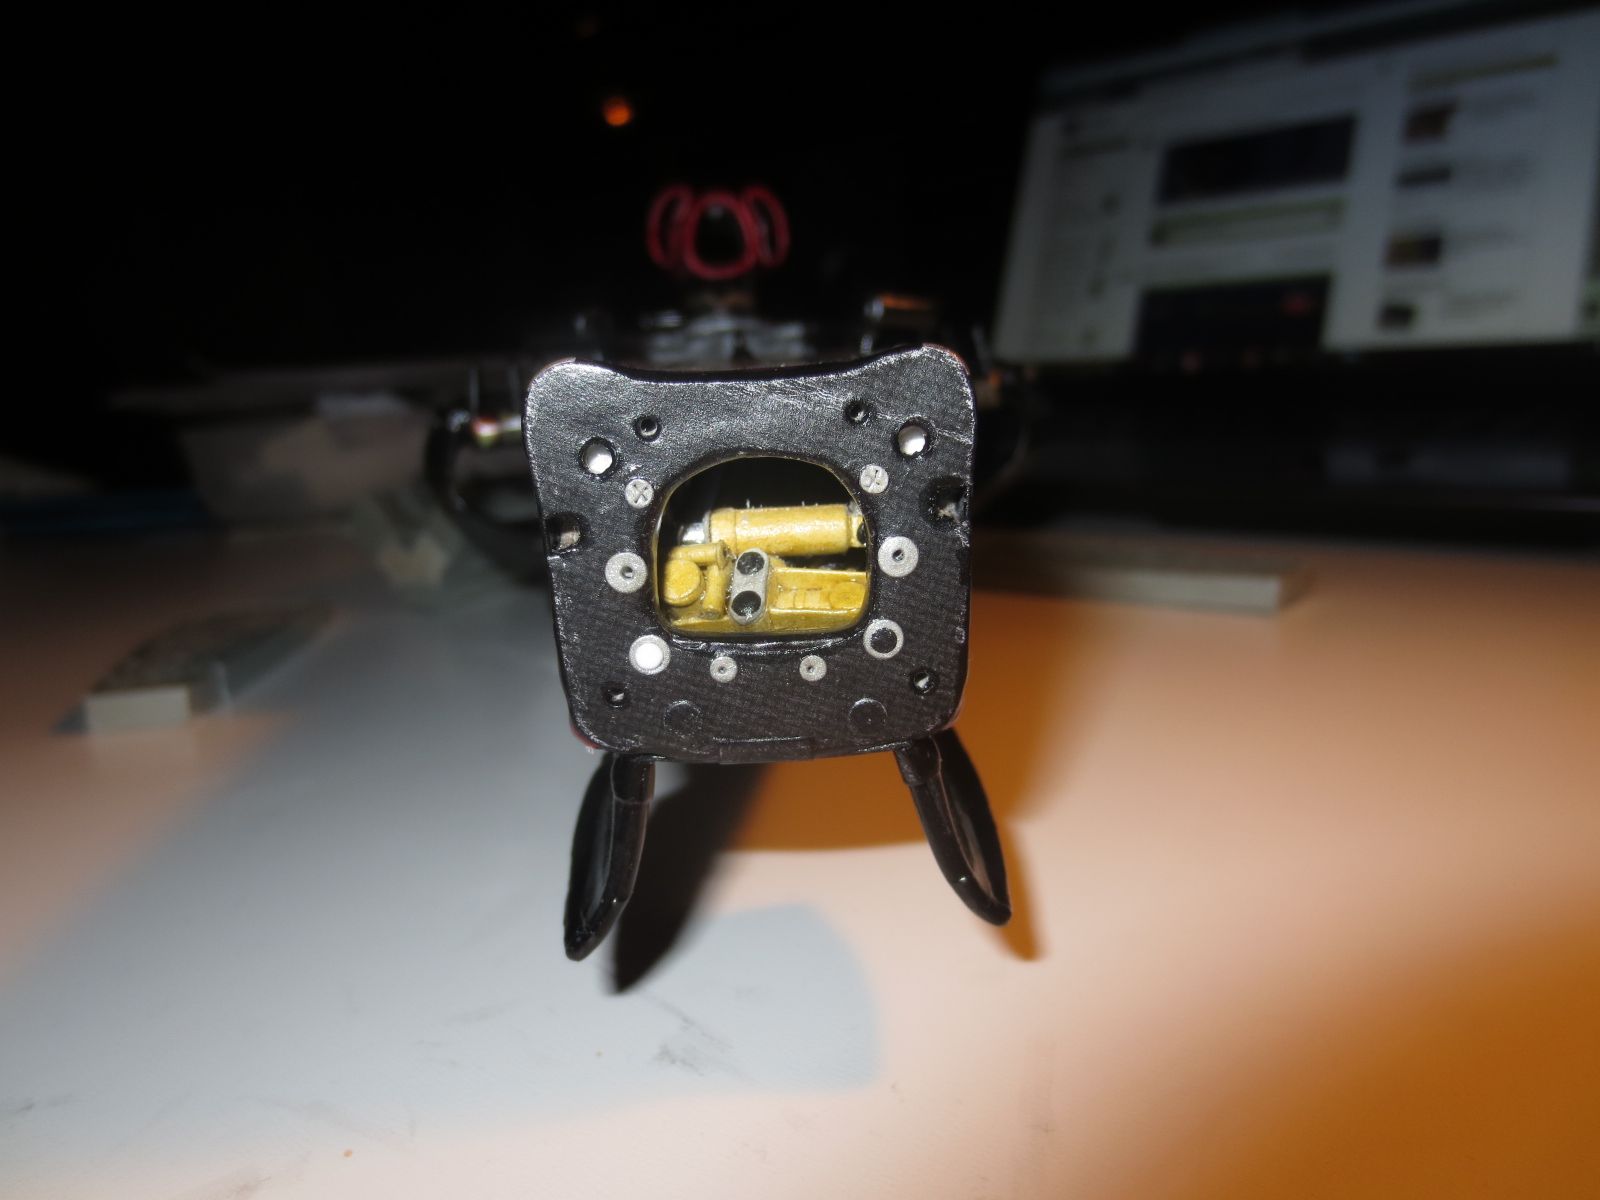
Finished chassis with (non painted) heatshield.
Image

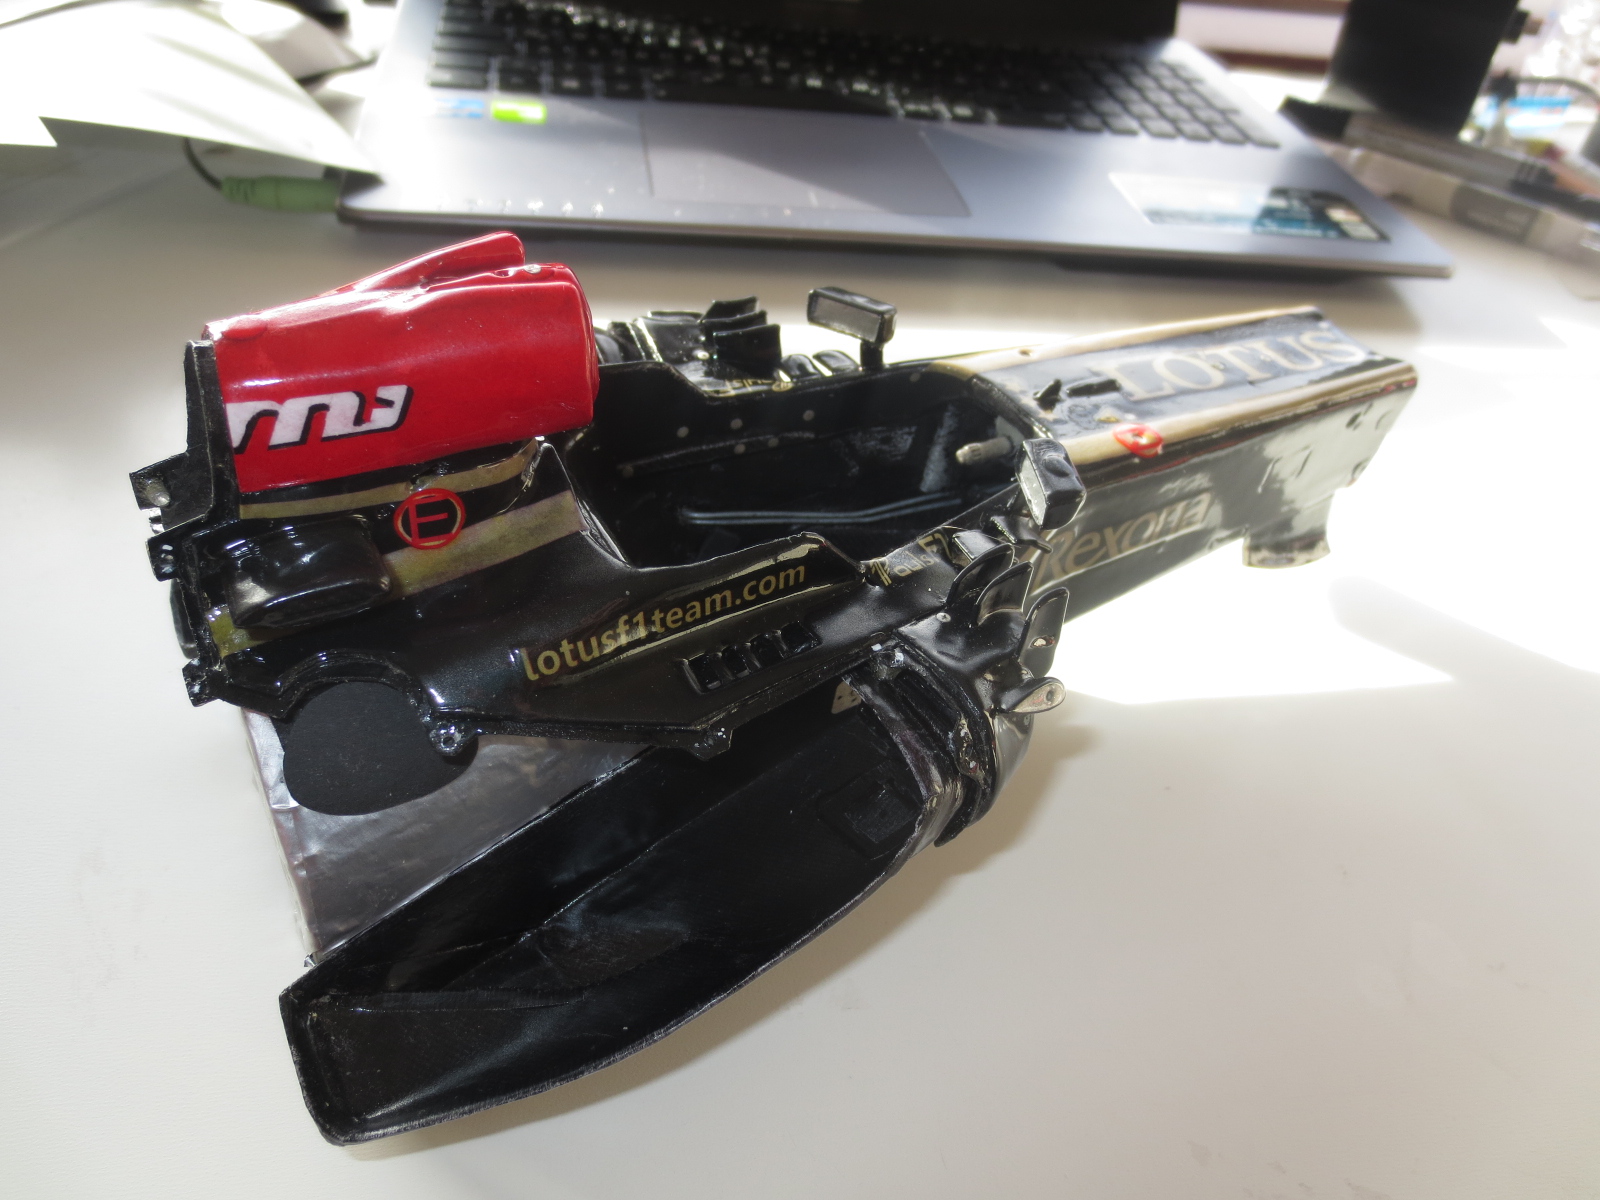
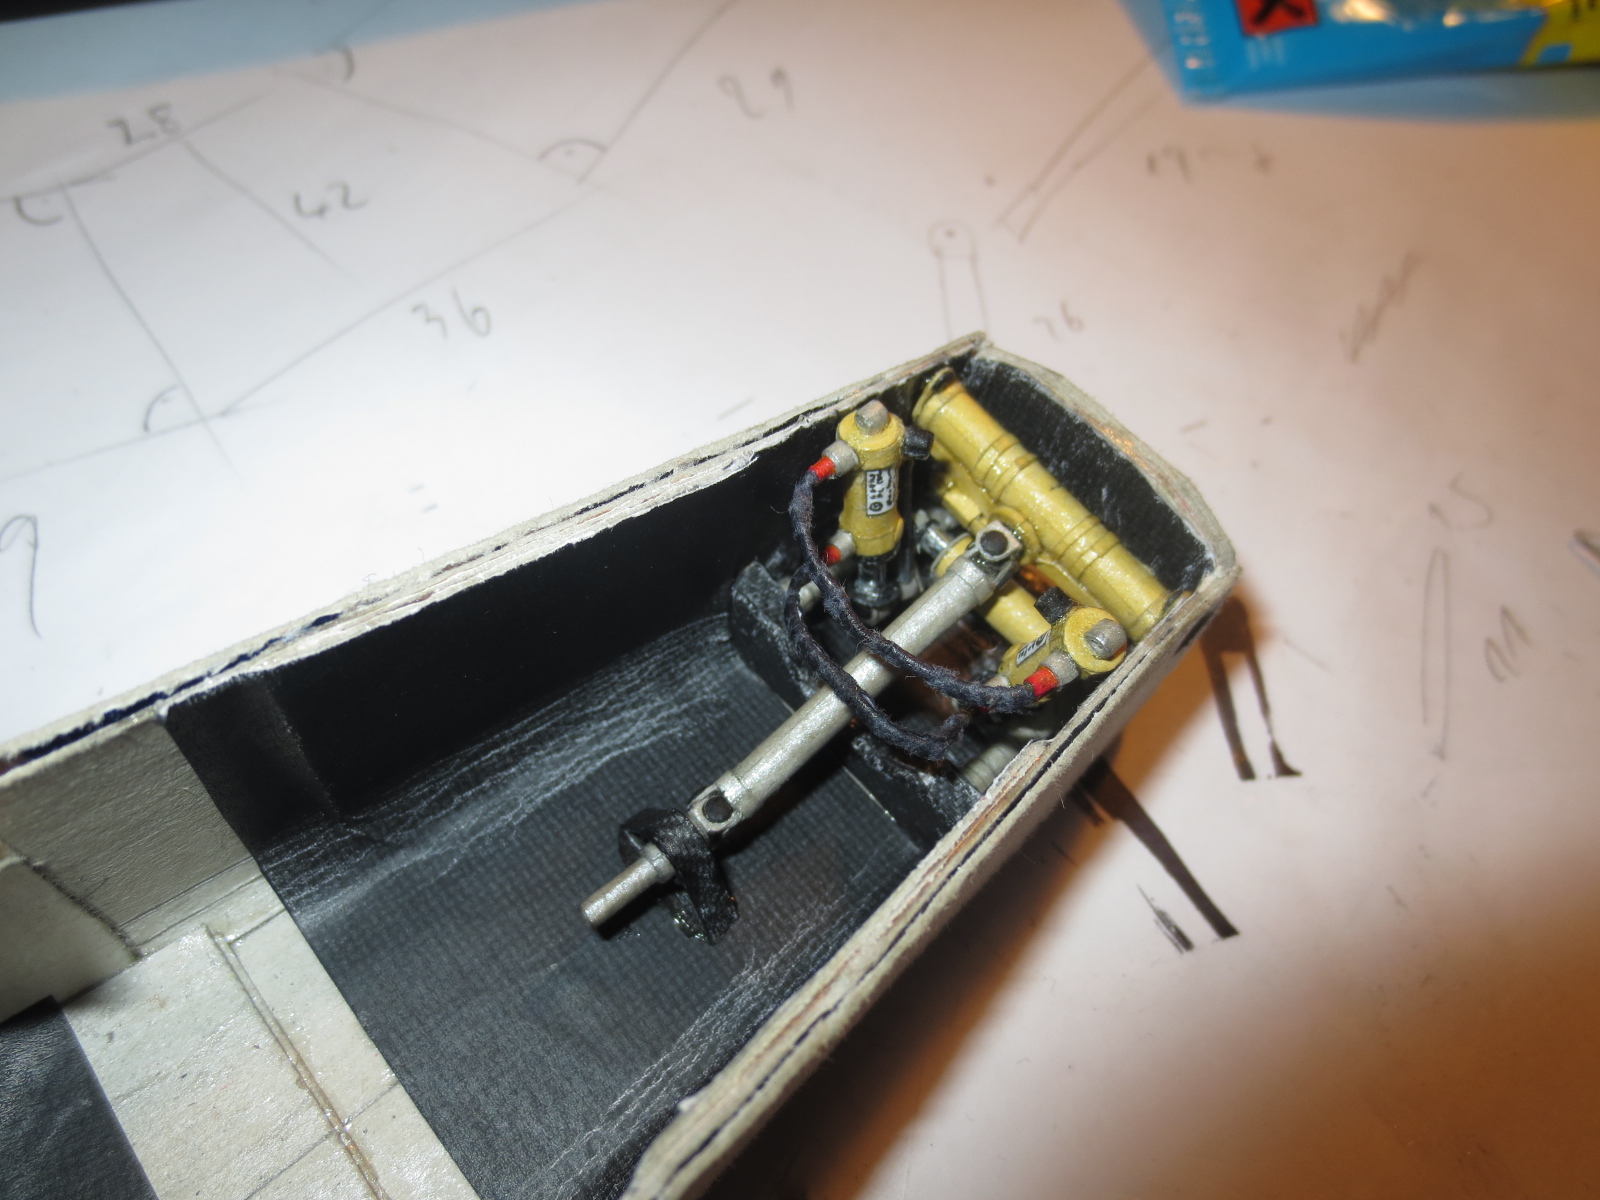
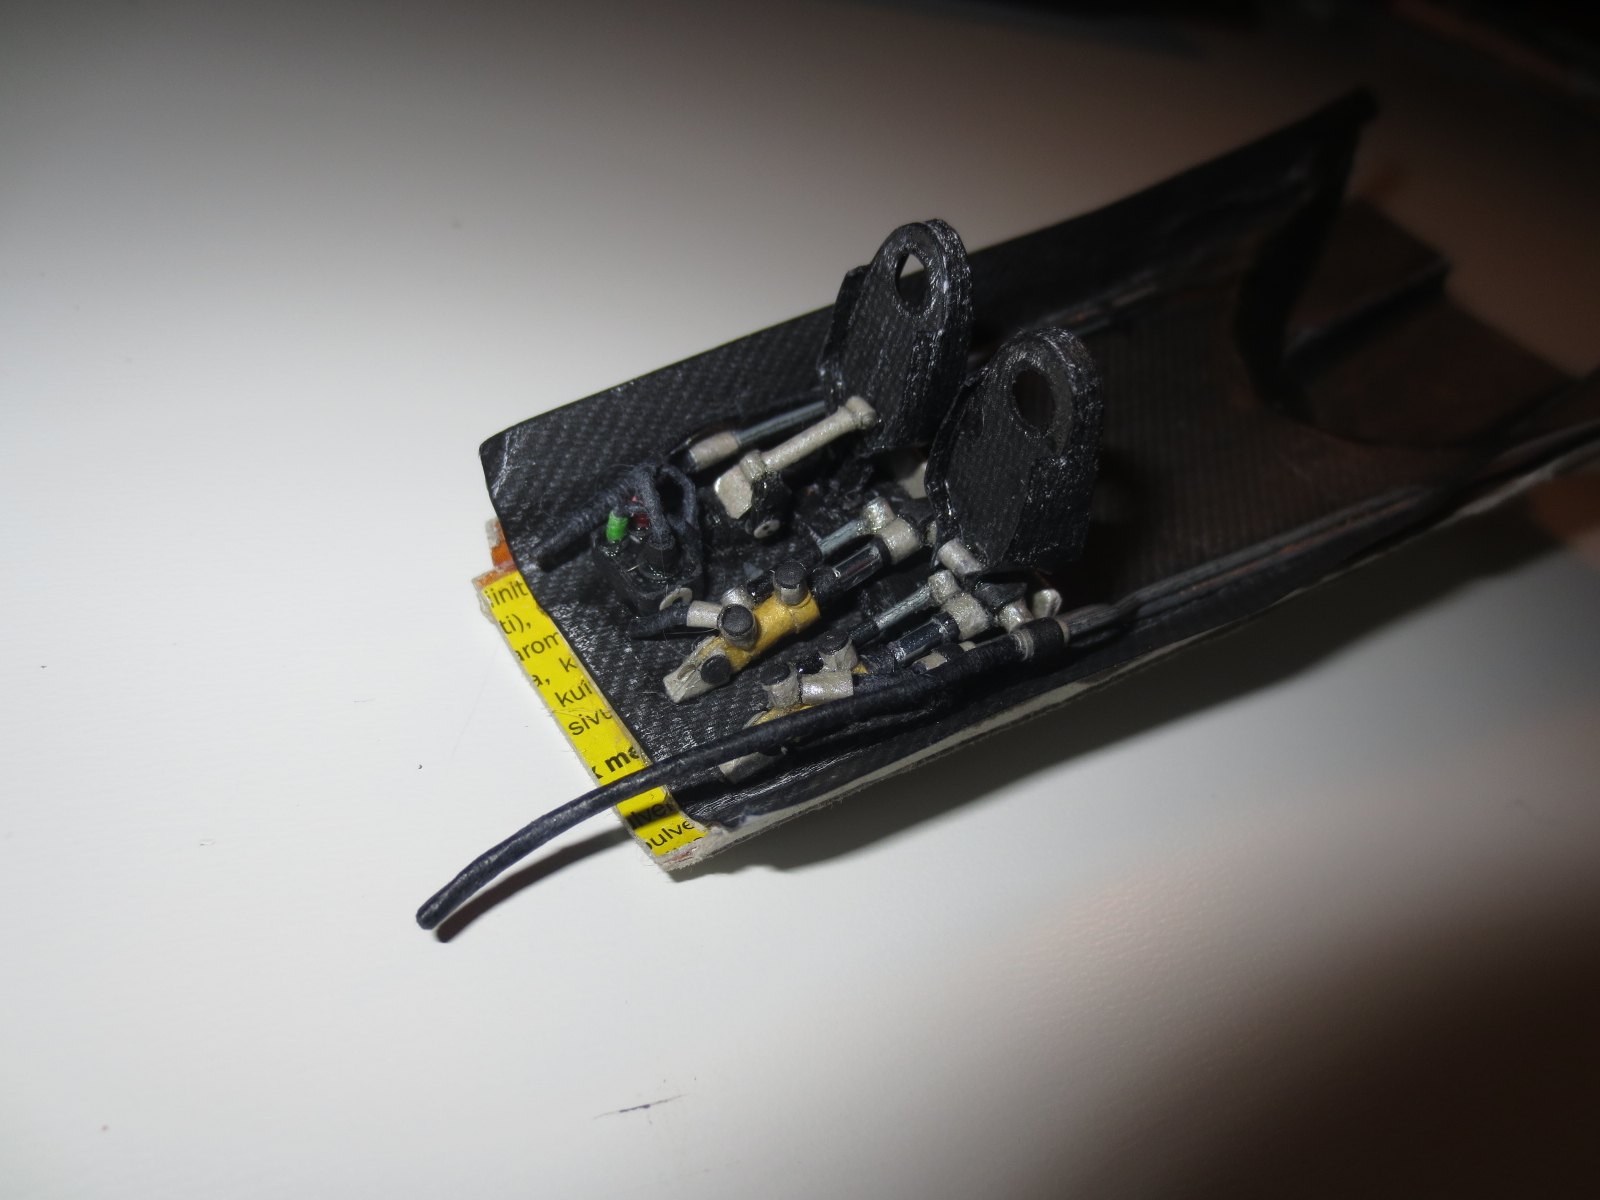
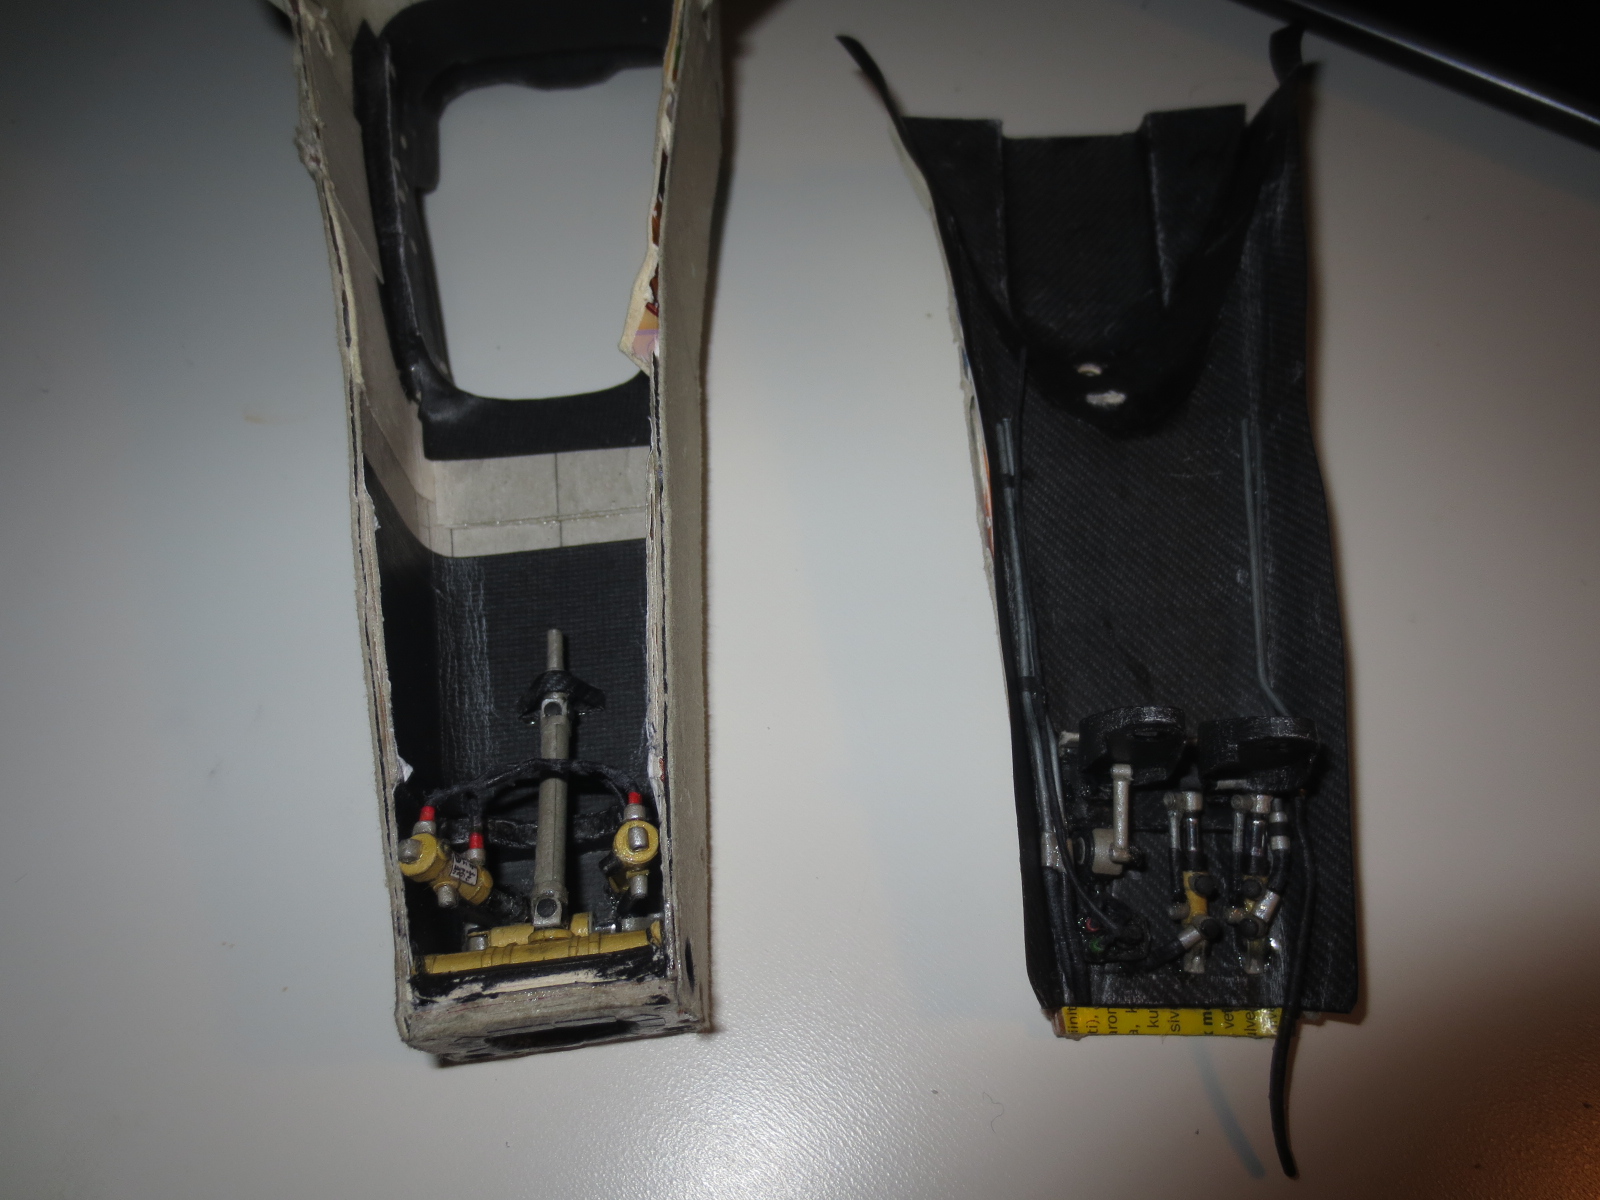
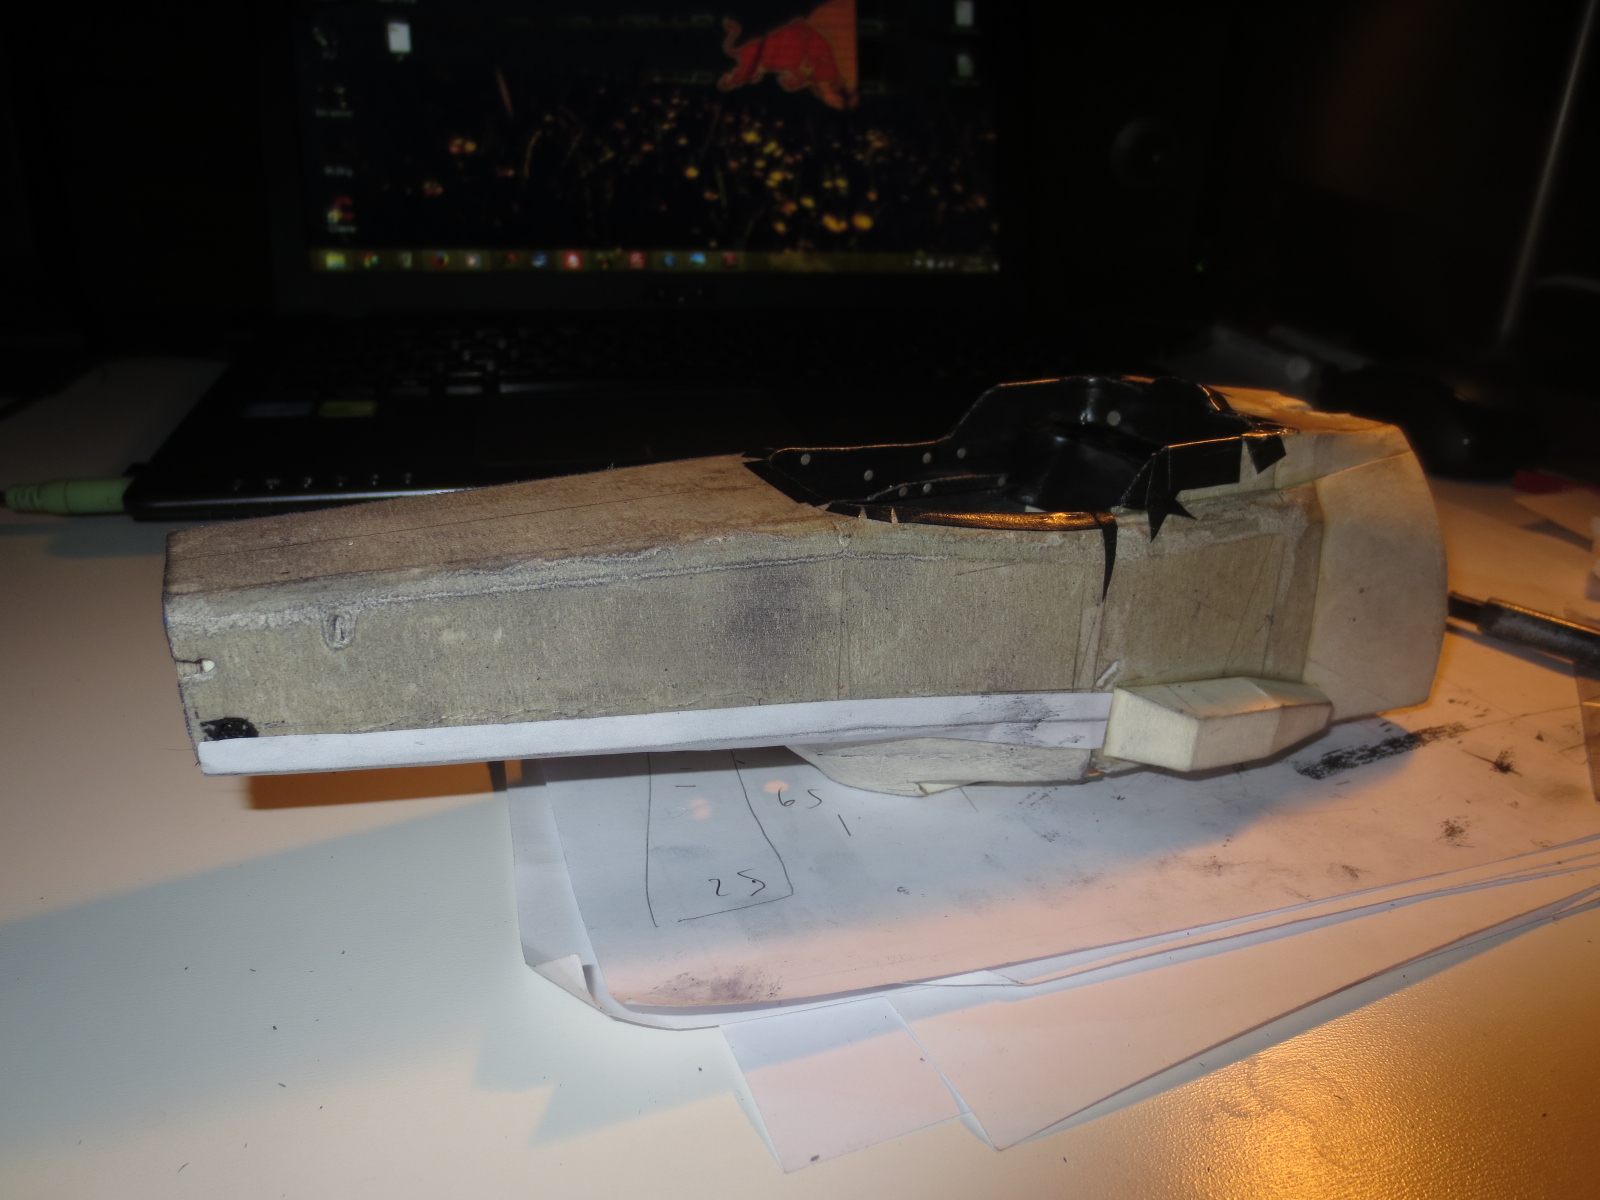
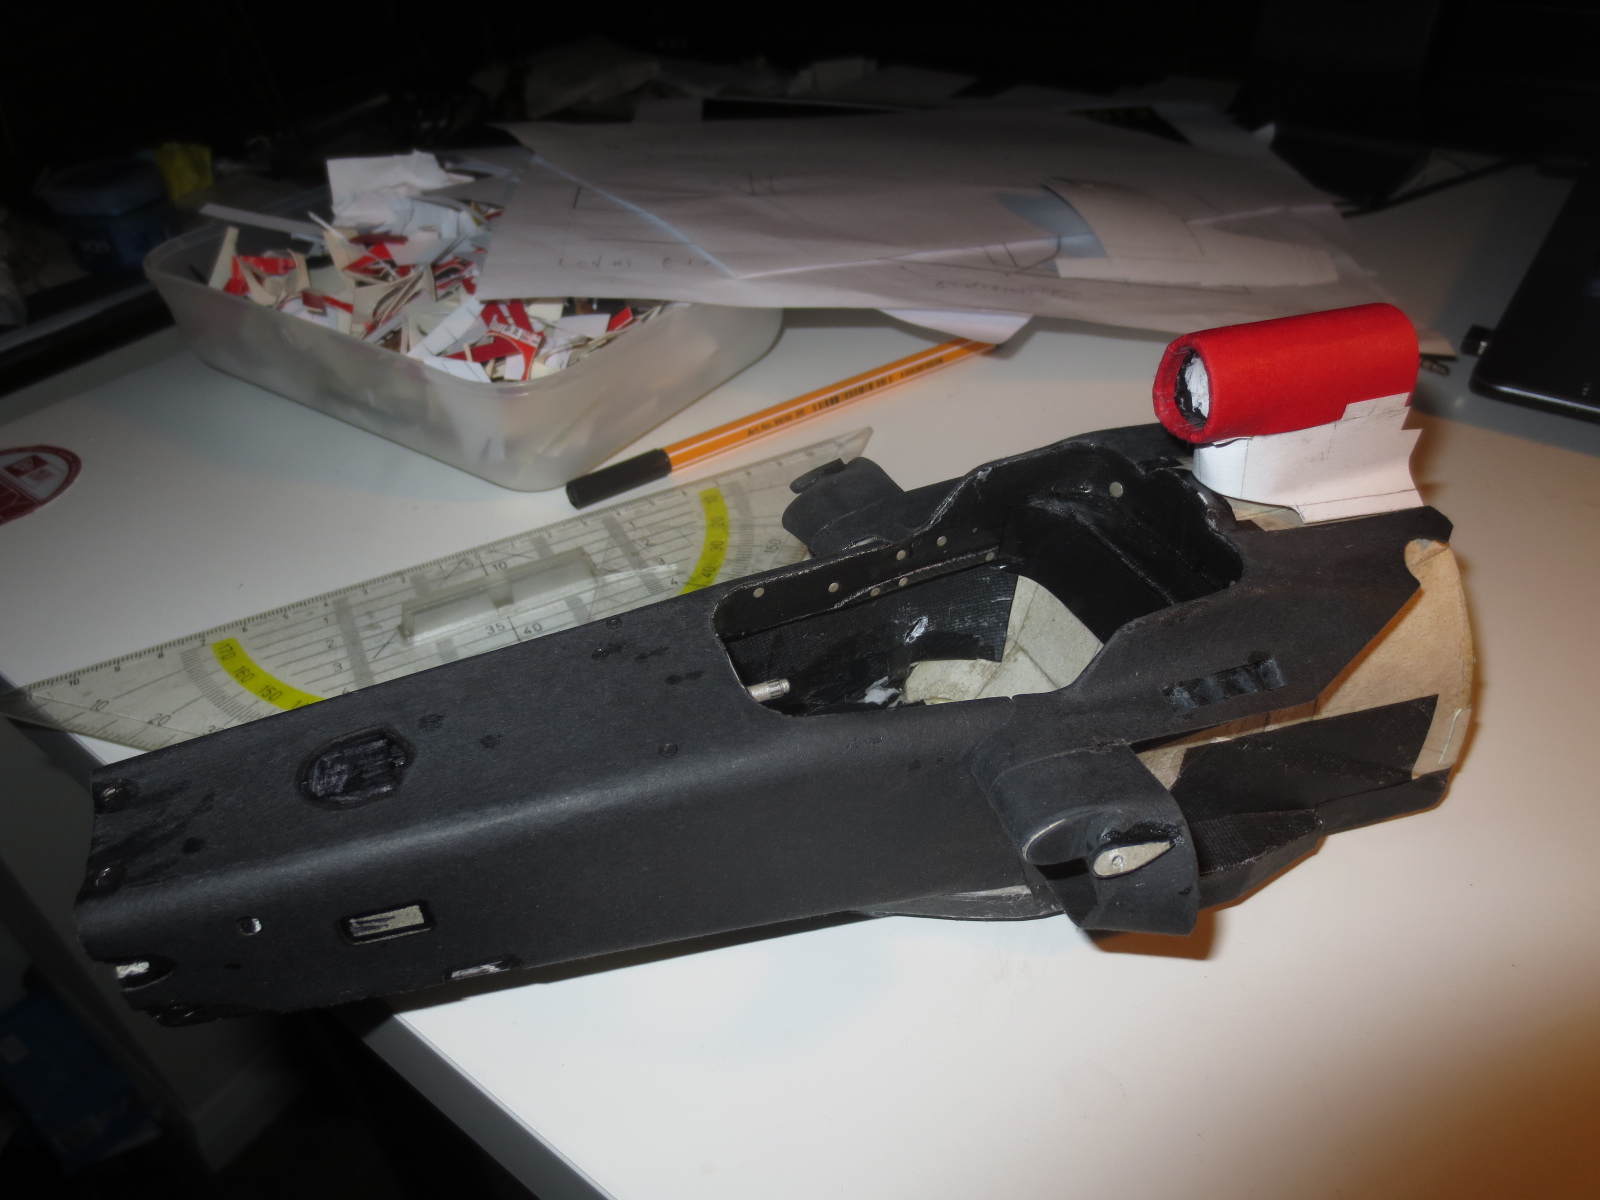
Current state of the car with half finished radiators and in production progress being engine block.
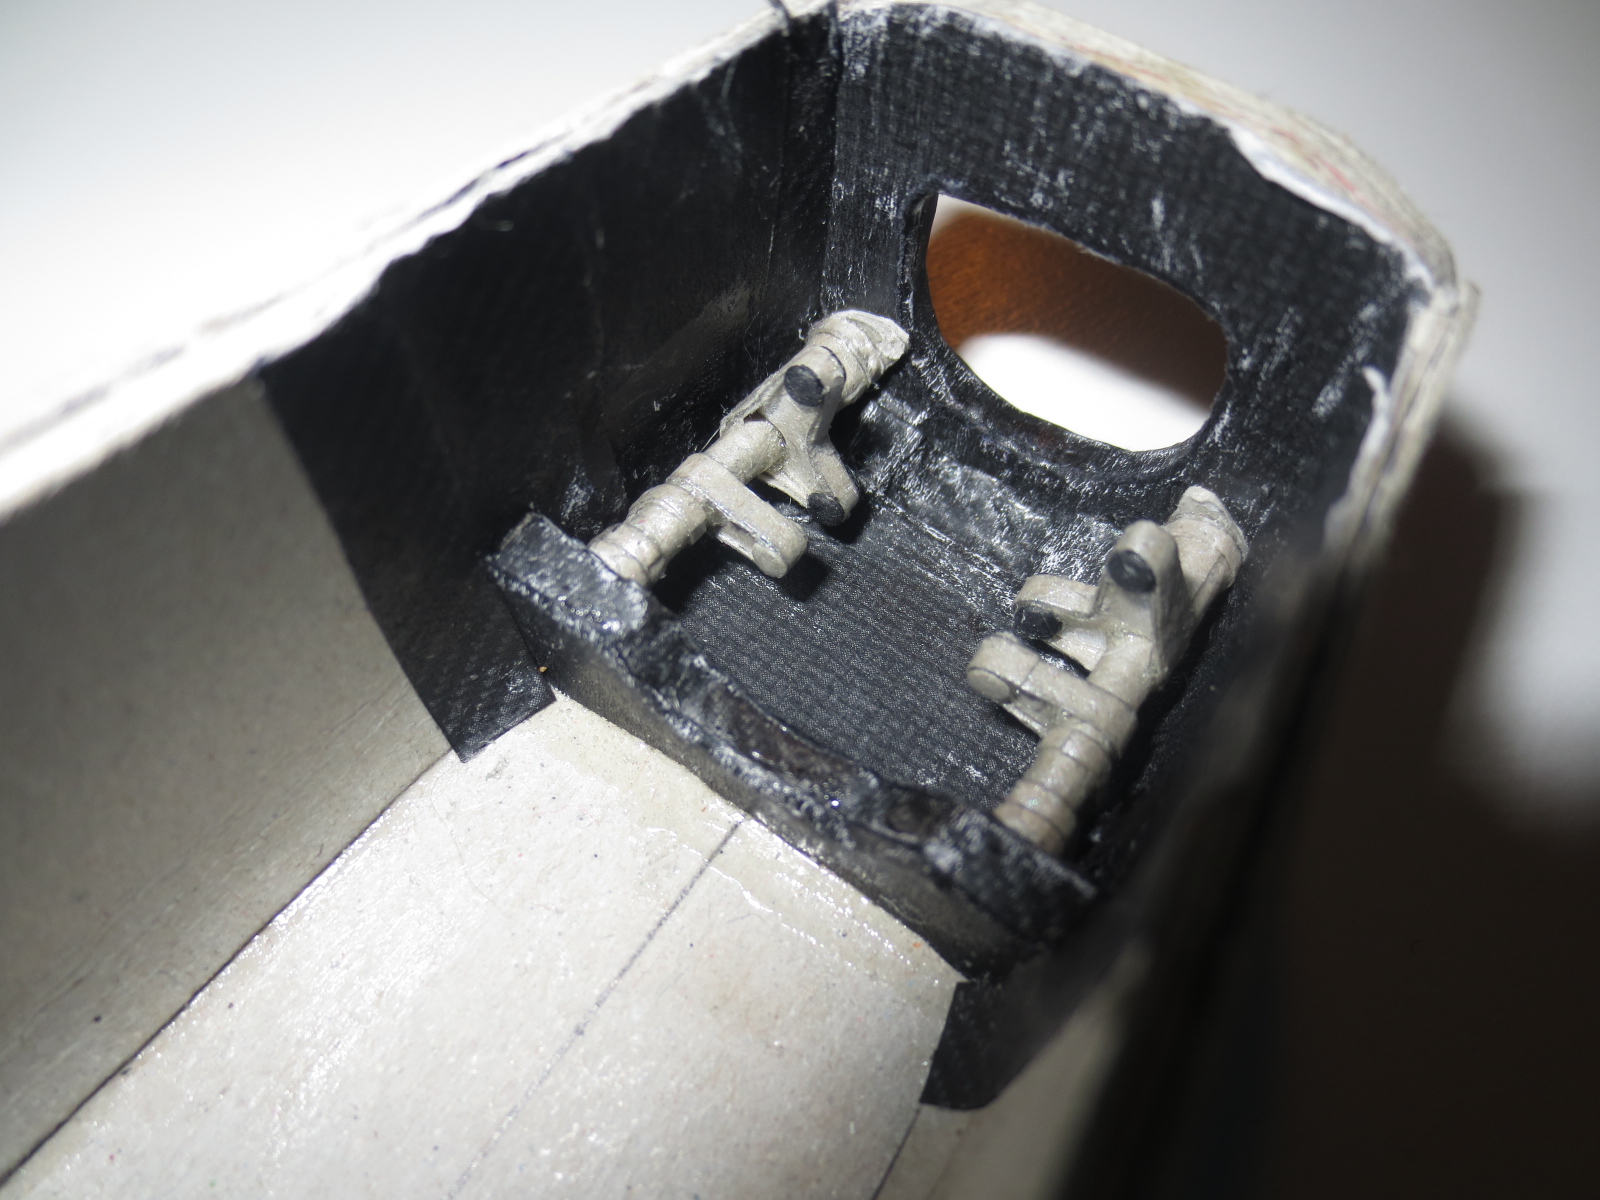
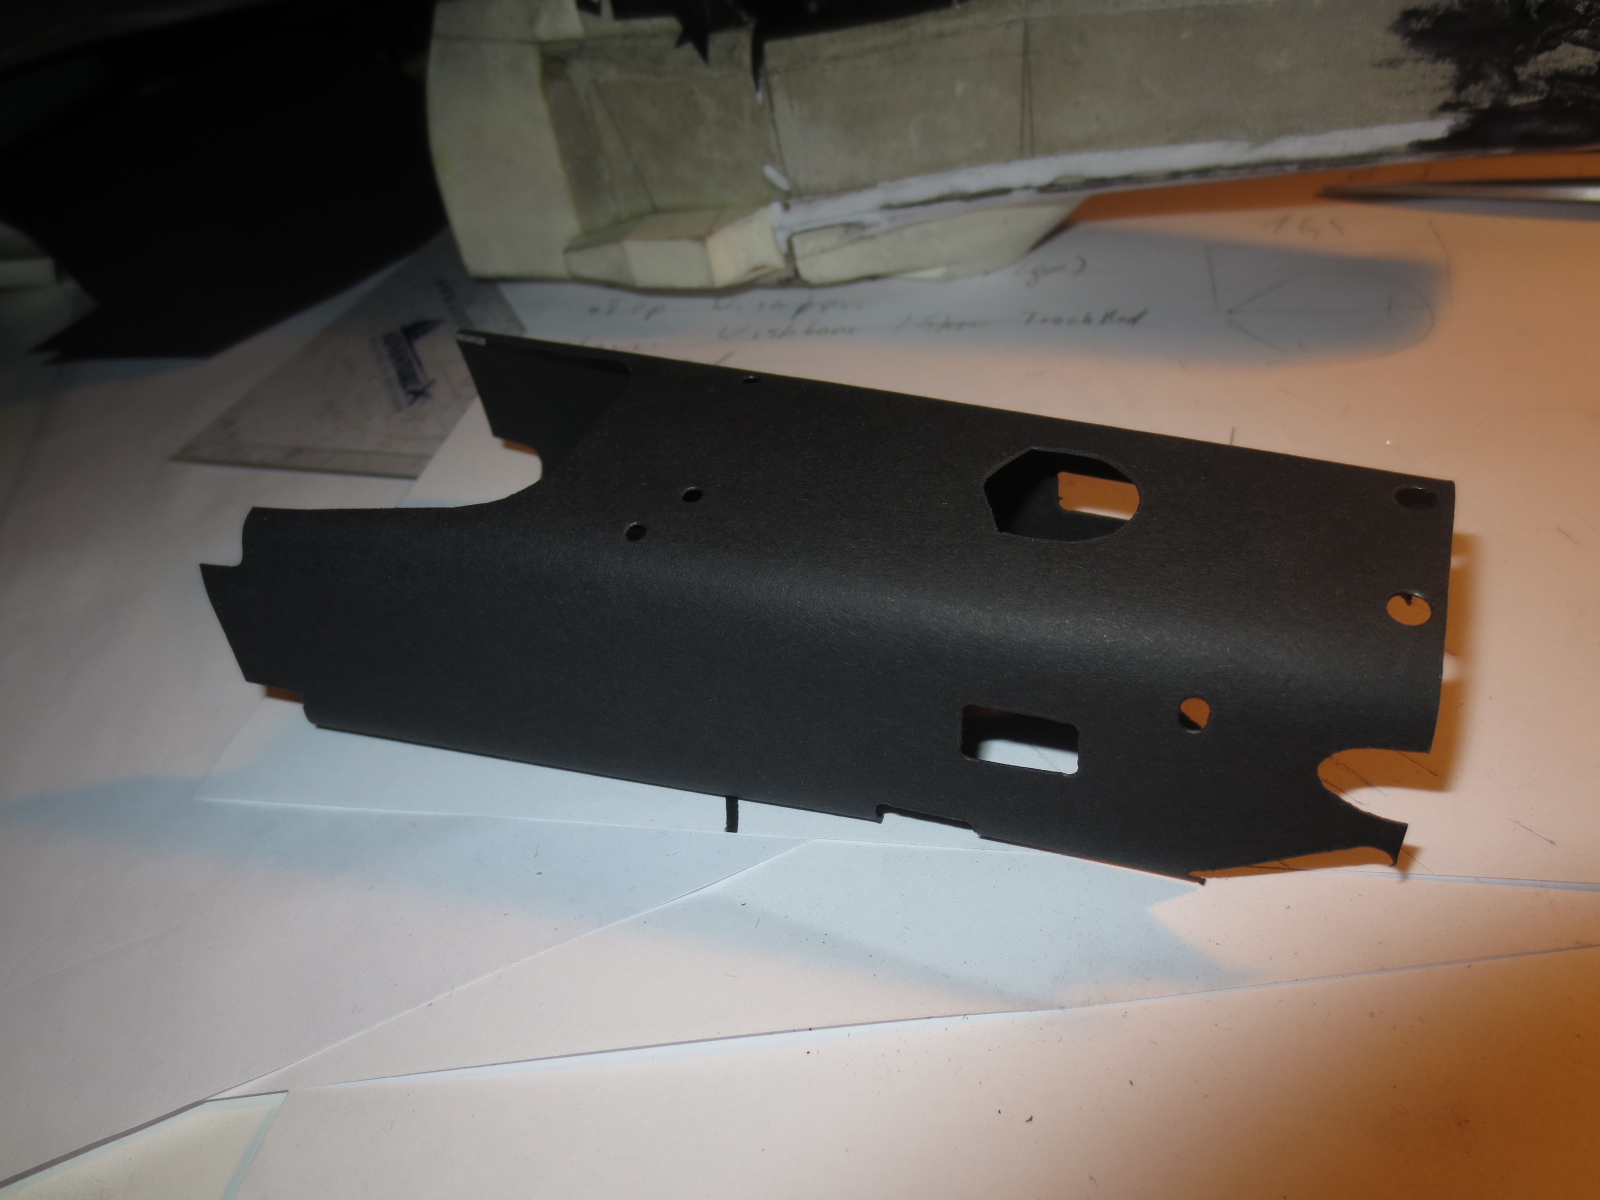
Image

Front bulkhead.
Image

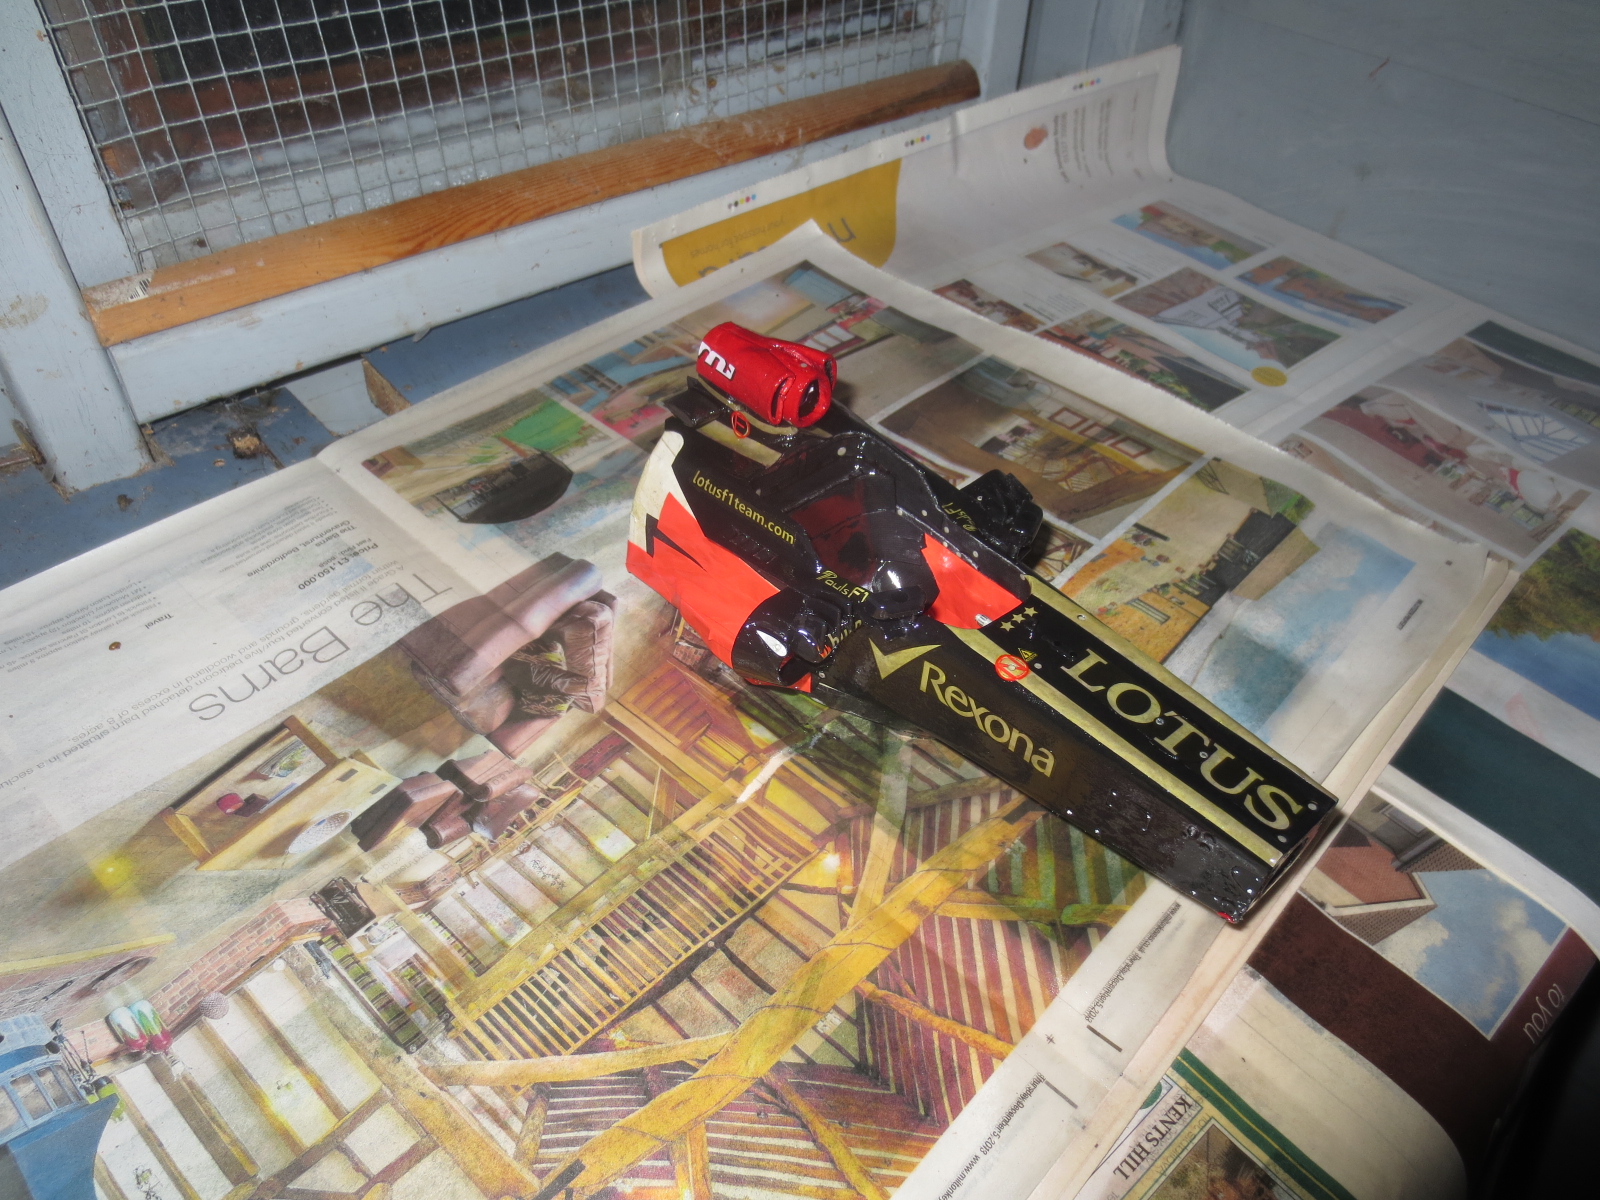
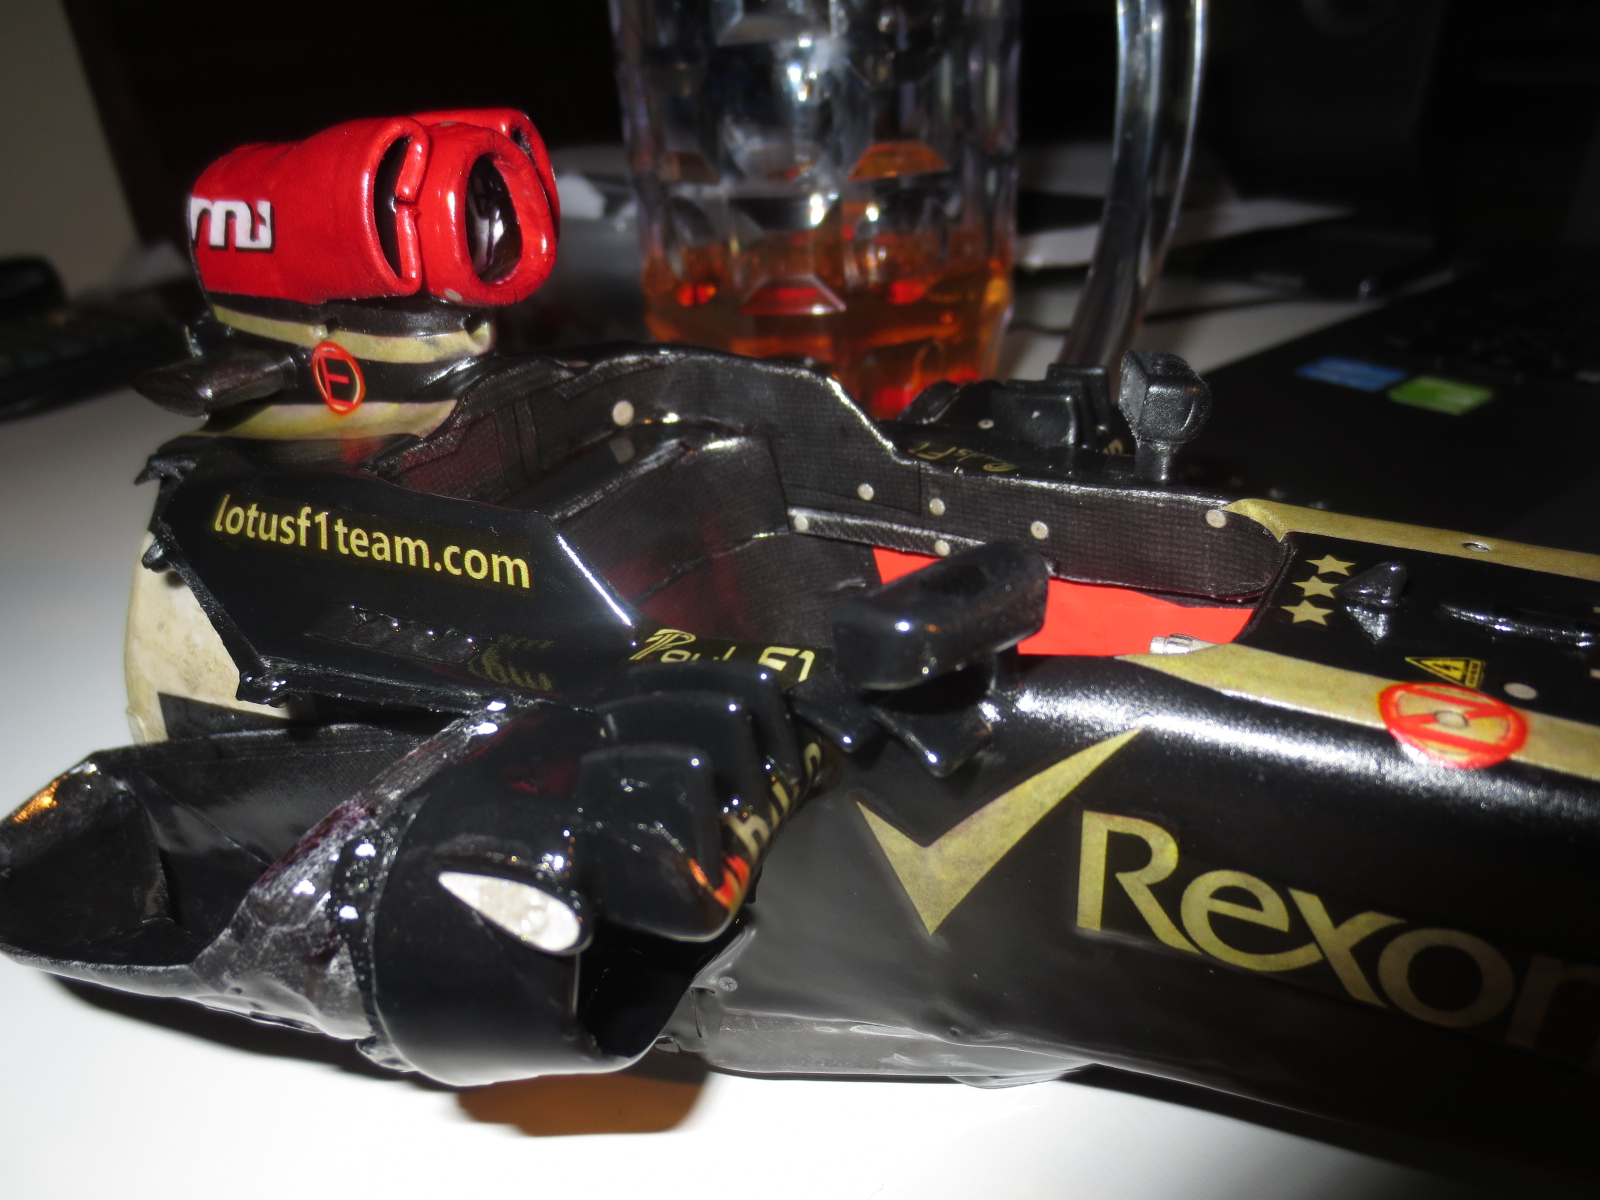
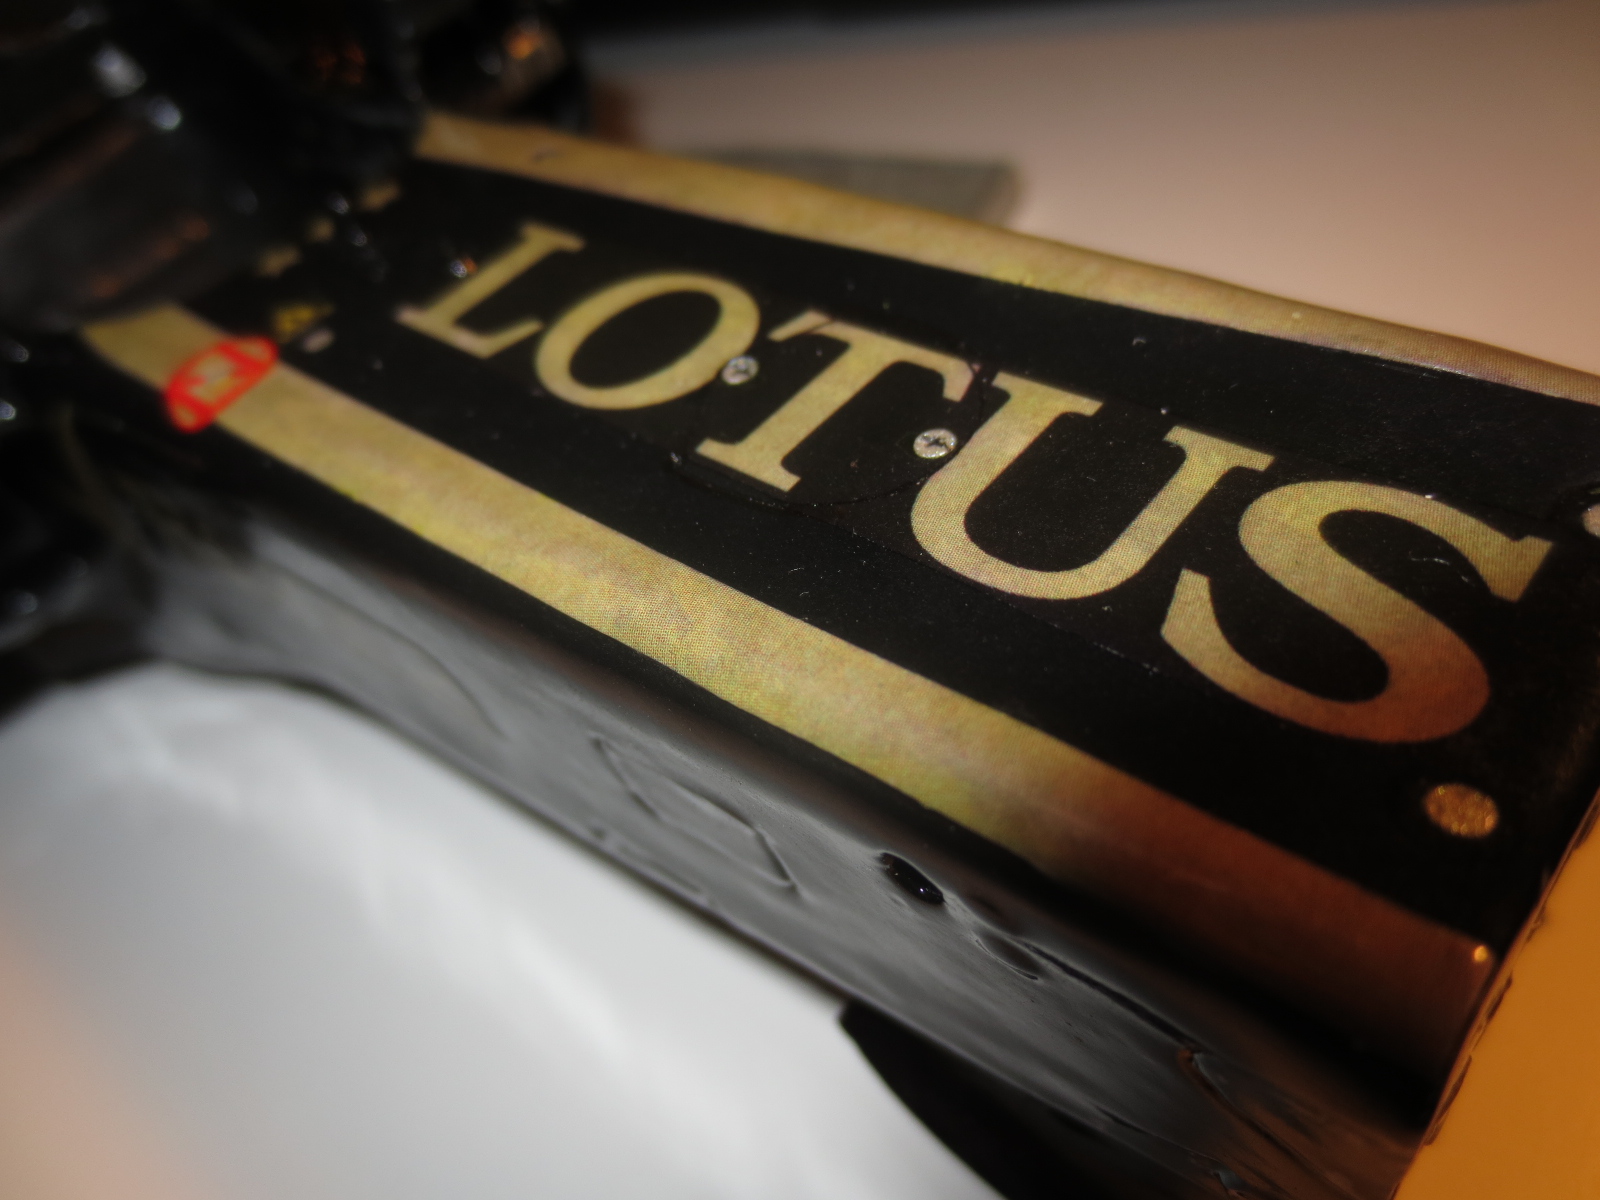
Here are just some pictures to show you the incredible surface finish of the car: The Kimi logo is the only one I did by hand. There was no suitable Kimi logo available on the net.
Image

I think in this pic, you can clearly see the really incredible finish of the chassis. Hopefully all parts of the car will get like this.
Image
Writinglife wrote:Holy crap you are talented. It makes me wonder if Lotus F1 would cool enough to show it off somehow (maybe on their website).

Anyway, keep showing off your work as it's astounding.
Lotus! It would be interessting to know, if I already caught Lotus' attention with my work as it was at the RB7 and the Audi R18 TDI (obviously, there I got not Lotus' attention, more the one from the associated team).
Image

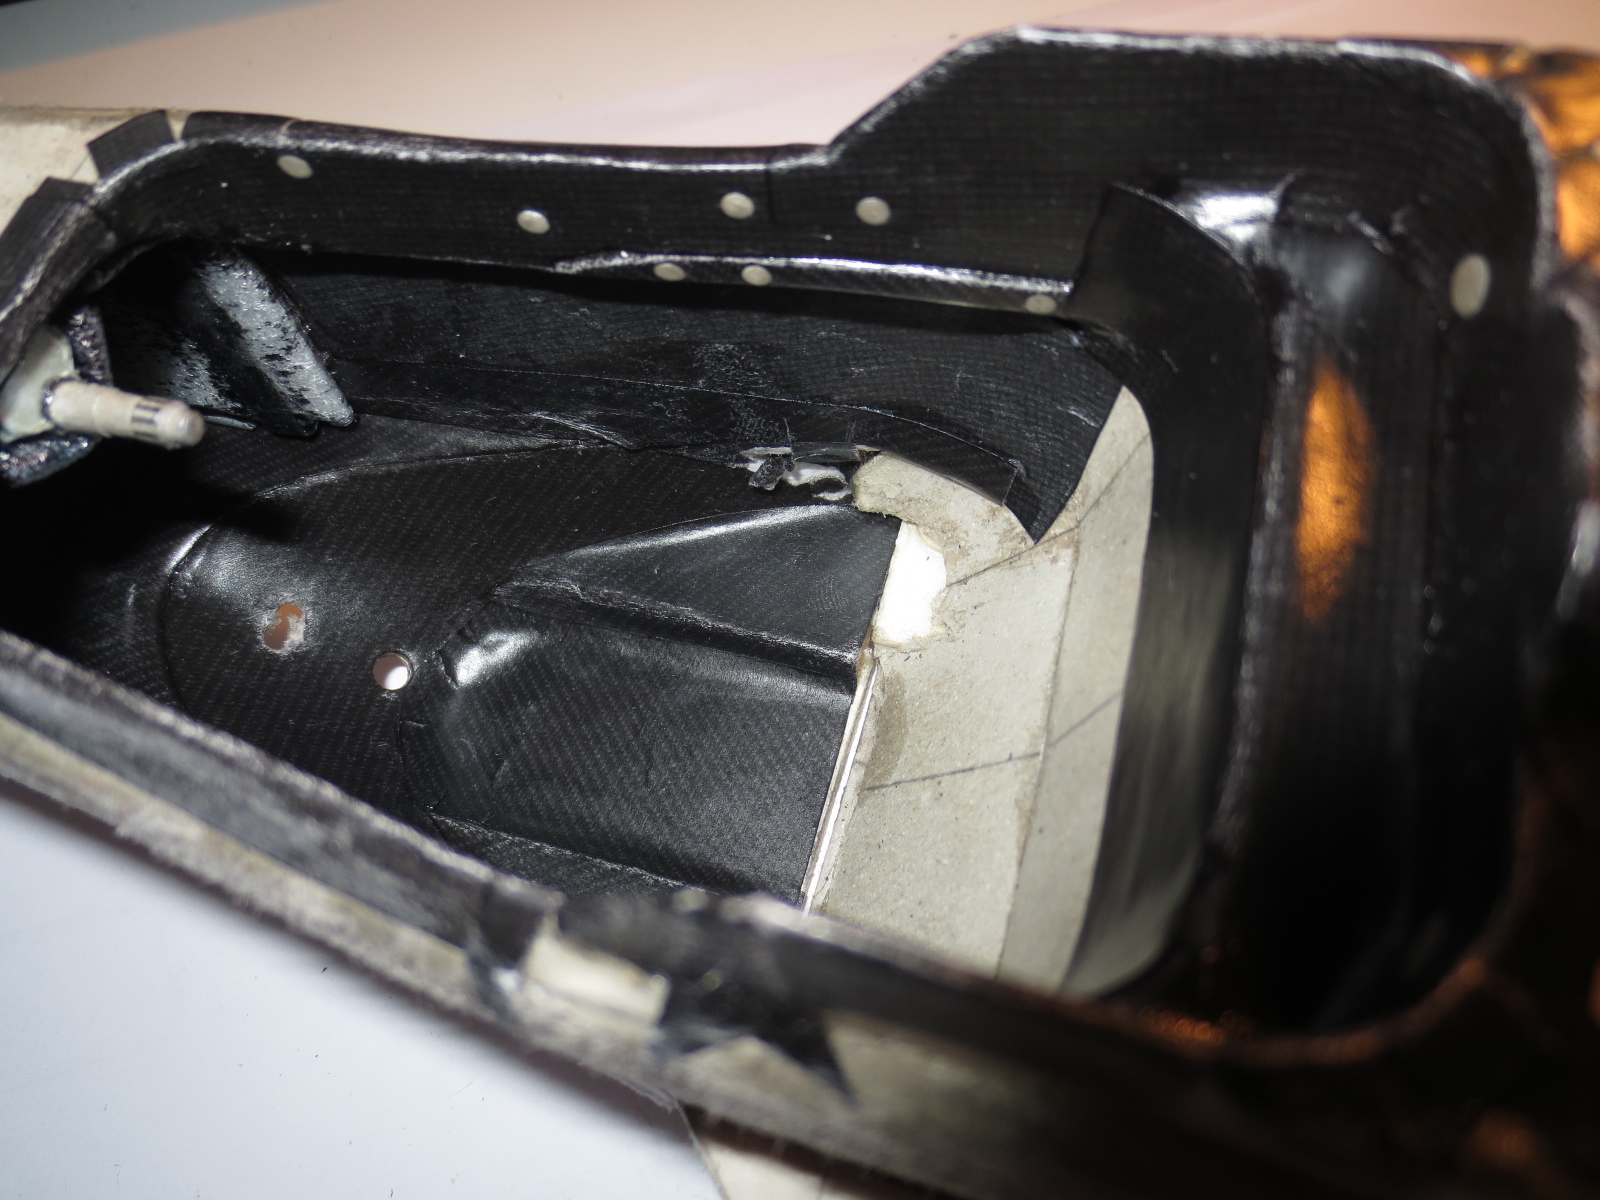
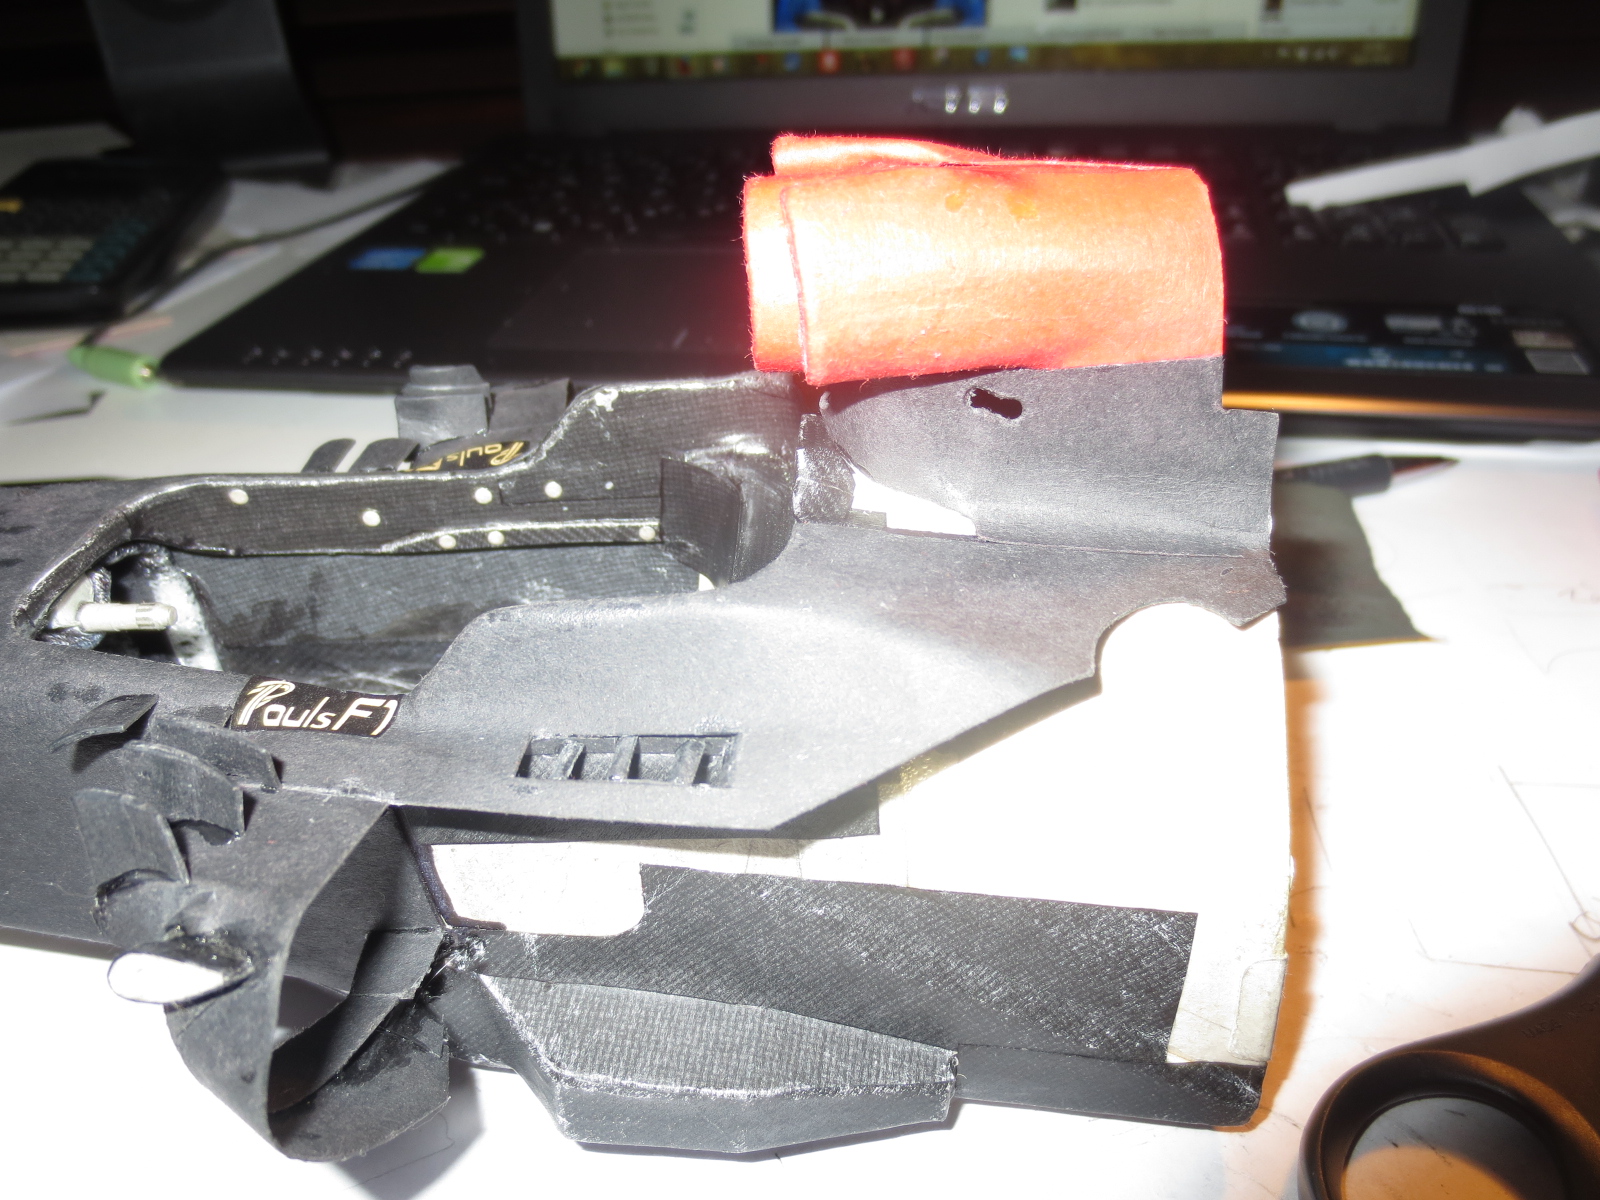
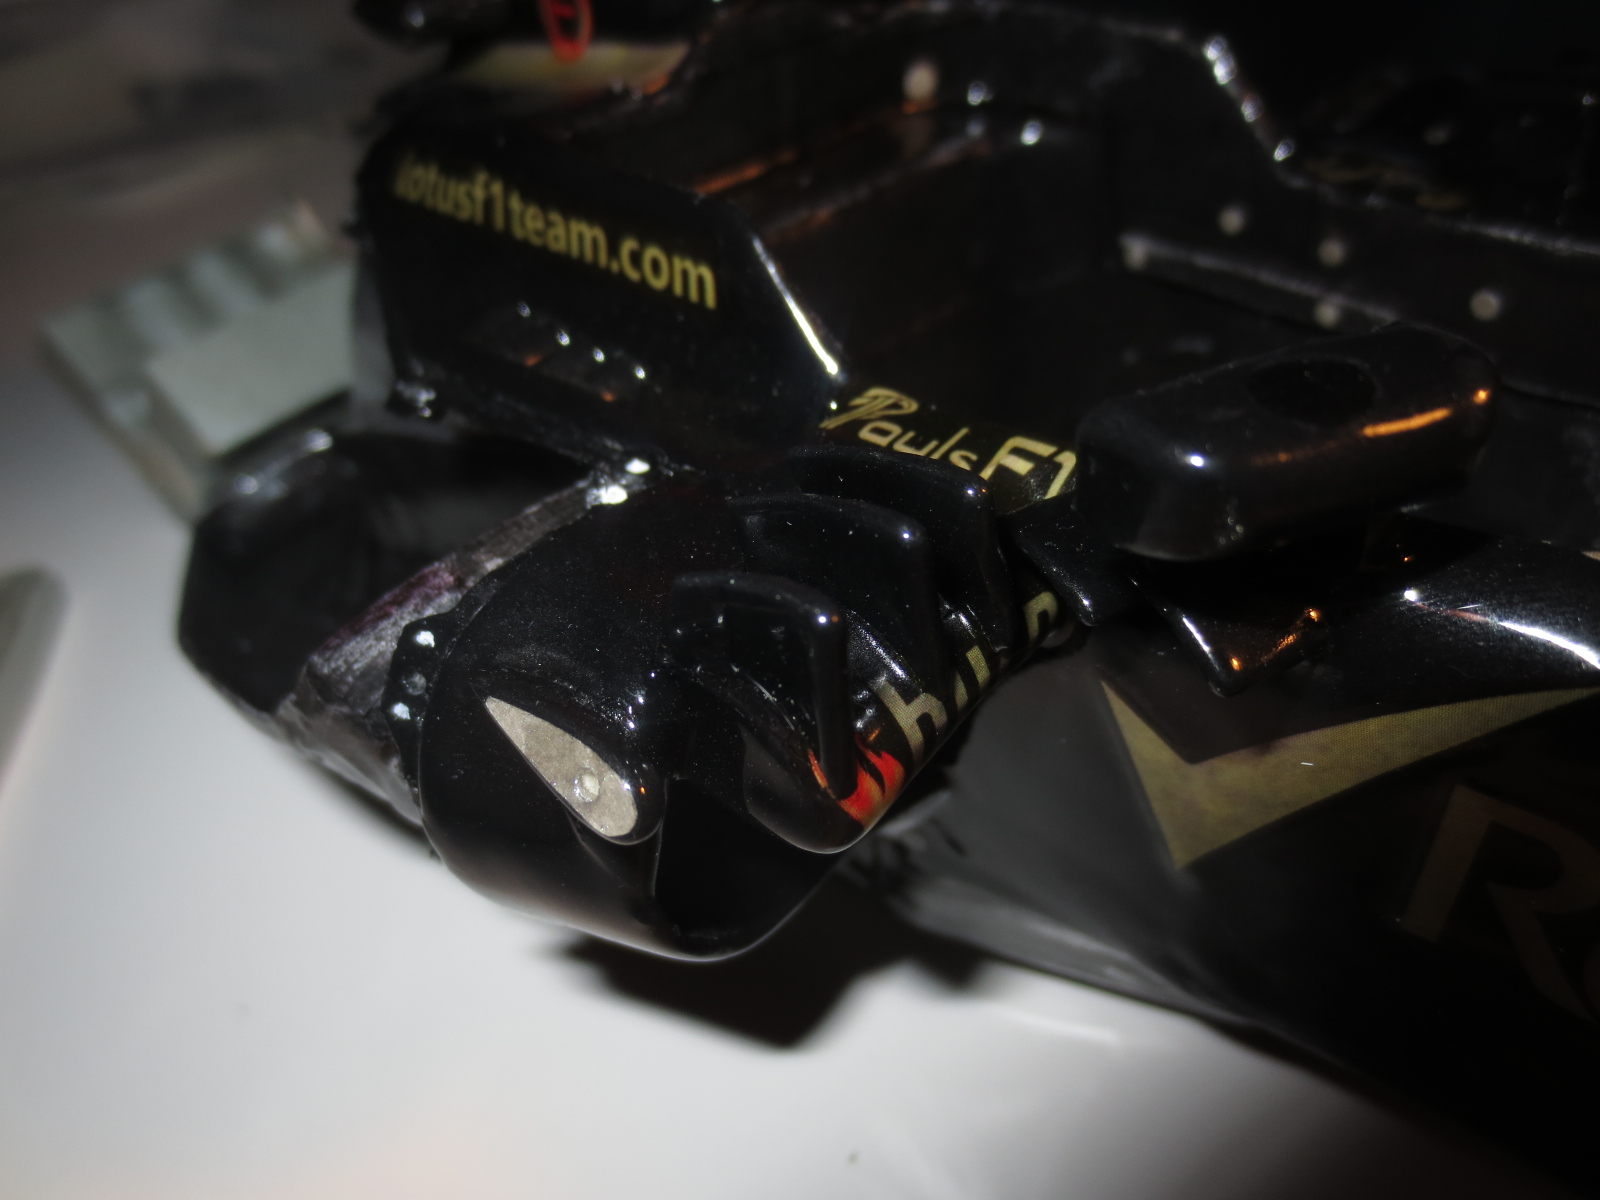
The thing I was most worried about were the side pods. Especially this extension (with the burn on it) which are housing the side impact structures. But with my now developed paint process, it got awsome...
Image

Best wishes,
Paul
"Being second is to be the first of the ones who lose!" - Ayrton Senna

Paul Bischof
Milton Keynes, UK
MK2 2HL
http://paulsf1.wordpress.com/

CottrellGP
4
Joined: 02 Sep 2011, 01:48

Re: A paperboard Lotus E21

Post

Just wow, that paint job is beautiful! Absolutely fantastic Paul :D
Dan Cottrell

Master Of Innovation!